

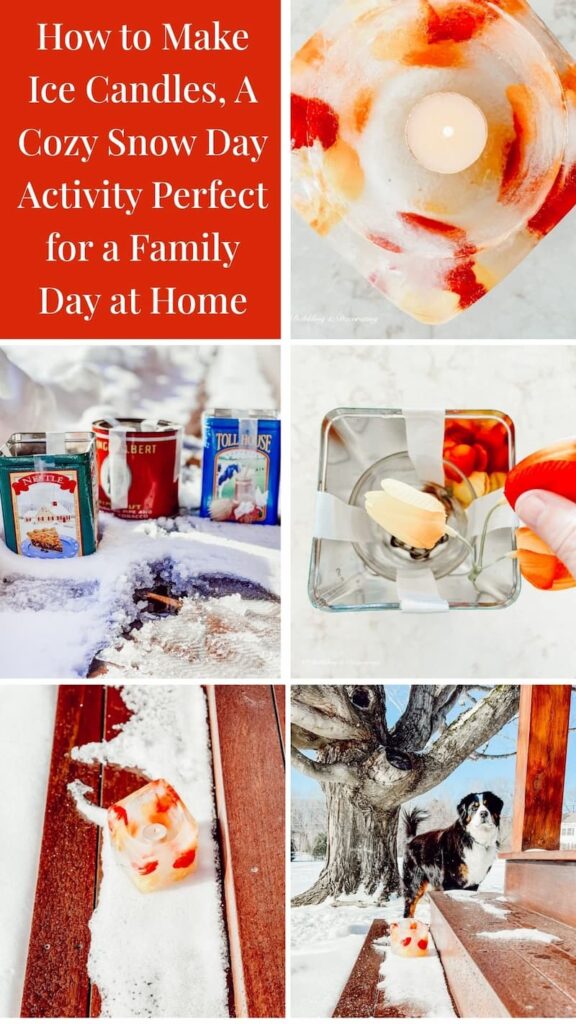
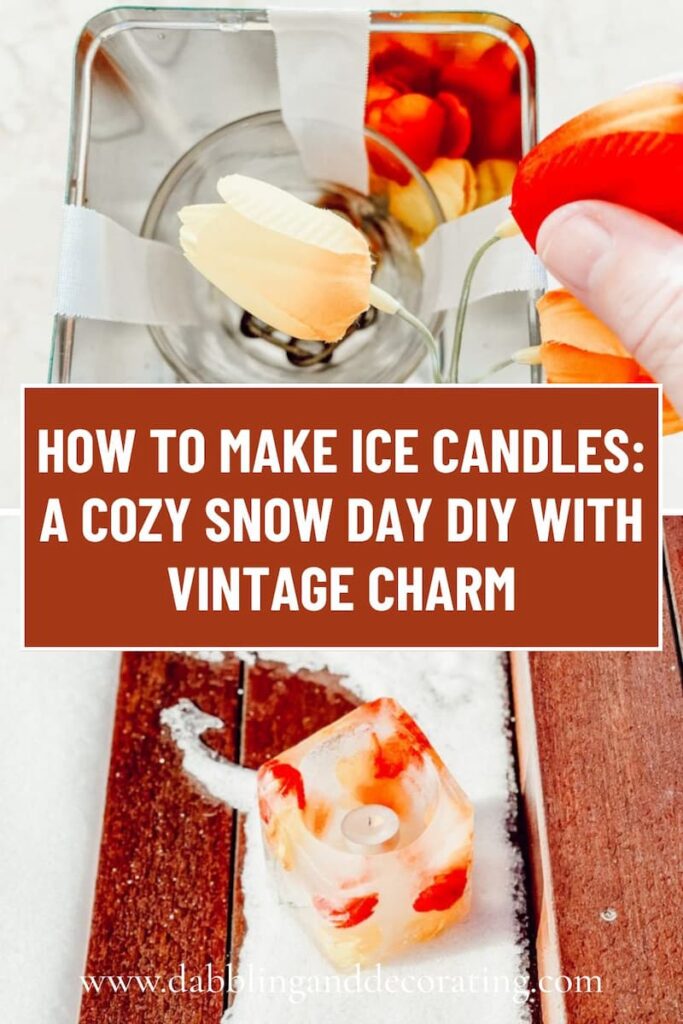
Learn how to make ice candles with this cozy snow day activity perfect for a family day at home. All you need are old tins, water, and a candle to create magical winter decor right on your porch.
Looking for a cozy, creative way to enjoy a snow day at home? Let me show you how to make ice candles, a simple and fun winter activity the whole family will love. Using just a few things you likely already have around the house, like water, faux flowers, greenery, and a tea light candle, these icy creations are easy to make and absolutely magical once lit. I froze mine right in the snow and added colorful touches to brighten up the winter chill. Whether you’re decorating your porch or just looking for a quick snow day craft, these DIY ice candles are the perfect way to make a snowy afternoon feel extra special.
This project is part of my Styling Tip series, where I share quick and thoughtful ideas to bring vintage charm into your home all year long.

Try a Styling Tip!
Looking for simple, vintage-inspired decorating ideas you can try in an afternoon? Explore all my Styling Tips for easy seasonal projects, quick DIYs, and creative ways to style your home with charm.
What Are Ice Candles and Why You’ll Love Making Them
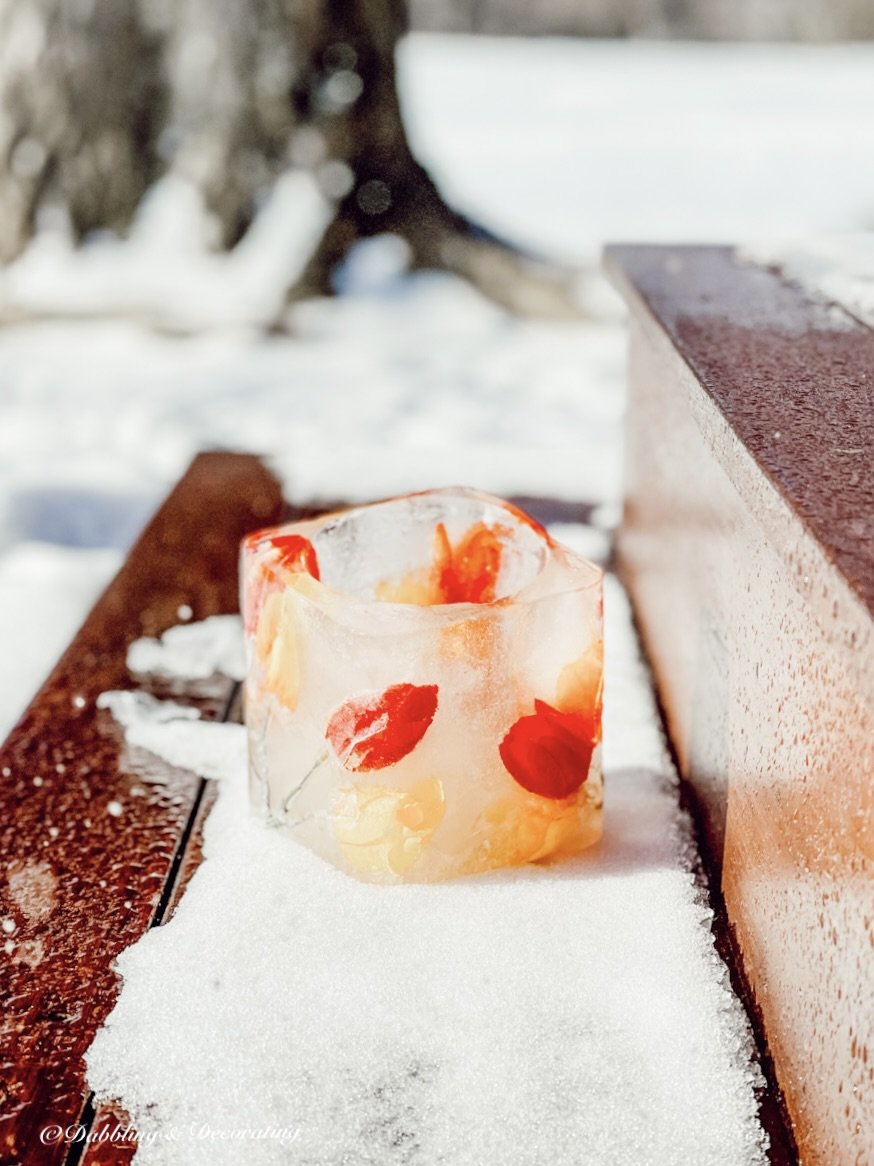
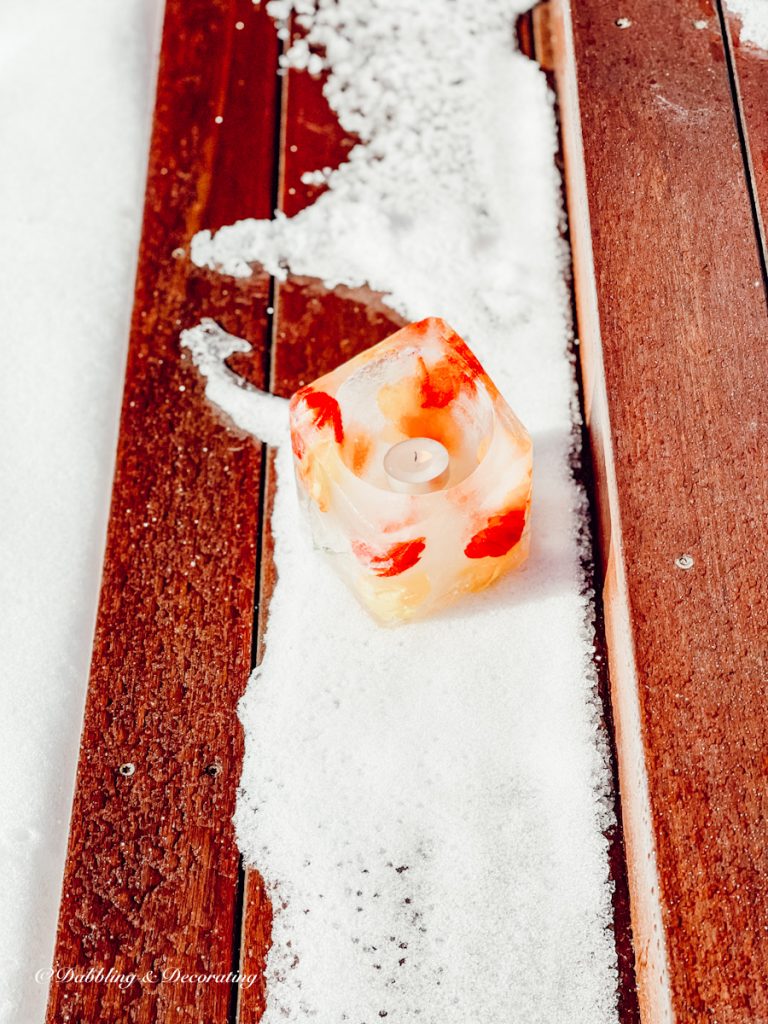
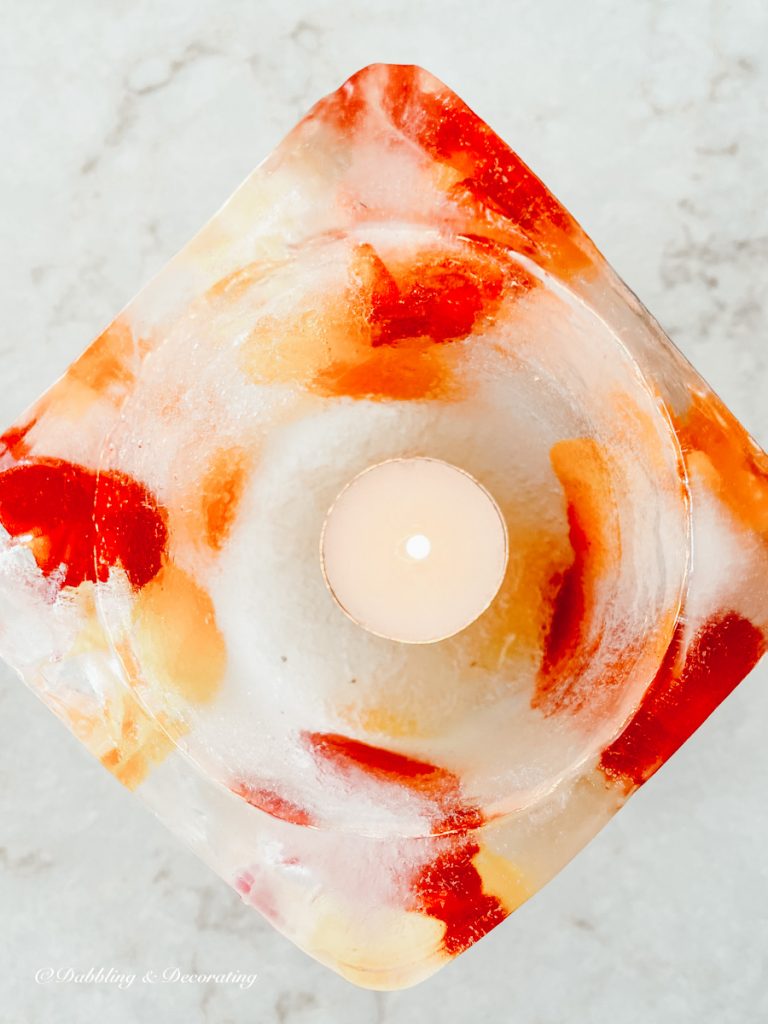
Ice candles, also known as ice lanterns, are simple yet beautiful creations made by freezing water into a block of ice with a hollow center, just large enough to hold a candle. When lit, the glow from the flame shines through the ice, casting a soft, magical light that feels especially cozy on snowy winter evenings.
Originally popular in Nordic and Scandinavian traditions, ice candles were used to light up walkways and porches during the darkest winter months. Today, they’re a charming and creative way to decorate your outdoor spaces with just a few things you already have around the house: water, a small container, and a candle.
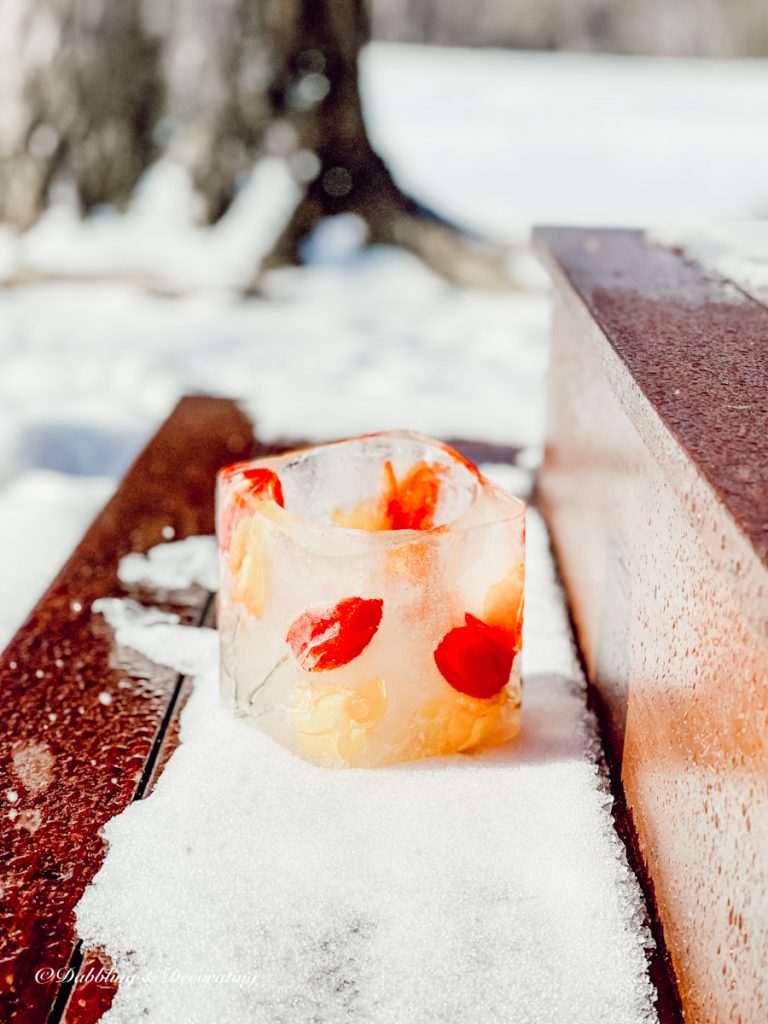
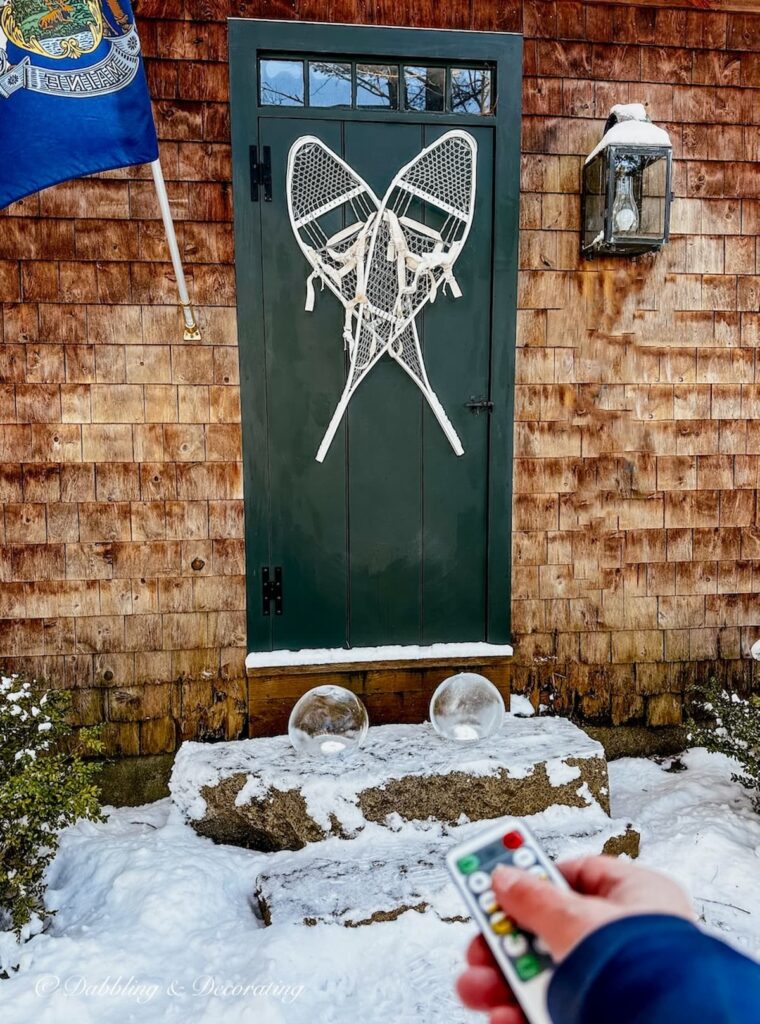
Whether you make yours in old tins, vintage molds, or even a milk carton, the result is always enchanting. These icy luminaries are perfect for snow day fun, holiday decorating, or simply adding a touch of sparkle to your front steps.
A New England Guide to Vintage Ski Lodge Decor
Love cozy winter charm and antique alpine finds? Don’t miss our Vintage Ski Lodge Decor Guide, where I share nostalgic winter decorating ideas, vintage ski gear styling, and charming pieces inspired by Vermont’s snowy mountain life.
How to Make Ice Candles Step by Step on a Snowy Afternoon
There’s something extra special about crafting outdoors while the snow falls quietly around you. Making ice candles is one of those simple pleasures; all you need is a few everyday supplies, a little patience while they freeze, and you’ll have something truly magical to light up your winter porch. Here’s how to make your own ice candles, step by step.
Everything You Need to Make Ice Candles on a Snowy Afternoon:
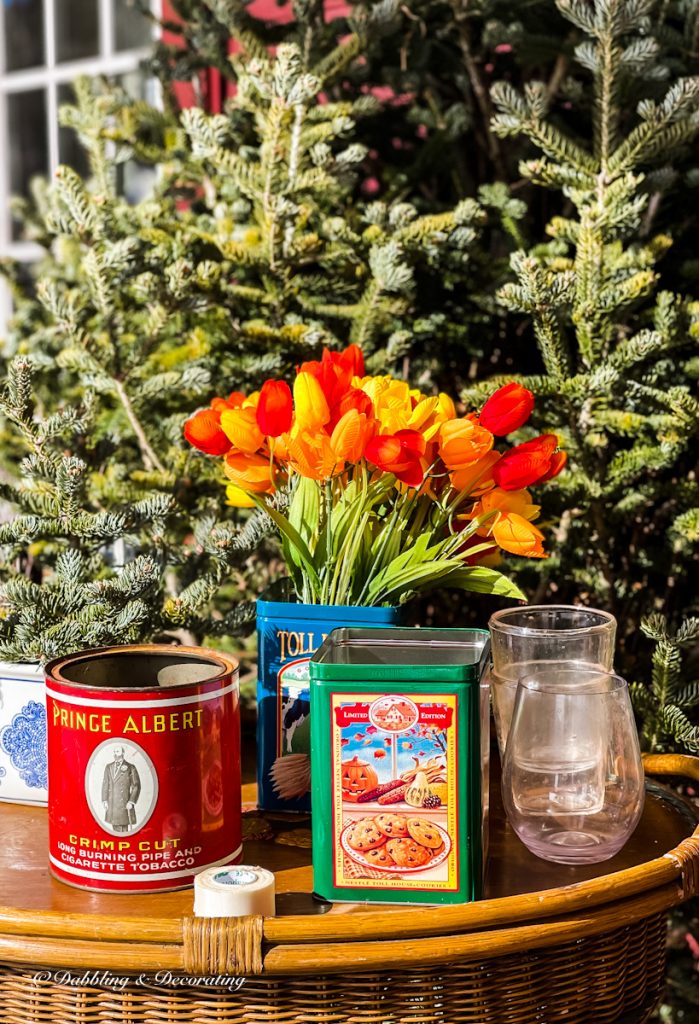
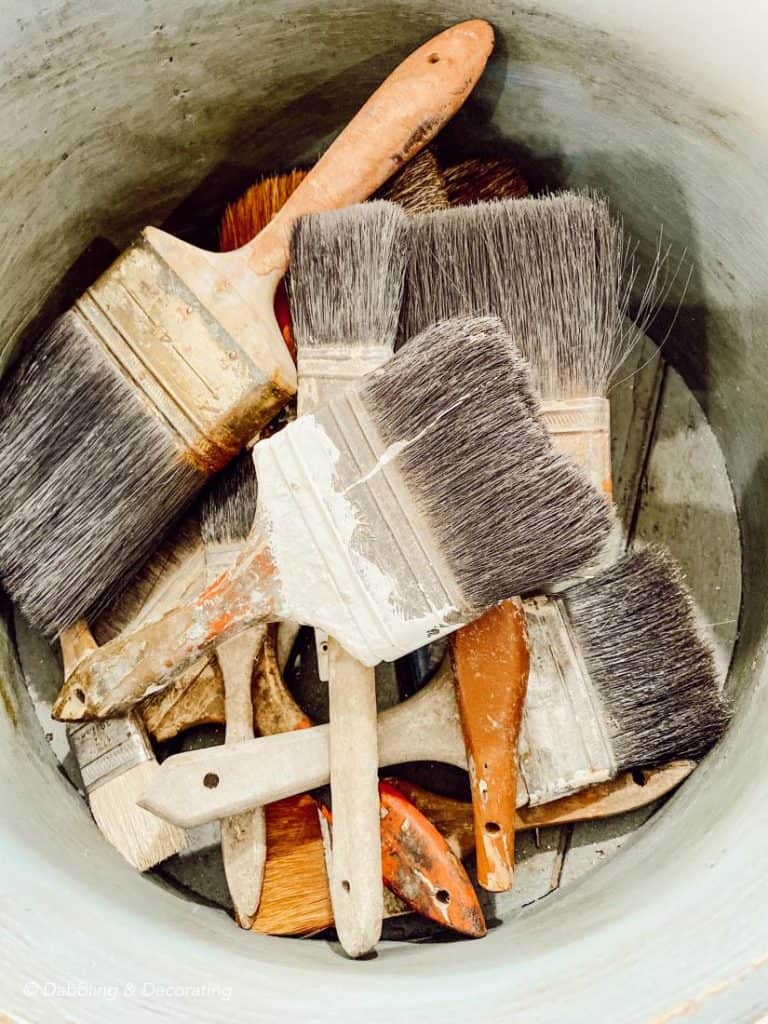
I gathered a few things I had tucked away in the basement, a handful of vintage tins, some colorful faux tulips, a few plastic cups, and a roll of tape, and that was all I needed to get started.
Step 1: Start with a Vintage Tin (or Whatever You Have!)
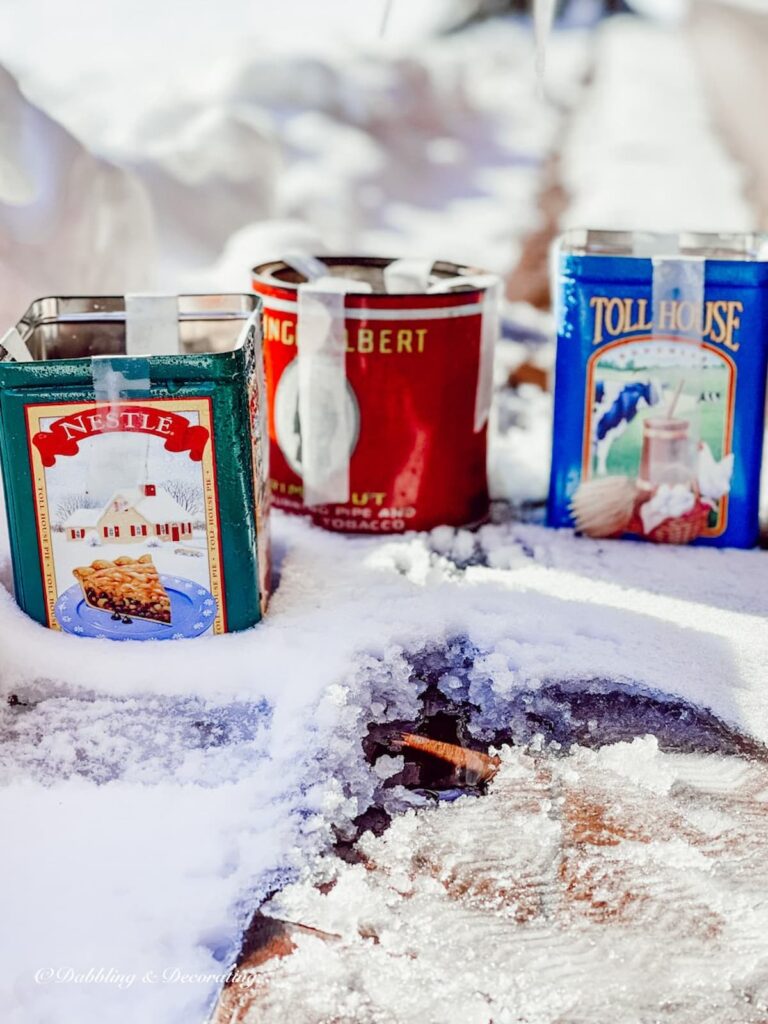
Begin by grabbing a large tin can, plastic container, or something similar from around the house. I used a few vintage tins I found tucked away in the basement; anything waterproof and tall enough to hold a candle will do. Fill the base with about half a cup of cold water to get things started.
Step 2: Add a Smaller Cup to Create the Candle Space
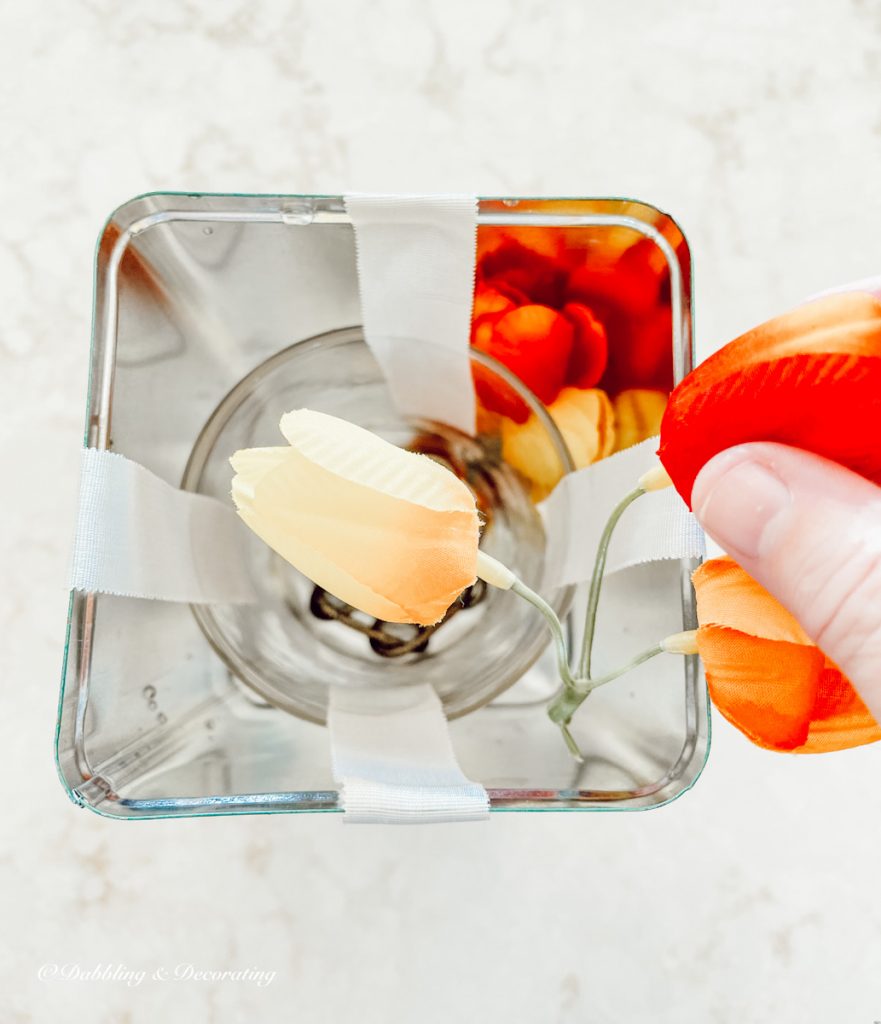
Now place a smaller container, like a tin can, paper cup, or plastic cup, directly inside your larger container. This will create the hollow space where your tea light candle will sit once frozen. I didn’t have a small tin on hand, so I used a basic plastic cup, and it worked just fine.
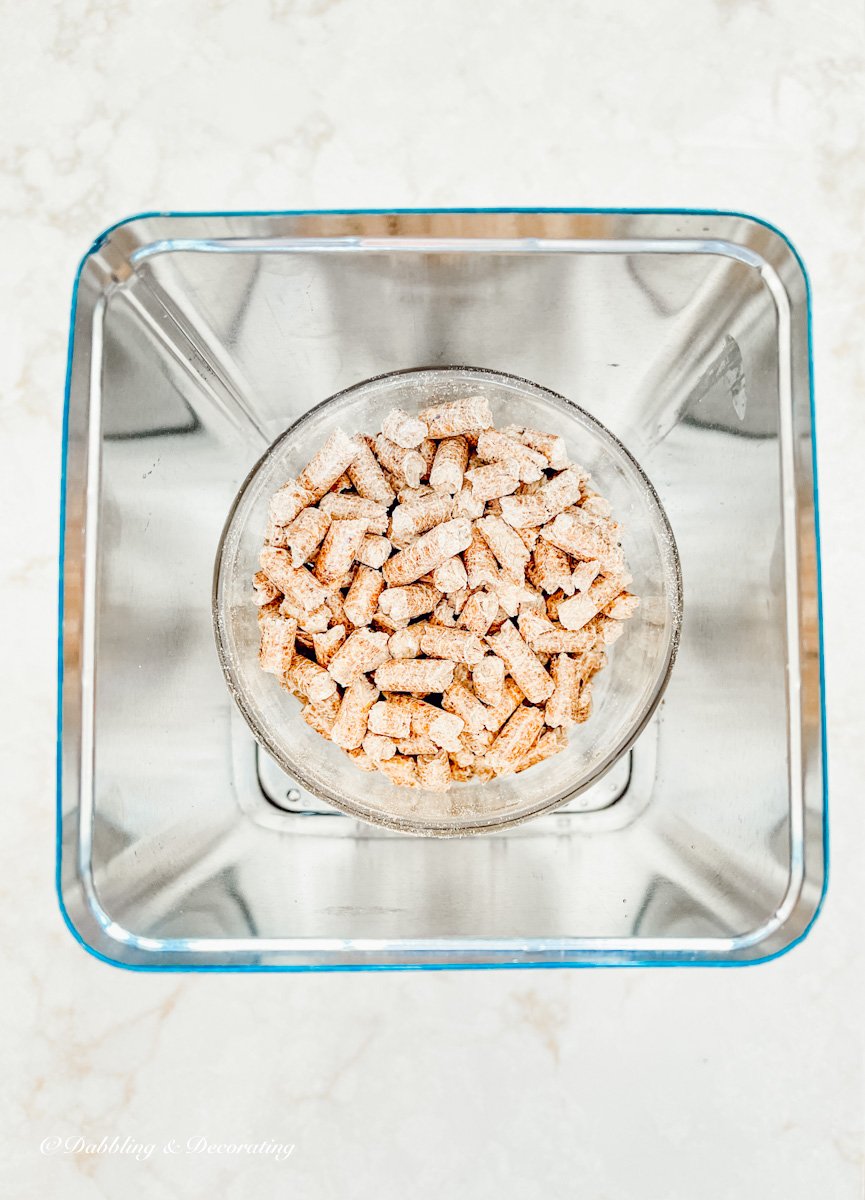
Step 3: Weigh It Down So It Stays Put
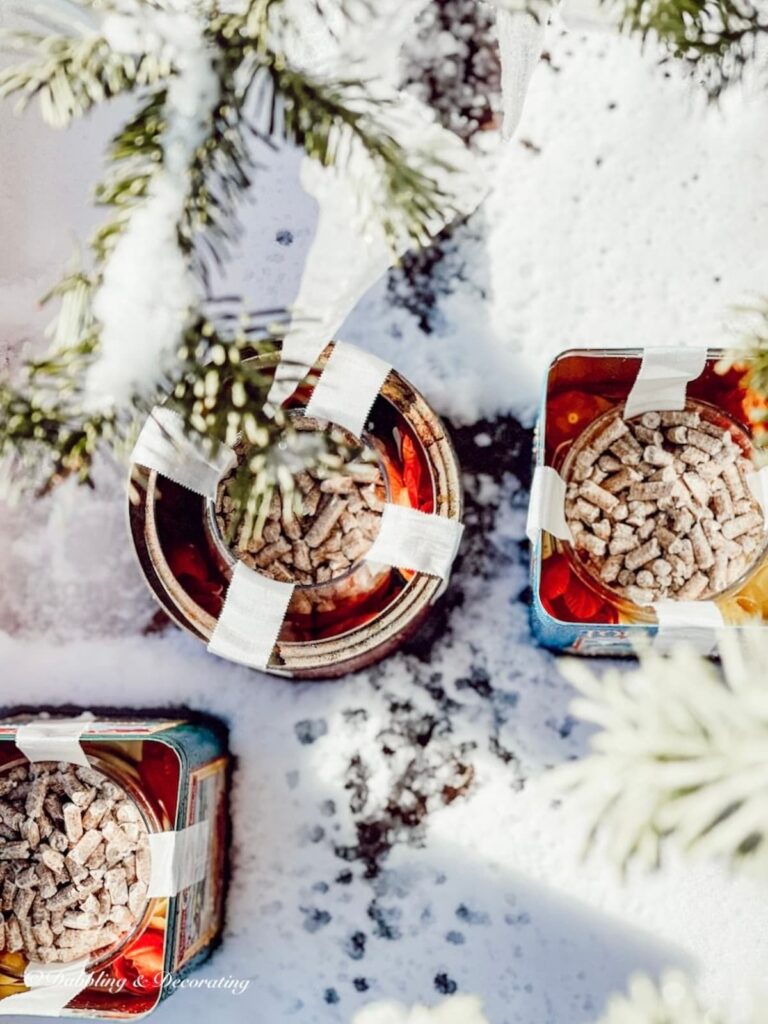
To keep the smaller cup from floating up when you add water, fill it with something heavy. You can use stones, dirt, or even wood pellets like I did. This will hold the inside cup in place and make sure your ice candle has a stable center.
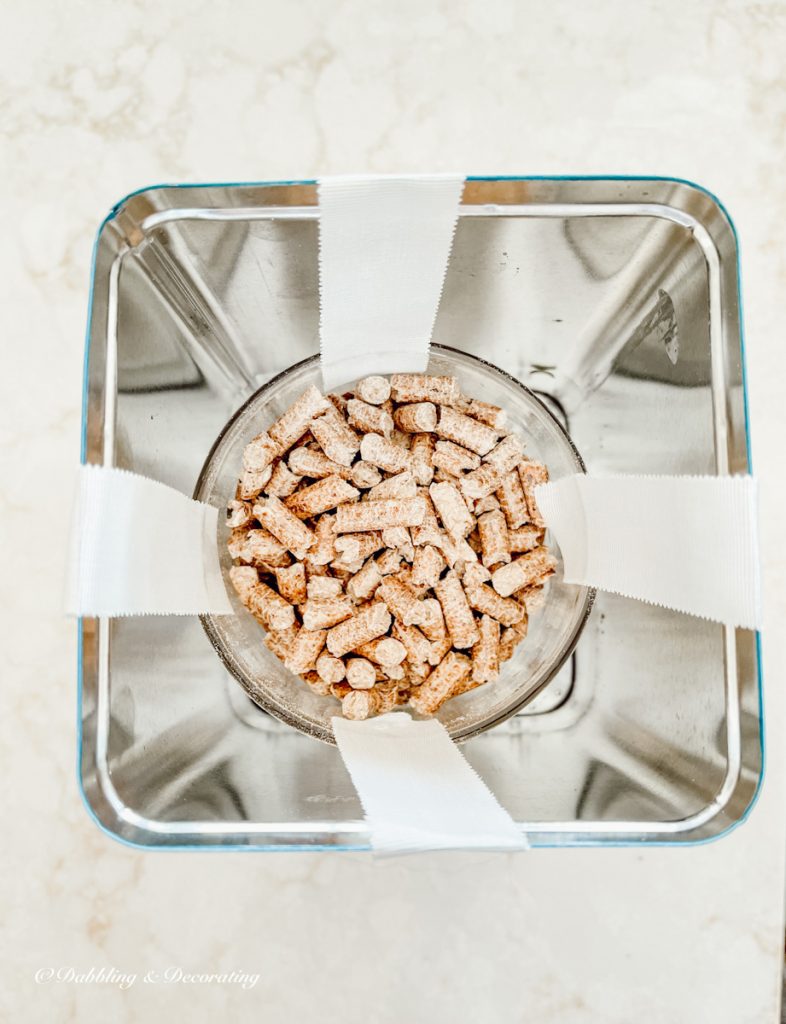
Step 4: Tape It All Together
Secure the smaller container in place with a piece or two of tape stretched across the top of the larger tin. This helps keep everything centered and steady while freezing, especially important when you add more water later.
Step 5: Add Your Decorative Touches
Now comes the fun part: decorating your ice candle! Tuck in faux flowers, berries, evergreen branches, or any other accents you’d like to freeze into the ice. I used colorful faux tulips for a cheerful winter look. A little goes a long way here; a few simple stems or clippings tend to freeze more cleanly than too many crowded pieces.
Step 6: Fill with Water and Freeze Overnight
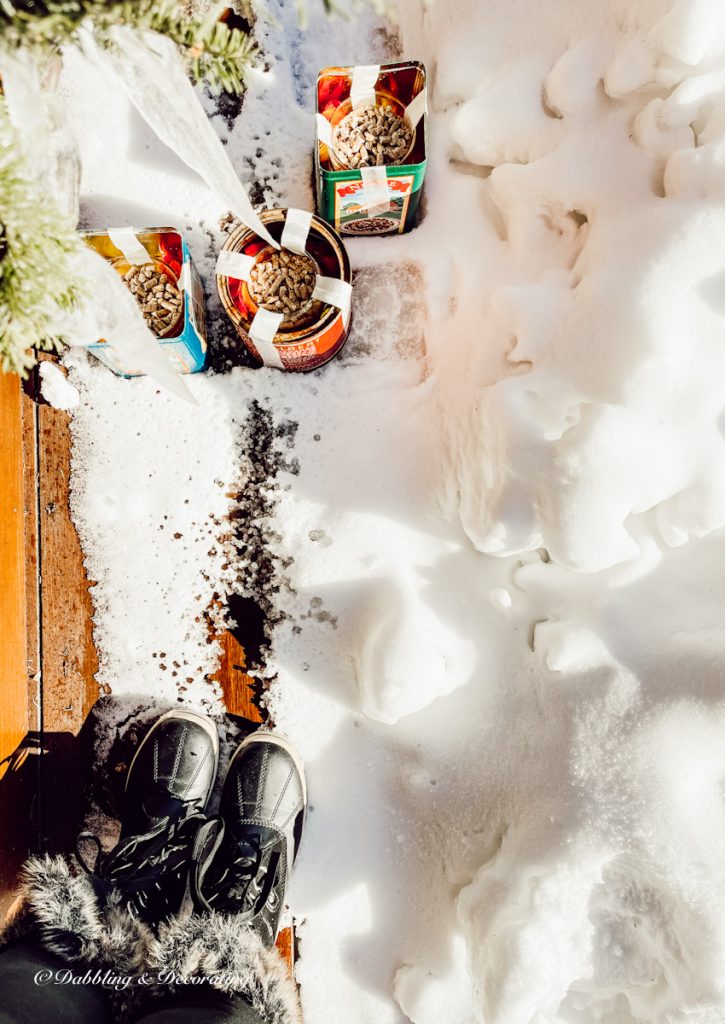
Pour cold water into the outer tin until it reaches about a third of the way up the sides of the inner cup. You want the smaller container to stay firmly at the bottom. Then, place your ice candle outdoors if the temperature is below freezing, or pop it into your freezer for 6–8 hours until it’s completely solid.
The Vintage Posts Readers Love Most
Start with the posts readers come back to again and again. These vintage decorating ideas are rooted in New England, styled with thrifted and antique finds, and filled with real-life tips you can use in your own home. Familiar Finds, Styled Your Way.
How to Start a Vintage Booth: Tips, Display Ideas, and Lessons Learned
Eclectic Decorating Style Guide: How to Layer Vintage, Antique, and Thrifted Decor
9 Vintage Booth Displays That Made Me Stop (And What You Can Learn From Them)
Scandinavian Spring Homes: 10 Light and Airy Cottage Tours to Inspire
Beyond the Flag: What to Look for in Antique Stores for Heritage Americana Decor
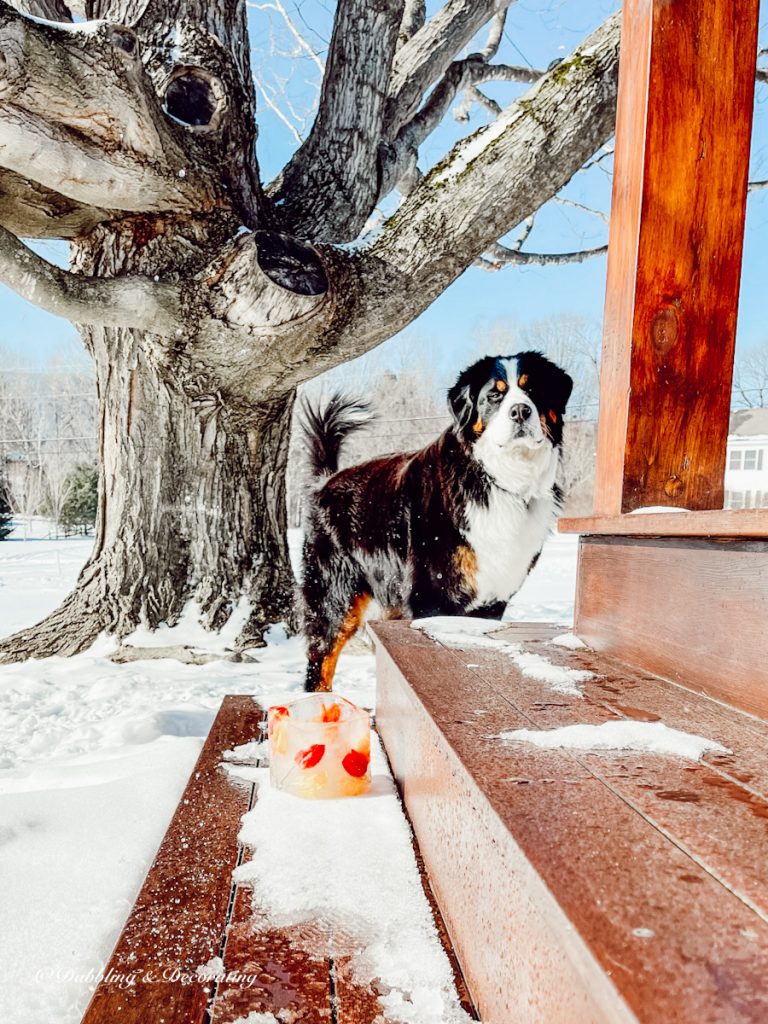
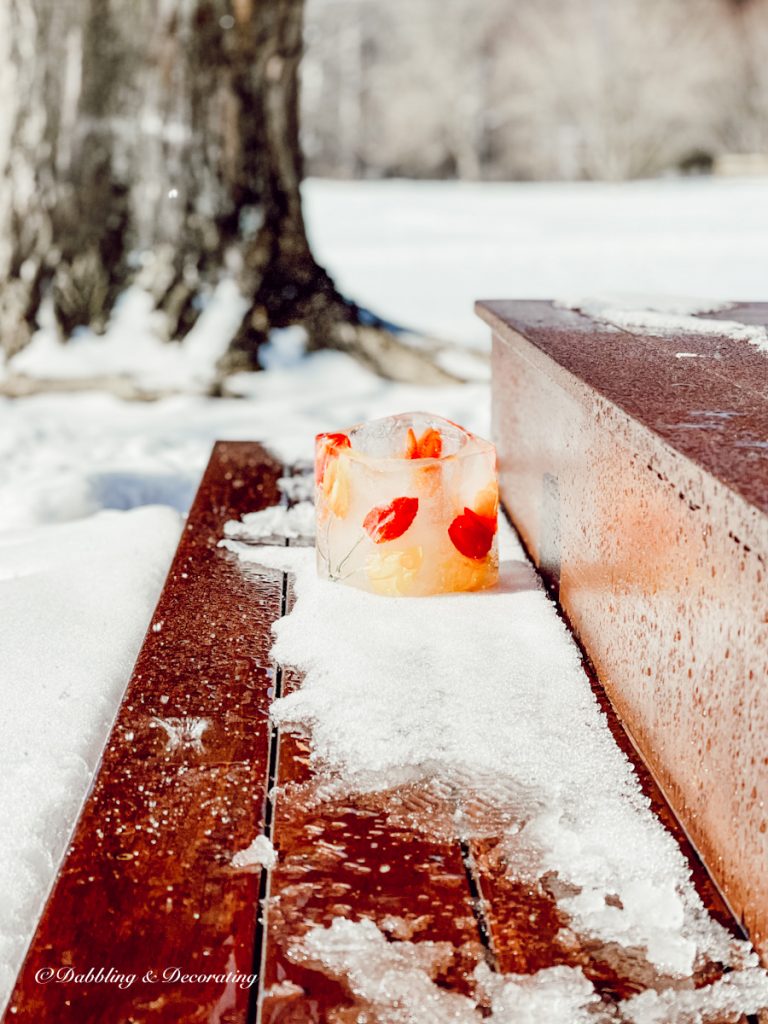
After leaving my ice candles outside overnight in the snow, I couldn’t wait to go outside to check on my new ice candles to see how they turned out.
Step 7: Unmold Your Ice Candle and Add a Tea Light
Once everything is frozen, bring your tin inside and run a bit of warm water around the outside to loosen the ice. The candle should slip right out! Gently remove the smaller cup from the center and drop in a tea light. That’s it, your DIY ice candle is ready to glow.

What to Avoid When Making Ice Candle Holders: Helpful Tip from Experience:
Water naturally expands when it freezes, so avoid using containers with a lip or ridge at the top; your ice candle might get stuck and won’t slide out easily. (Ask me how I know!)
Also, double-check that your containers don’t have any small cracks or leaks, or you might wake up to an empty tin and no ice candle to show for it.
This winter craft is simple, but these little tips will help it go smoothly and save you from the “frozen oops” I ran into the first time around.
The Secret Cupboard: Vintage Decorating Ideas Readers Love Most
Peek inside The Secret Cupboard, a cozy collection of vintage decorating ideas readers love most. Filled with thrifted finds, styled corners, and quick home inspiration.
Looking for More Cozy Snow Day Ideas?
If you’re enjoying this snow day DIY, here are a few more chilly-day projects you might love, all made with ice, a little creativity, and a touch of vintage charm:
A Note From Me
I’ll be honest, I wasn’t sure this post would make the cut. But after lighting those little ice candles on the porch and watching them glow against the snow? I was hooked. Sometimes it’s the simplest projects that surprise you.
How to Decorate with Ice Candles for a Magical Winter Look
DIY ice candles are one of those winter crafts that are as pretty as they are practical. They’re budget-friendly, easy to make with items you already have on hand, and can instantly turn your home into a cozy winter wonderland. Whether you’re lighting up your porch, styling a centerpiece, or creating a snowy backyard glow, these frozen candle holders are full of charm and versatility.
Here are some of my favorite ways to decorate with ice candles:
Easy DIY Home Decor Projects with Vintage Style
Explore our easy DIY home decor guide with vintage style, using thrifted and repurposed finds. Simple, beginner-friendly ideas to decorate your home with charm.
How to Make Ice Candles You’ll Want to Create Every Snowy Season
There’s just something about the quiet magic of a snowy afternoon and a simple craft like these ice candles. With a few everyday supplies and a little winter chill, you can create something truly special, whether it’s for your front porch, a backyard hot tub, or just to bring a soft glow to your window.
So the next time the flakes start to fall, gather a few tins, light a candle, and turn your snow day into something cozy and creative. You may also find inspiration in my Cozy Snow Day at Home: New England Winter Decor and Simple Comforts post.

Have you ever made ice candles before? I’d love to hear how you decorated with them, or what accents you’d freeze inside. Leave a comment below, or tag me on Instagram so I can see your beautiful winter creations!
Frequently Asked Questions About How to Make Ice Candles
How long do ice candles last outdoors?
If the temperature stays below freezing, your ice candles can last for several days or even longer. They hold up best in shaded or snowy areas and may melt more quickly in direct sun.
Can I make ice candles using real flowers or greenery?
Yes! You can use real flowers, evergreen clippings, berries, or even dried citrus slices. Just keep in mind that delicate florals may fade or brown as they freeze, while faux stems tend to keep their color and shape better.
What kind of container works best for making ice candles?
Look for containers without a lip or ridge at the top so you can easily slide the ice candle out when it’s frozen. Vintage tins, recycled plastic tubs, or old yogurt containers all work great, just make sure they don’t leak.
Can I use food coloring or colored water to tint the ice?
Absolutely! Adding a few drops of food coloring to the water creates a soft, tinted glow when the candle is lit. Try blues, greens, or even reds for a festive look.
Do ice candles work indoors?
They’re best suited for outdoor use, but you can display them briefly indoors in a dish or bowl if you want to enjoy them for a short time. Just be sure to catch the melt and never leave them unattended.
Join the Vintage Circle — Familiar Finds, Styled Your Way™
Love vintage treasures, thrifted gems, and a home that tells your story? Leave a comment, share this post with a kindred spirit, or head to my Start Here page to explore more. Want fresh prompts and timeless ideas? Subscribe to join our Seasonal Vintage Decor Styling Challenge for weekly inspiration and behind-the-scenes peeks.
Pin forLater!


This is so pretty and fun Ann!!! I need to do this at my house! Thanks for the inspiration!
Thanks so much Kristin😃
This is the cutest idea, Ann. I absolutely love how it turned out.
Ann, these candle holders are just so cute. I’m sharing on my Sunday post.