

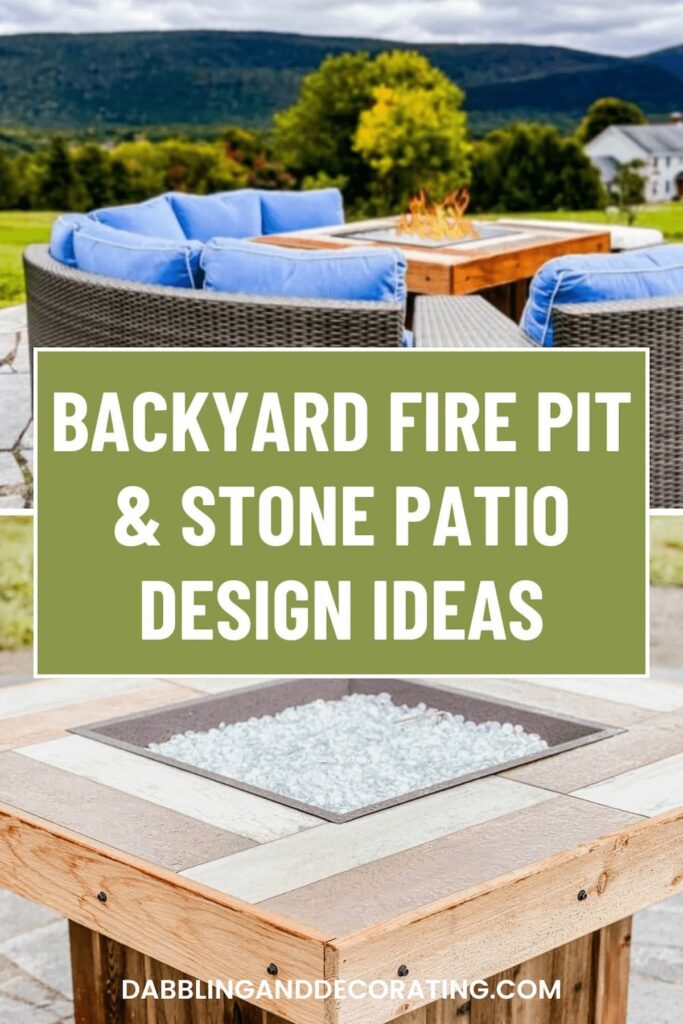
Learn how to design a stone patio and fire pit for outdoor living in New England. From landscaping to layout ideas, this cozy backyard design is perfect for gathering in all seasons.
Thinking about adding a stone patio and fire pit to your backyard?
In this first part of our two-part blog series, I’m sharing how we designed and built a cozy outdoor living space in Vermont — from landscaping and layout to choosing the right fire pit and stone materials for our New England climate.
See Part Two of this Blog Series:
This is the first post in a two-part series. For the final outdoor living reveal, be sure to check out the Backyard Fire Pit and Stone Patio Ideas for New England Living post next.
Creating Our Outdoor Living Space in Vermont
Our home sits in a beautiful valley nestled between the Green Mountains of Vermont, offering scenic views right outside our windows. Inspired by this natural backdrop, we set out to design a custom outdoor living space we could enjoy for three seasons — and maybe even the occasional sunny winter day.
The front yard, however, was originally filled with apple trees and diseased pine trees, a common issue in Vermont due to tree blight, which ultimately led us to clear this space and start fresh.
This photo was taken before we began any landscaping or patio design — and it’s amazing to see how far it’s come.
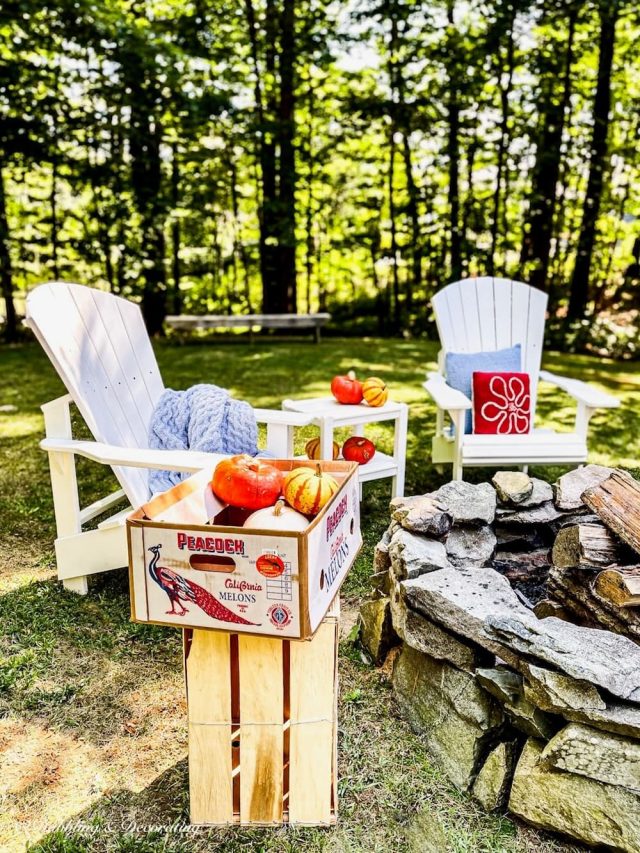
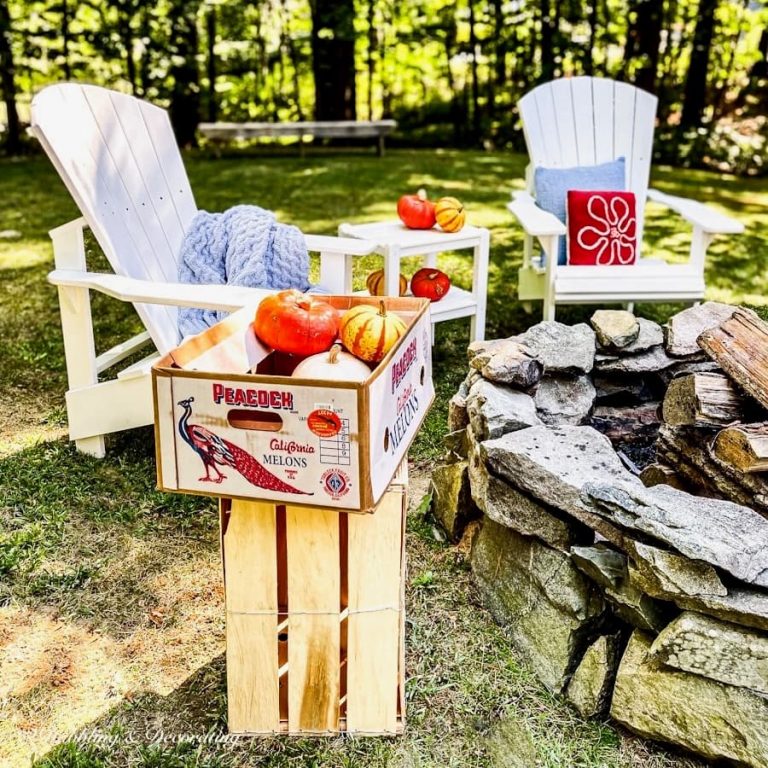
From there, we began planning a low-maintenance outdoor area complete with a smokeless fire pit, comfortable seating, and natural landscaping — a space we could relax in, entertain around, and truly enjoy with family, friends, and neighbors.
Clearing the Landscape for Our Backyard Patio Design
Backyard Tree Removal: Making Room for the View
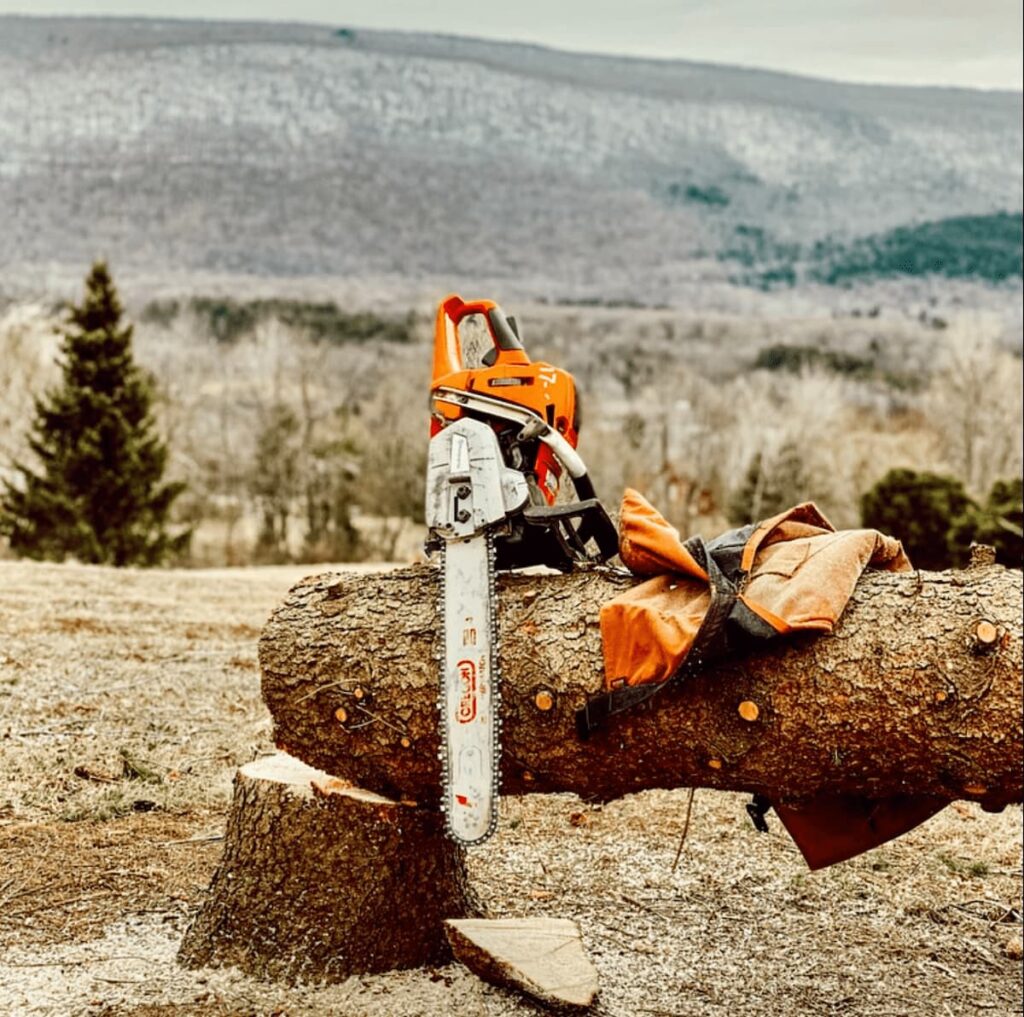
Our Vermont backyard makeover began with a big decision — to remove the existing landscaping and trees to open up the space and make way for our new stone patio and fire pit design.
While the original pine trees had grown tall and full, they’d become overgrown and diseased and were now blocking the mountain views we wanted to highlight.
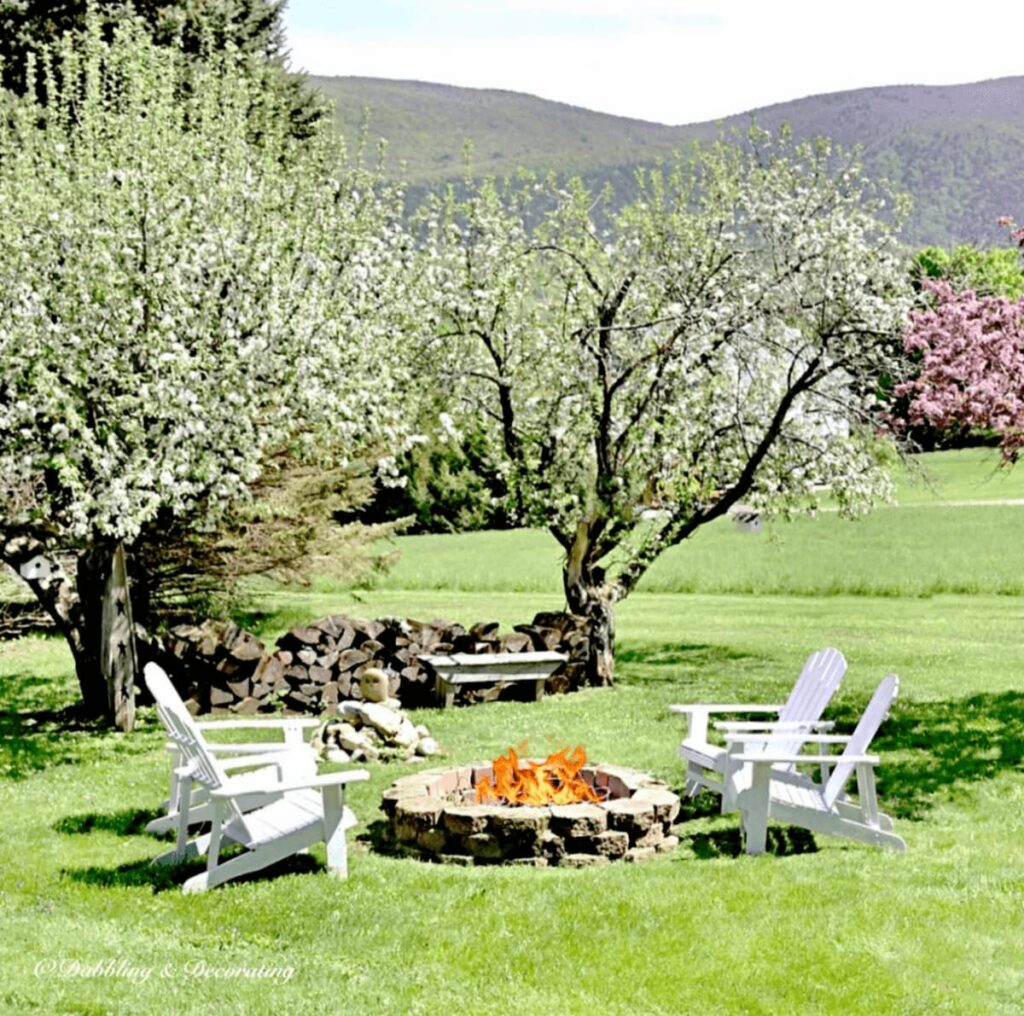
The old apple trees, while beautiful in bloom, dropped messy fruit throughout the yard. Our Bernese Mountain Dog, Ella, also loved to snack on the fallen apples — and since apple cores can be toxic for dogs, it was one more reason to start fresh.
The entire removal process took place during the pandemic, and we documented it all — from winter tree cutting to the final cleared yard.
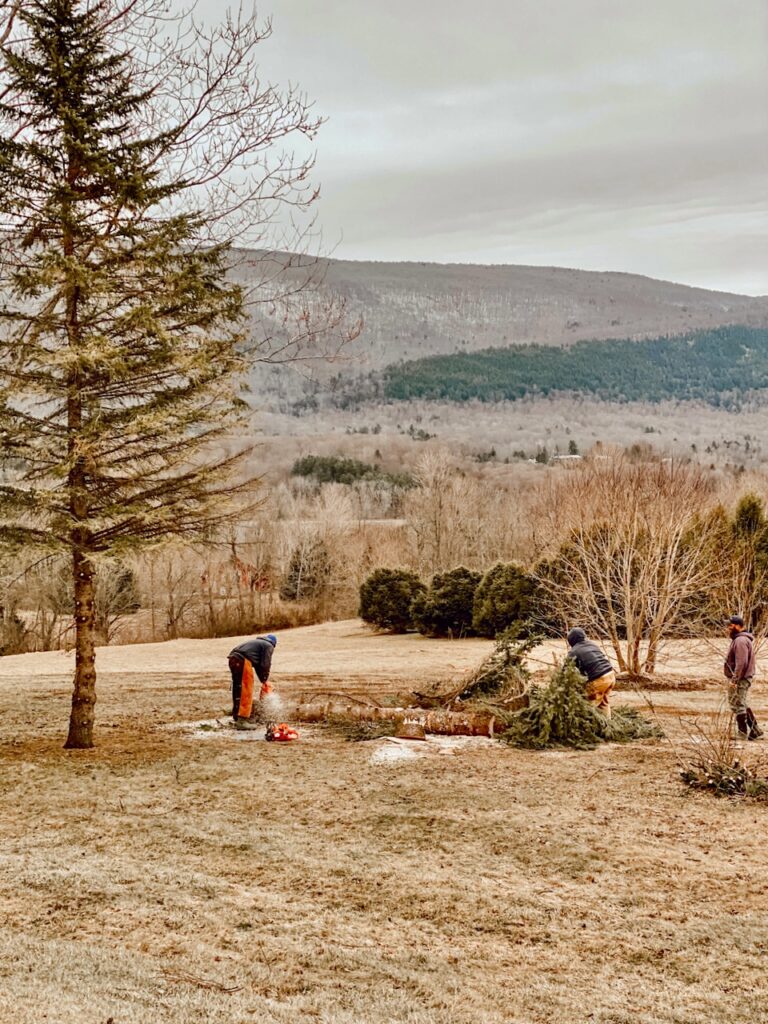

Tip: Taking Down Trees Goes Faster Than You Think
We were shocked at how quickly the tree removal process went! A full crew arrived in the morning, and within just a few hours, they had taken down about 10 diseased and rotting pine trees, fed them through a massive wood chipper, and were on their way. It was one of the more expensive parts of this project—but also one of the most efficient. And honestly, it was fascinating to watch.
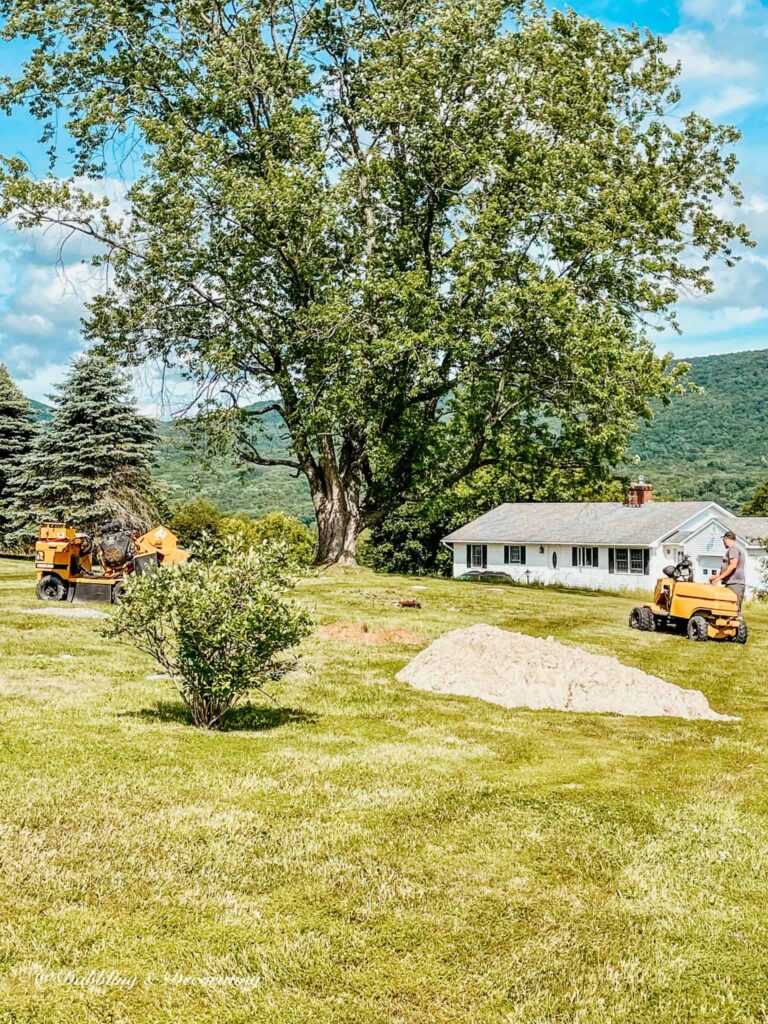
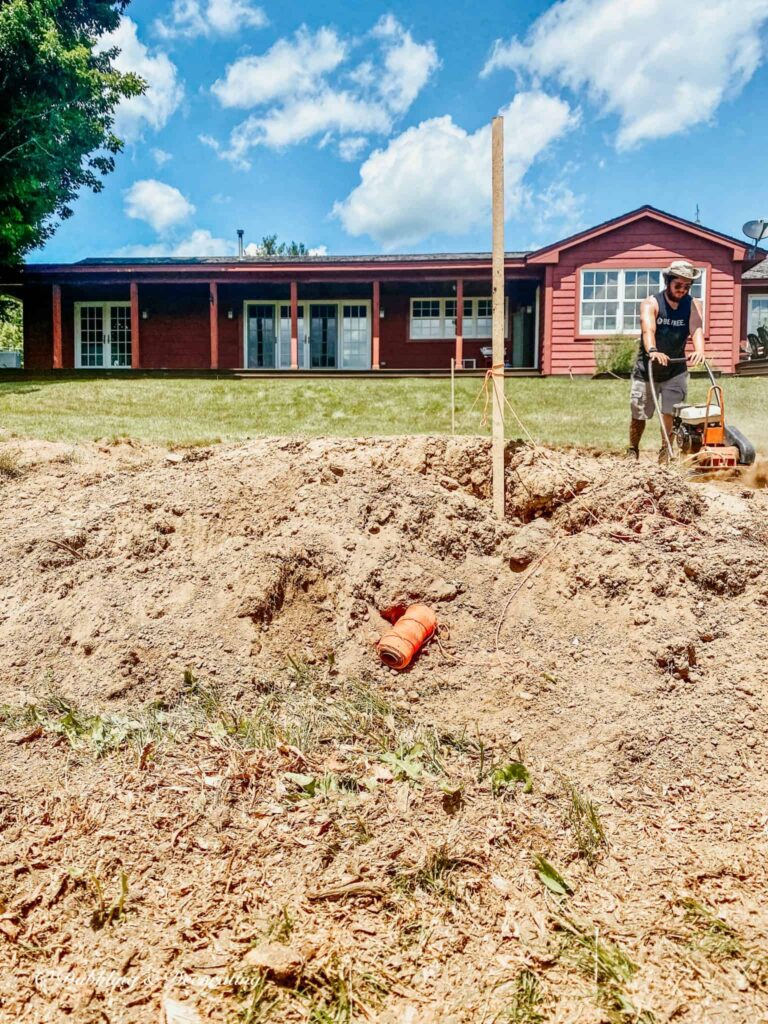
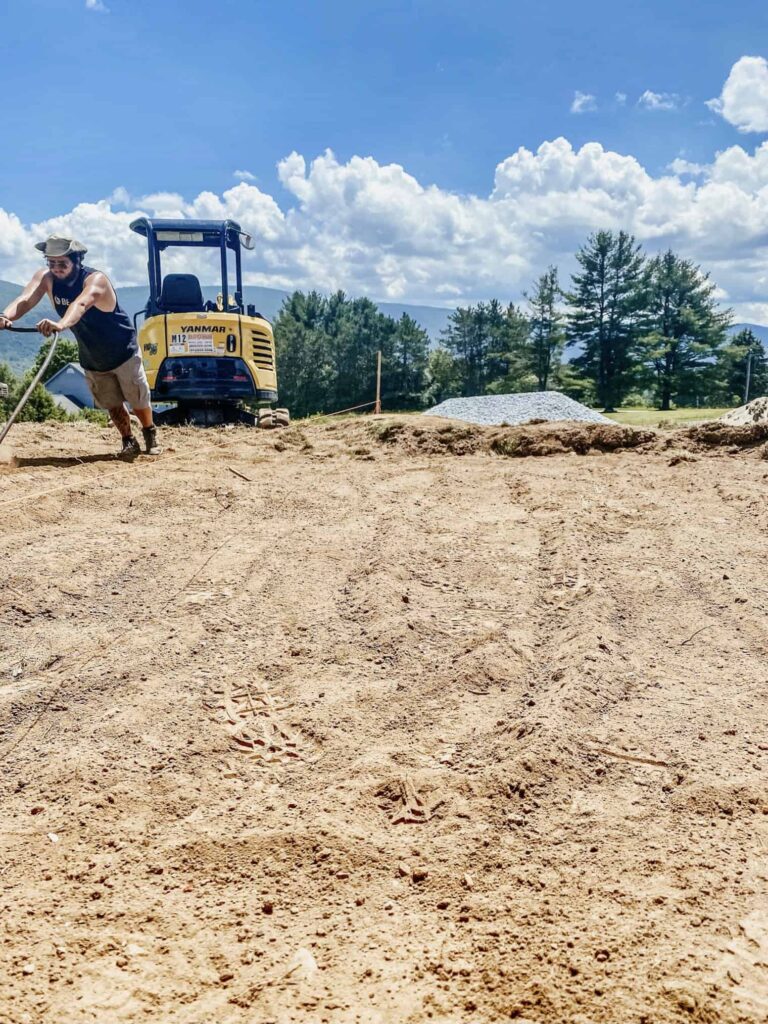
Tree Stump Removal: Preparing for a New Patio
Once the trees were down, it was time to remove the stumps — and this was no small task. Every stump needed to be ground down and cleared before we could begin designing and building our stone fire pit patio.
We hired a local tree company to handle the removal using professional-grade stump grinders. And while it’s possible to rent a chipper and attempt the job yourself, these machines are expensive and easy to damage without the proper know-how. In our opinion, this is one job best left to the pros.
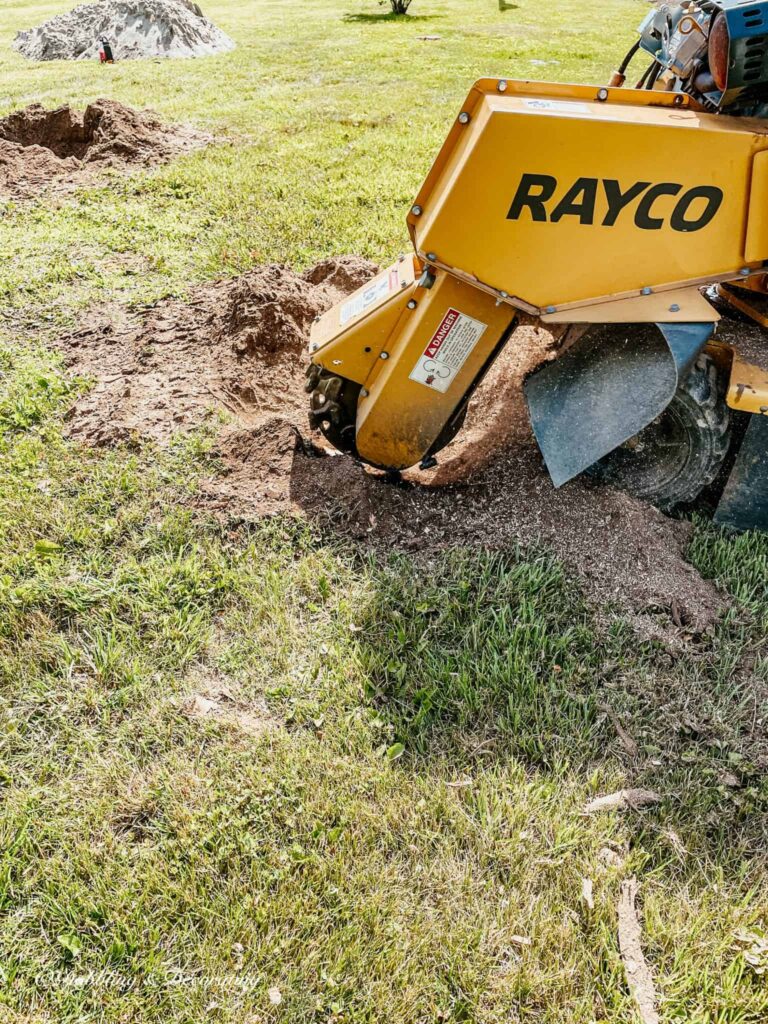
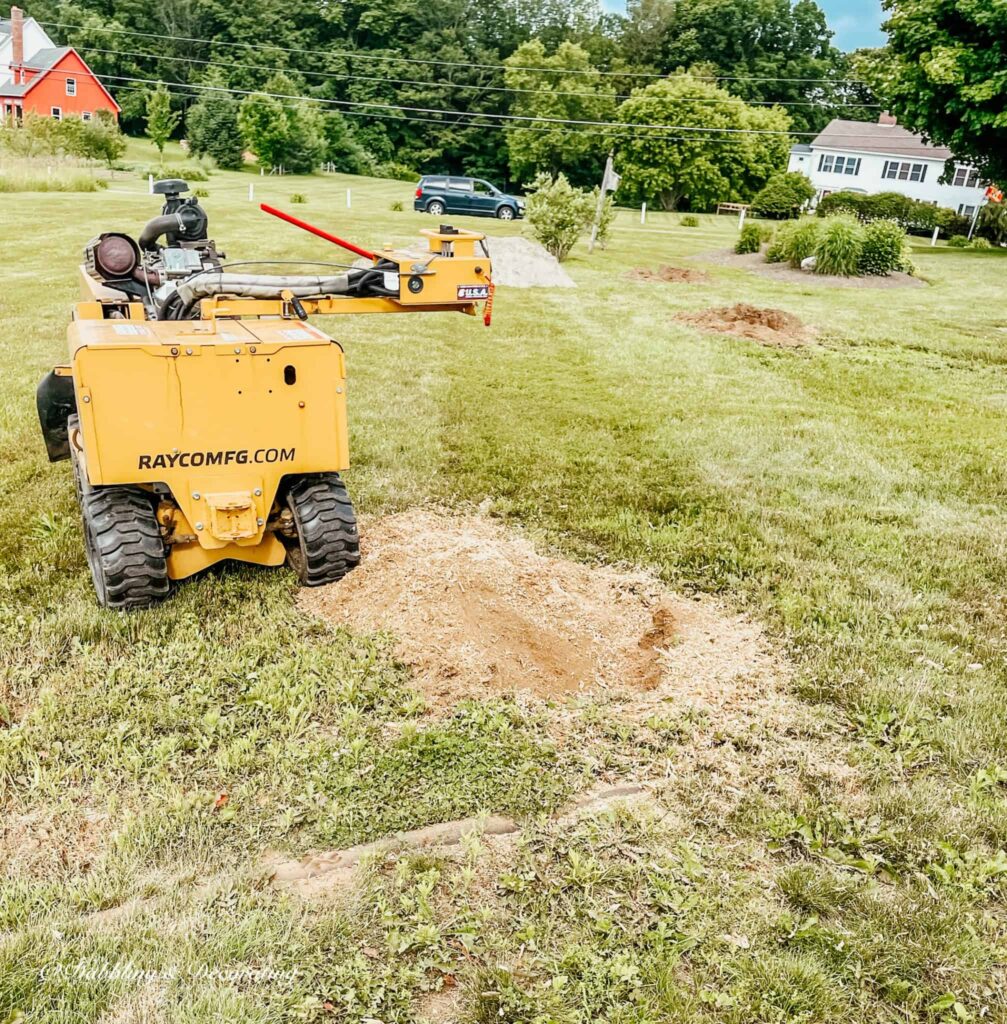
Watch the process in action as we clear the tree stumps to prep the space for our future stone patio and fire pit — a big job, but worth every step!
Choosing the Best Fire Pit for Windy Outdoor Spaces
Why a Natural Wood Fire Pit Didn’t Work for Us
Here in Vermont, our front yard is wide open and frequently exposed to strong winds — especially during the colder seasons. As charming as our wood-burning fire pit was at first, it just didn’t hold up to the elements. The smoke and ash would blow everywhere, making it nearly impossible to sit outside and enjoy a fire for long. That’s when we knew it was time to find a low-maintenance, smoke-free fire pit that was both functional and beautiful.
What We Were Looking For in a Fire Pit
When we began our search, we made a checklist of must-haves to fit our New England outdoor living needs:
The Fire Pit We Chose (and Love)
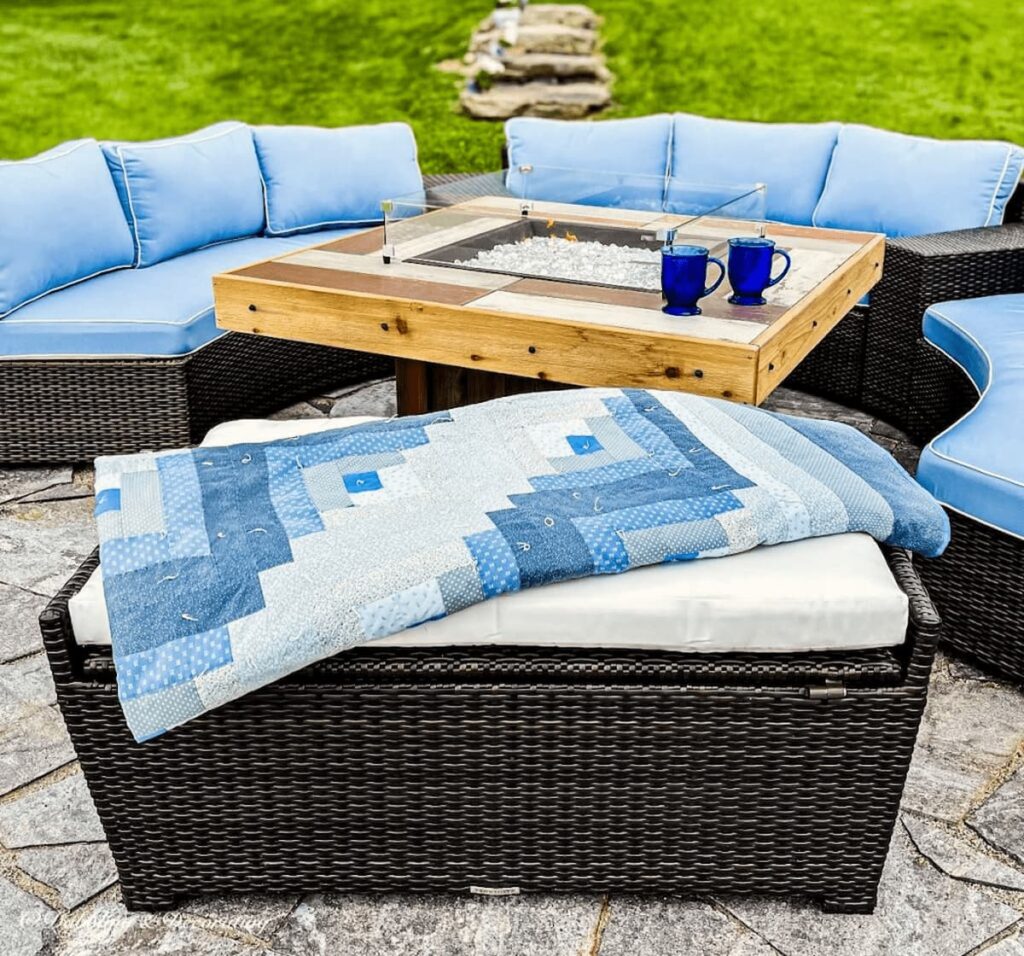
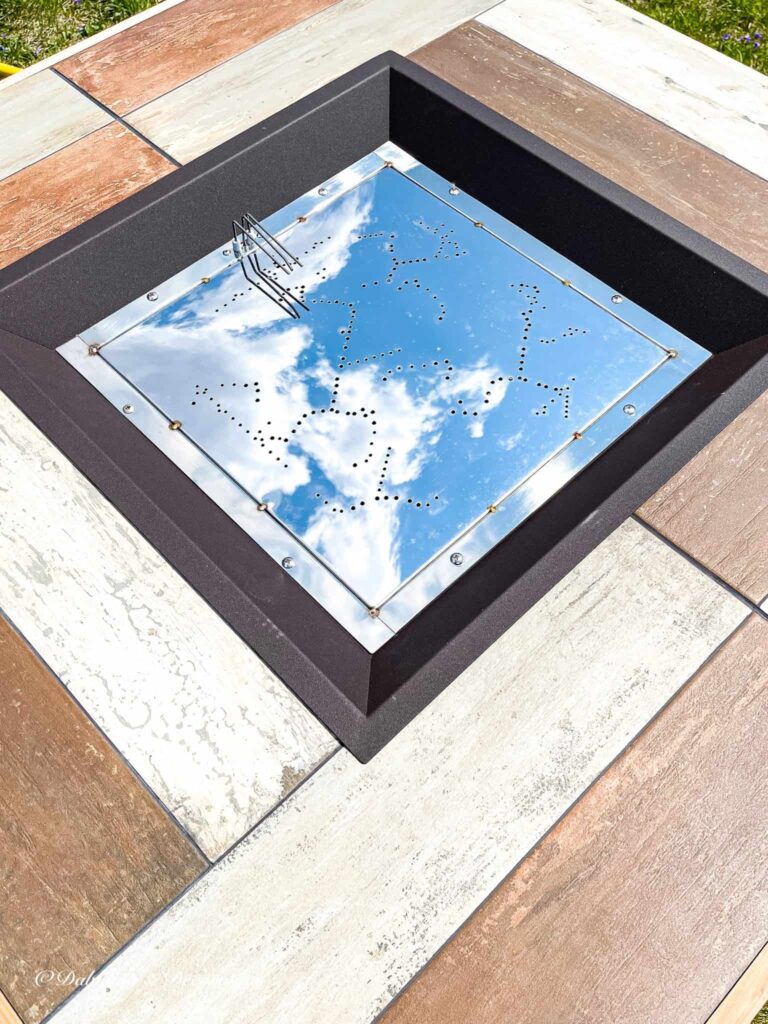
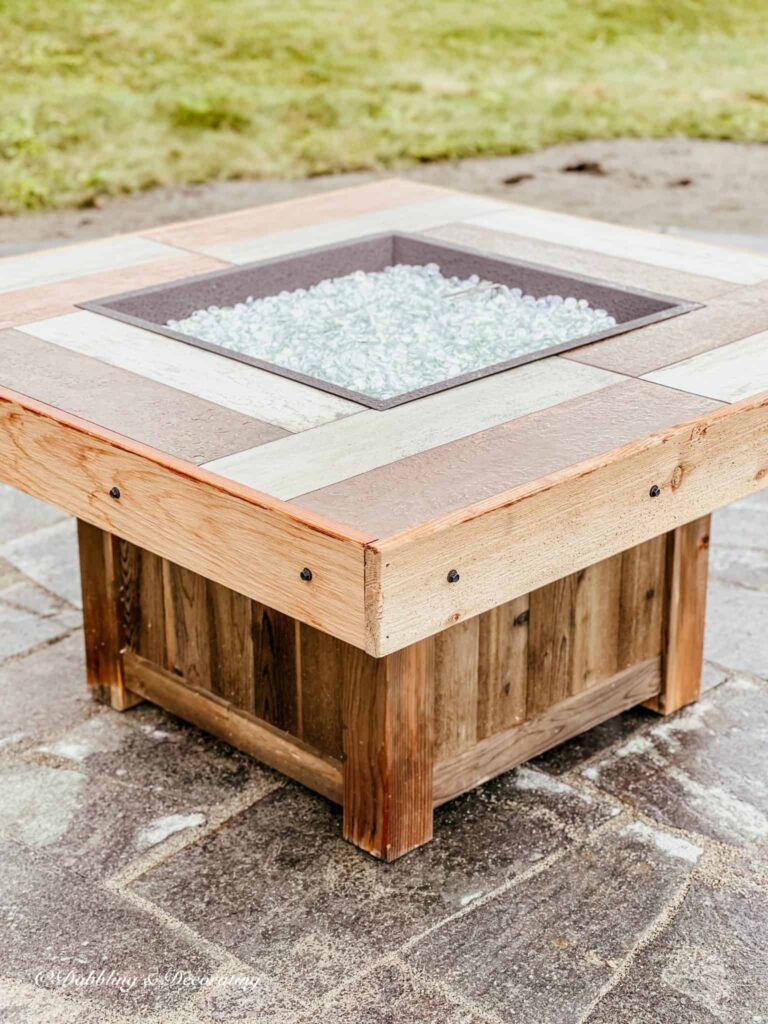
The Outdoor Greatroom’s Vintage Square Faux Wood Fire Table
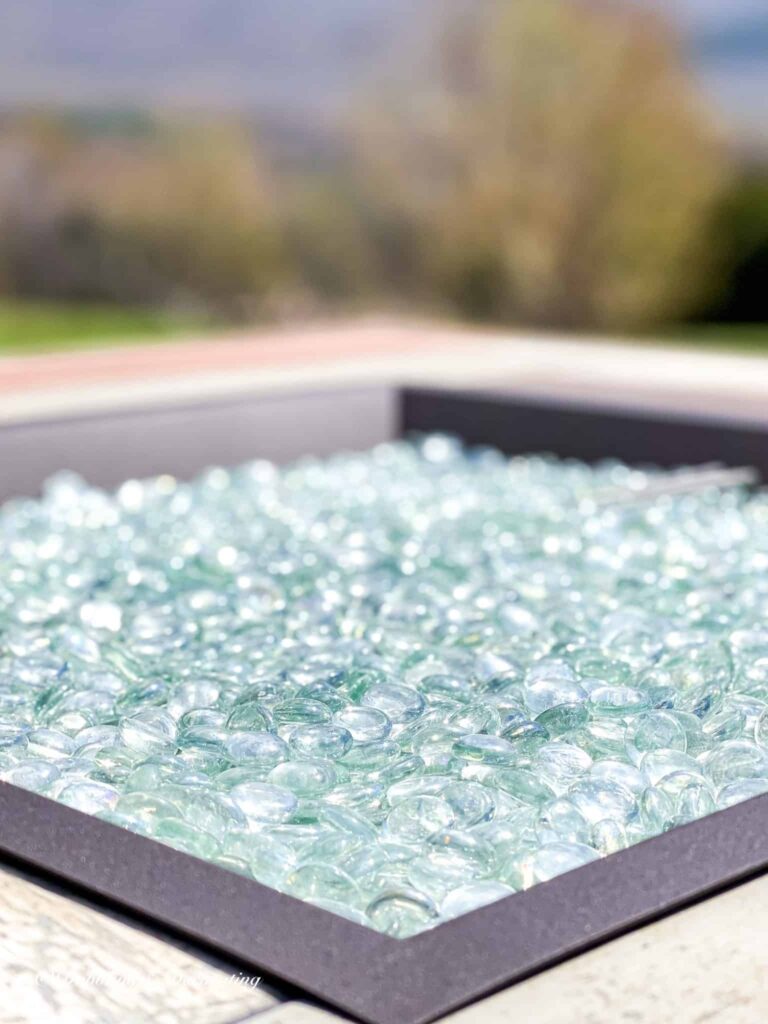
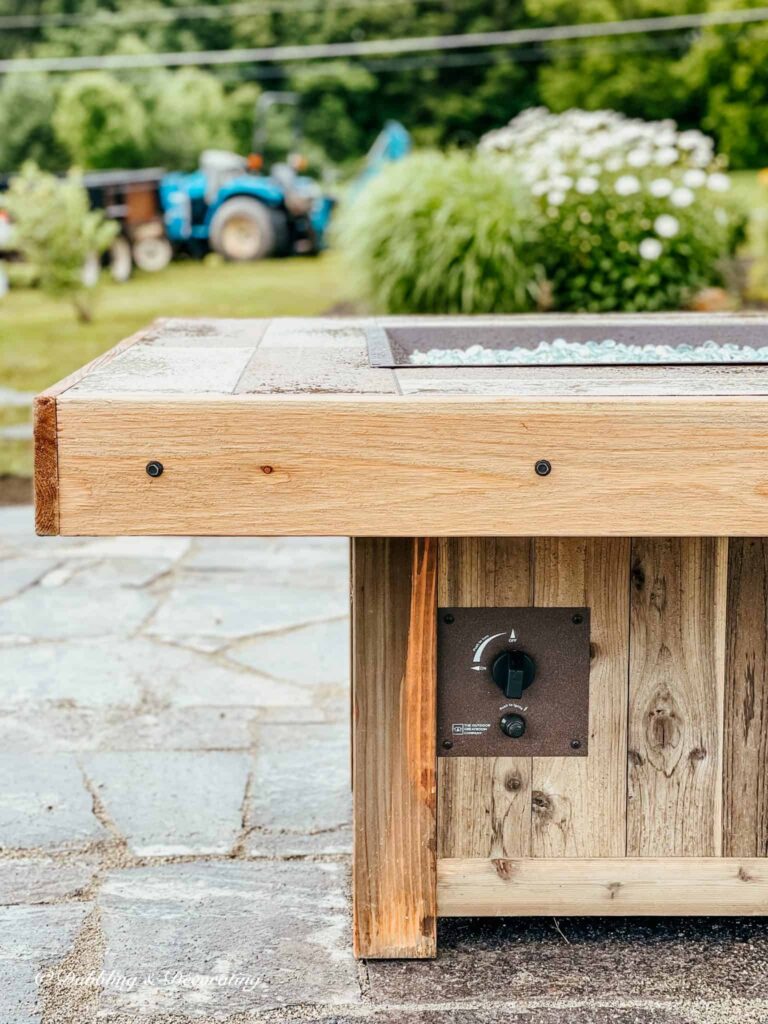
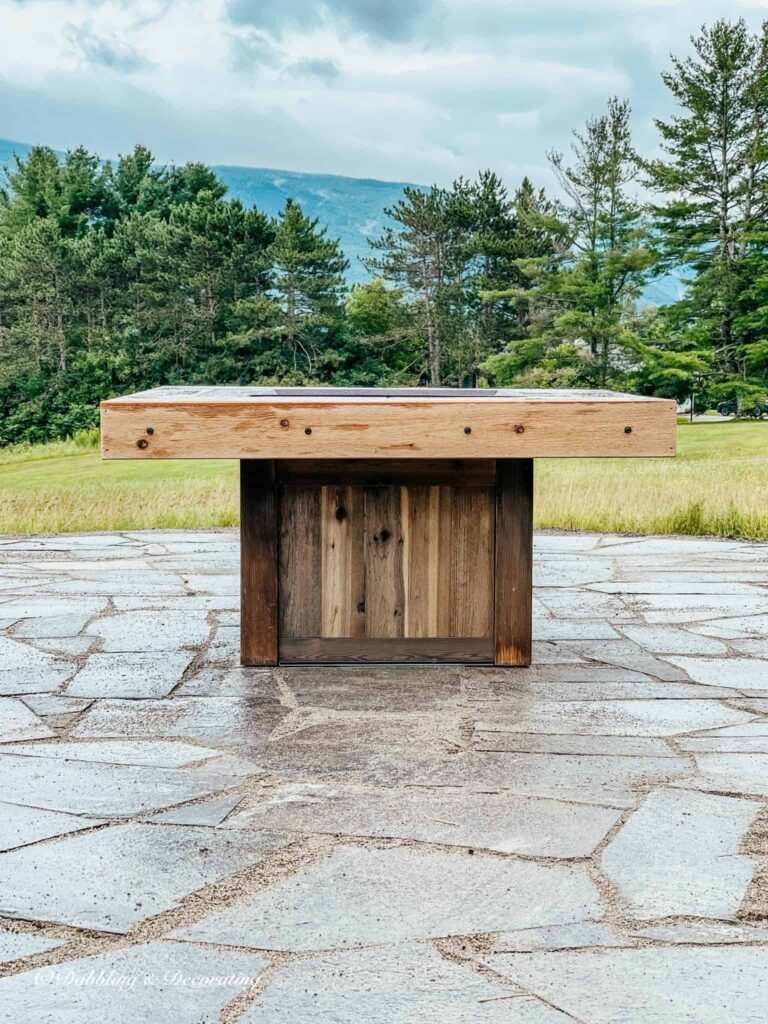
We landed on the Vintage Square Gas Fire Table from The Outdoor GreatRoom Company, and we couldn’t be happier with it. Not only did it check every box on our wishlist, but it was also in stock and ready to ship — a huge bonus. The fire table arrived on a single pallet weighing about 350 pounds, and assembly was surprisingly simple.
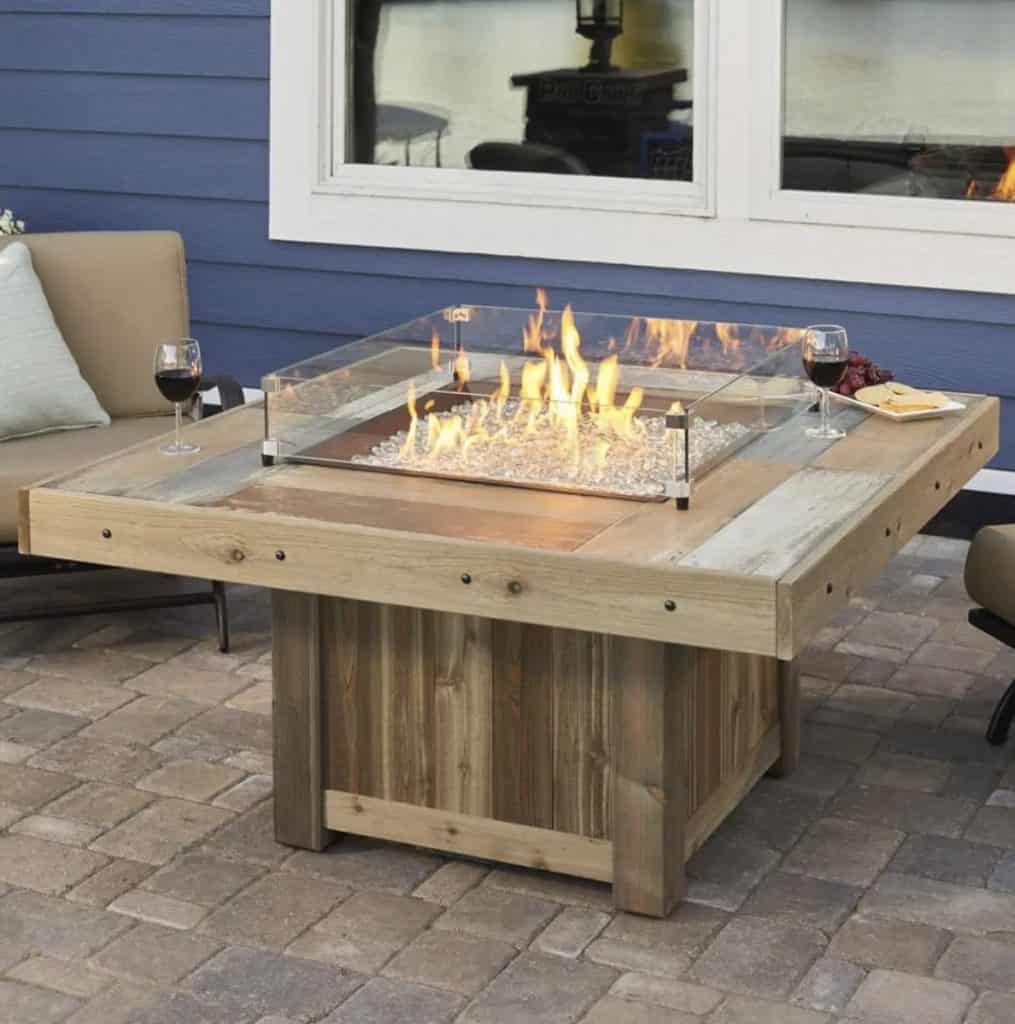
It runs on a standard propane tank tucked neatly inside the base, with an optional remote on/off switch that makes using it effortless. For entertaining, we always keep a second propane tank on hand, just in case — because no one wants the flames to go out mid-s’mores!
Tip: Keep a Backup Propane Tank on Hand
One of the easiest ways to avoid unexpected interruptions during your outdoor gatherings? Always keep a second propane tank ready to go. Our fire pit runs for about 8–10 hours per tank, and having a backup means we never have to worry about running out of fuel mid-fire. It’s a simple trick that makes a big difference when entertaining!

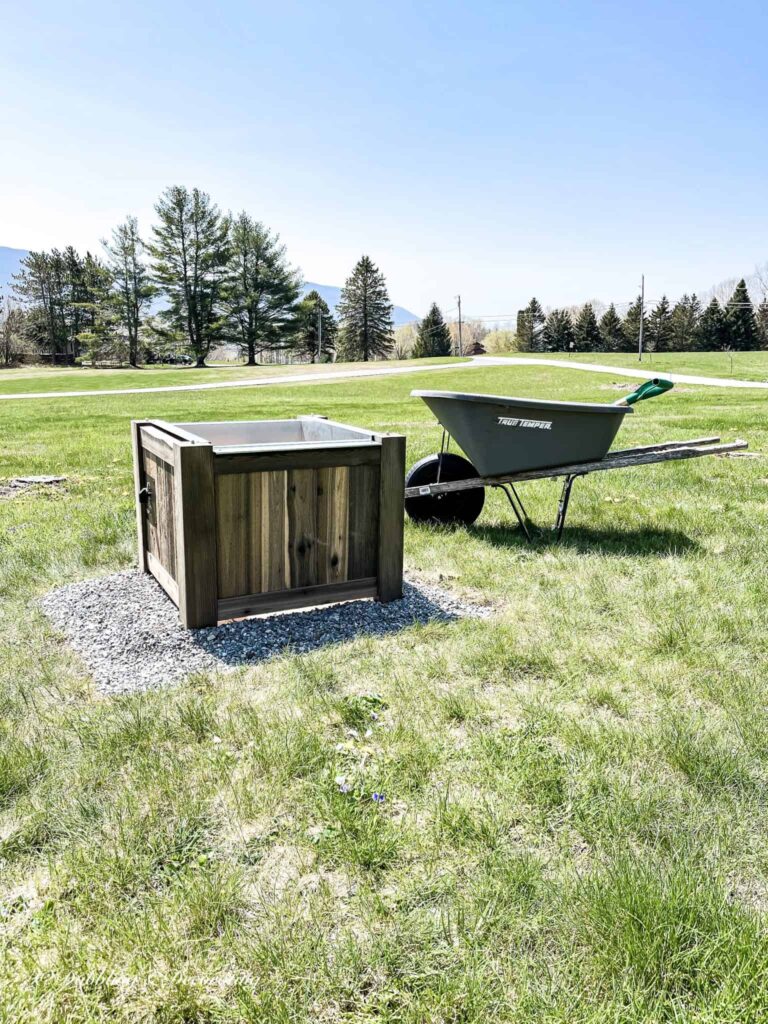
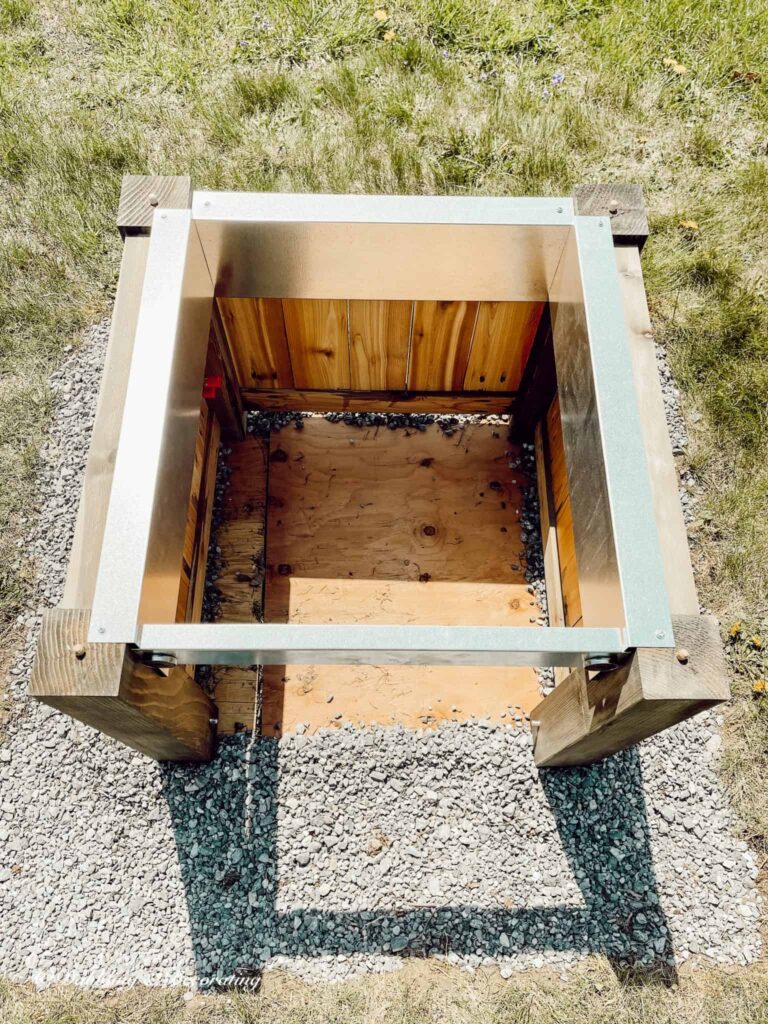
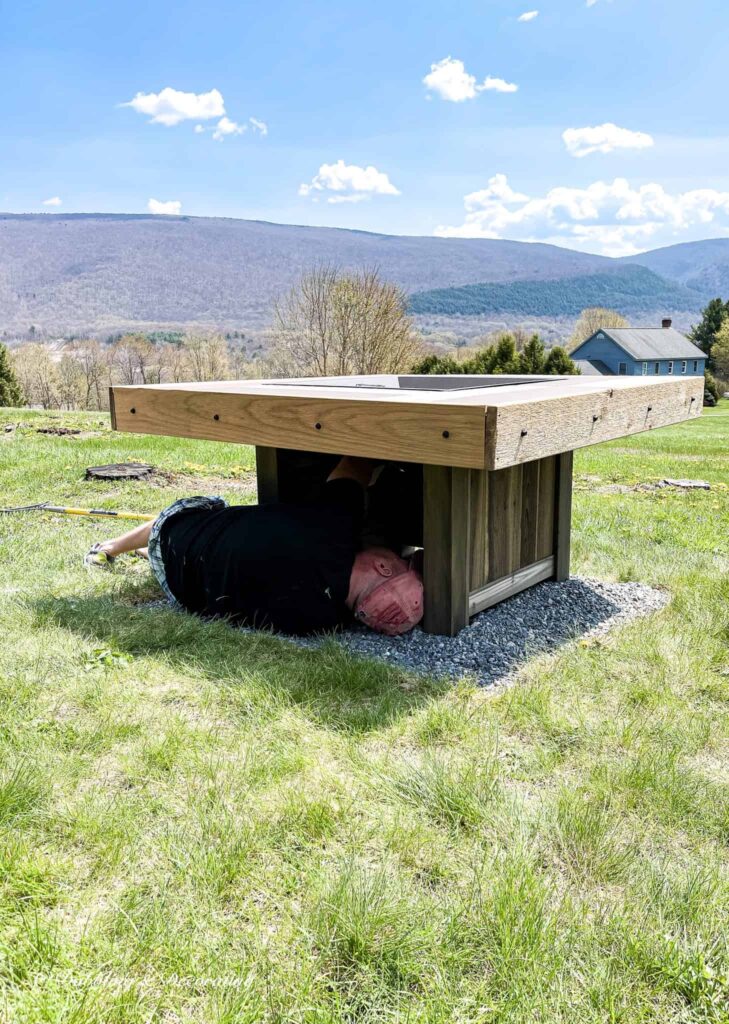
How We Installed Our Propane Fire Pit on a Temporary Base
While we knew a stone patio was in our near future, we were too excited to wait — so we installed our new propane fire pit on a temporary gravel base to start enjoying it right away. The setup was quick, easy, and perfect for testing everything out before the permanent stonework began. If you’re planning a similar outdoor fire pit installation, here’s how we did it in just a few simple steps.
Recommended Reading
You may also find inspiration in this 17 Fall Decor Fire Pit Ideas for a Cozy Gathering post.
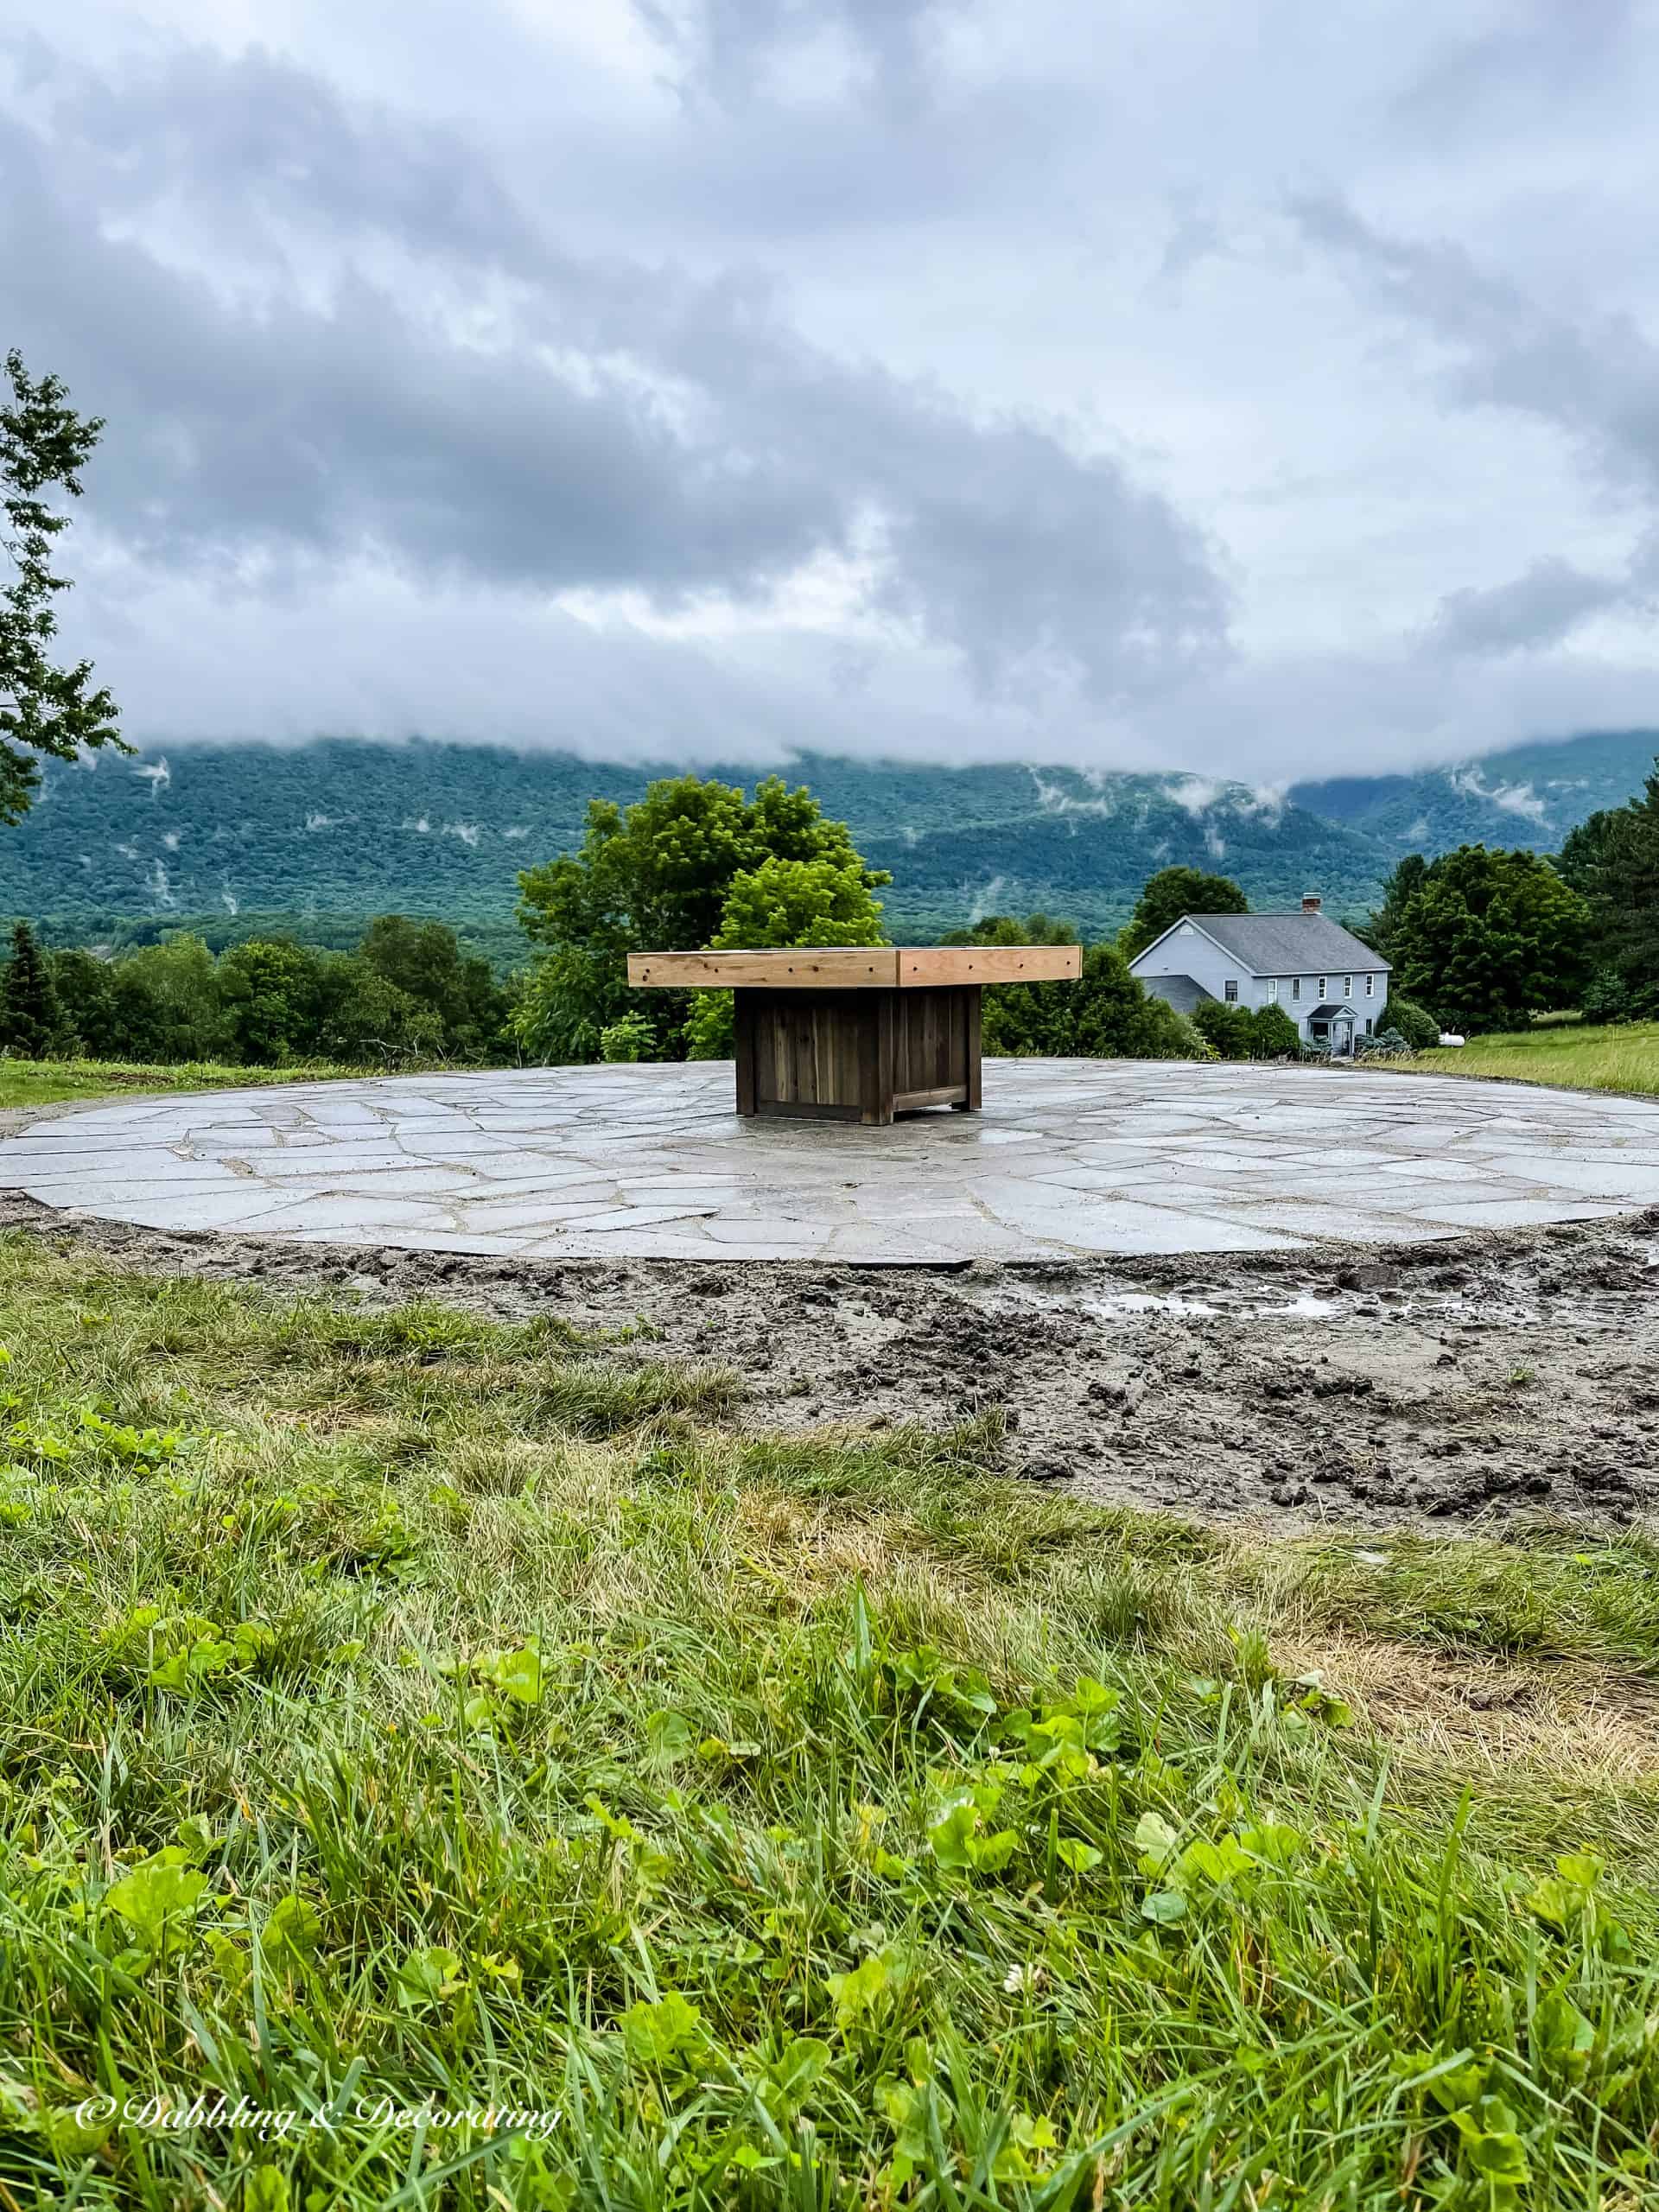
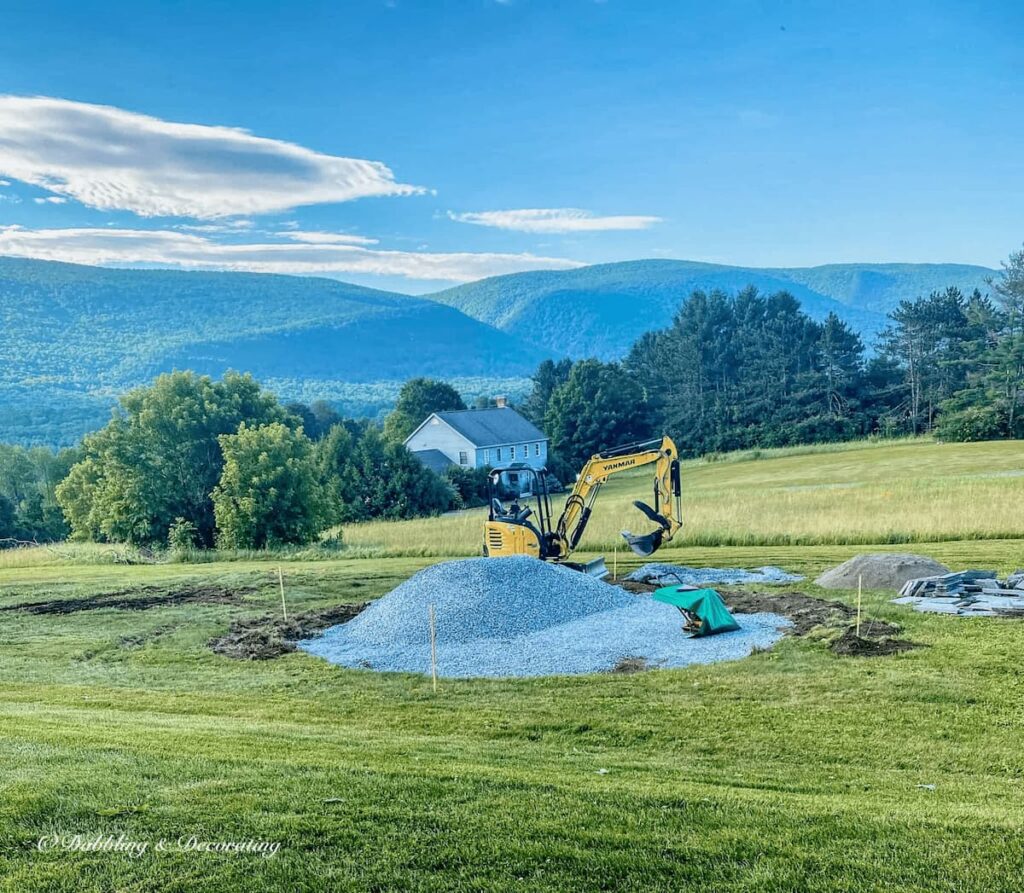
Designing a Round Stone Patio for Our Fire Pit
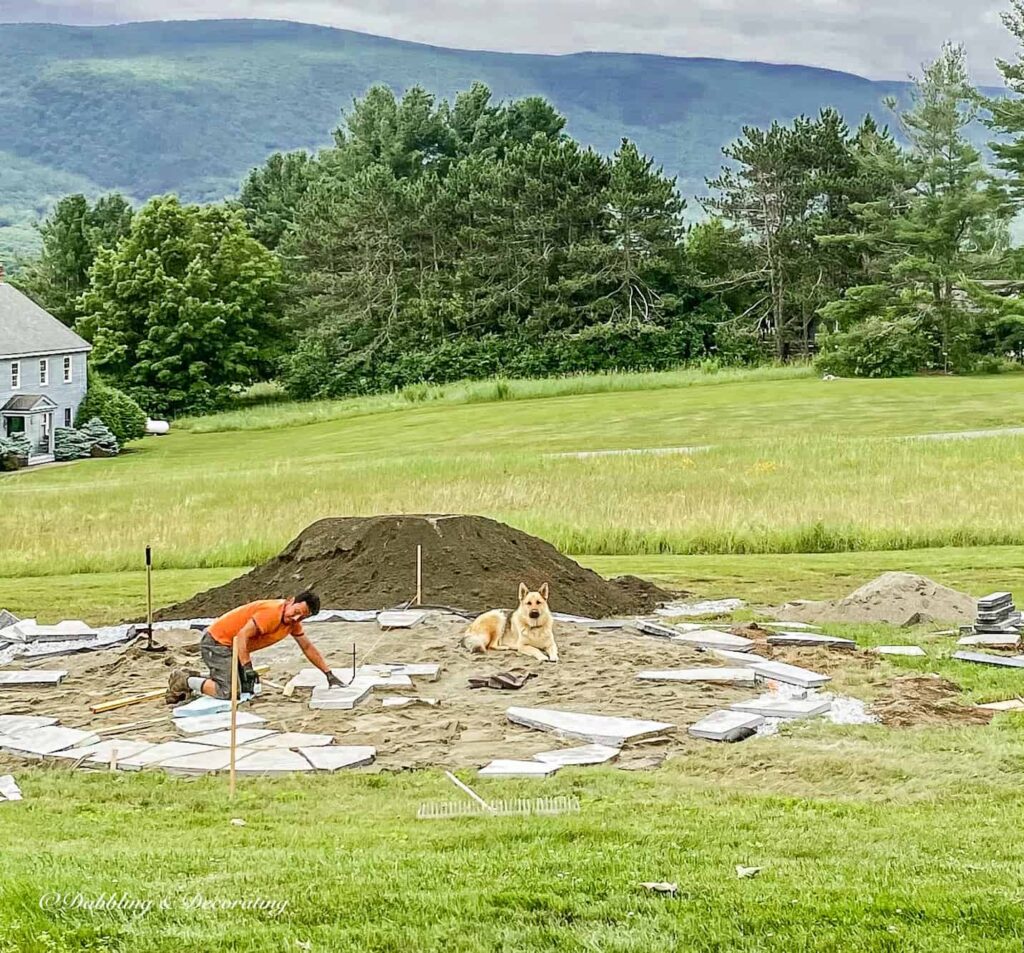
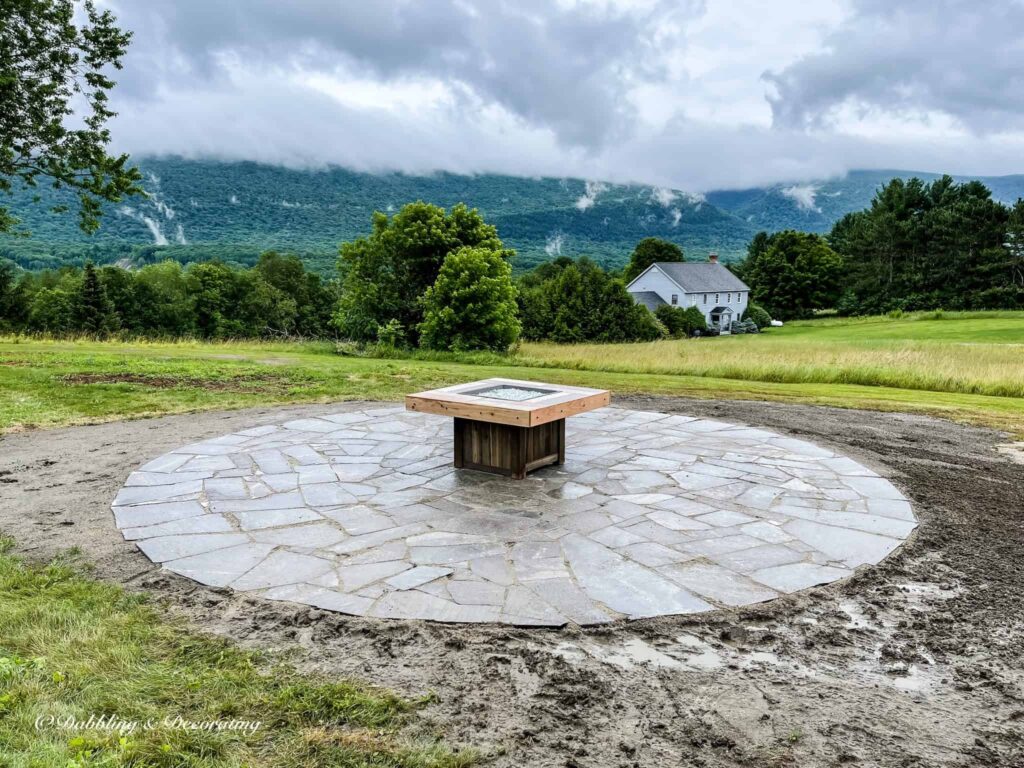
Once we had our fire pit in place, it was time to bring the full fire pit patio design to life. We hired a talented local stonemason, René from Evergreen Designs, to help us create a 10-foot round stone patio that would serve as the centerpiece of our outdoor living space.
We carefully selected Corinthian granite for the patio — a beautiful, rustic stone that blends perfectly with the natural Vermont landscape and all the cozy backyard elements we planned to incorporate.
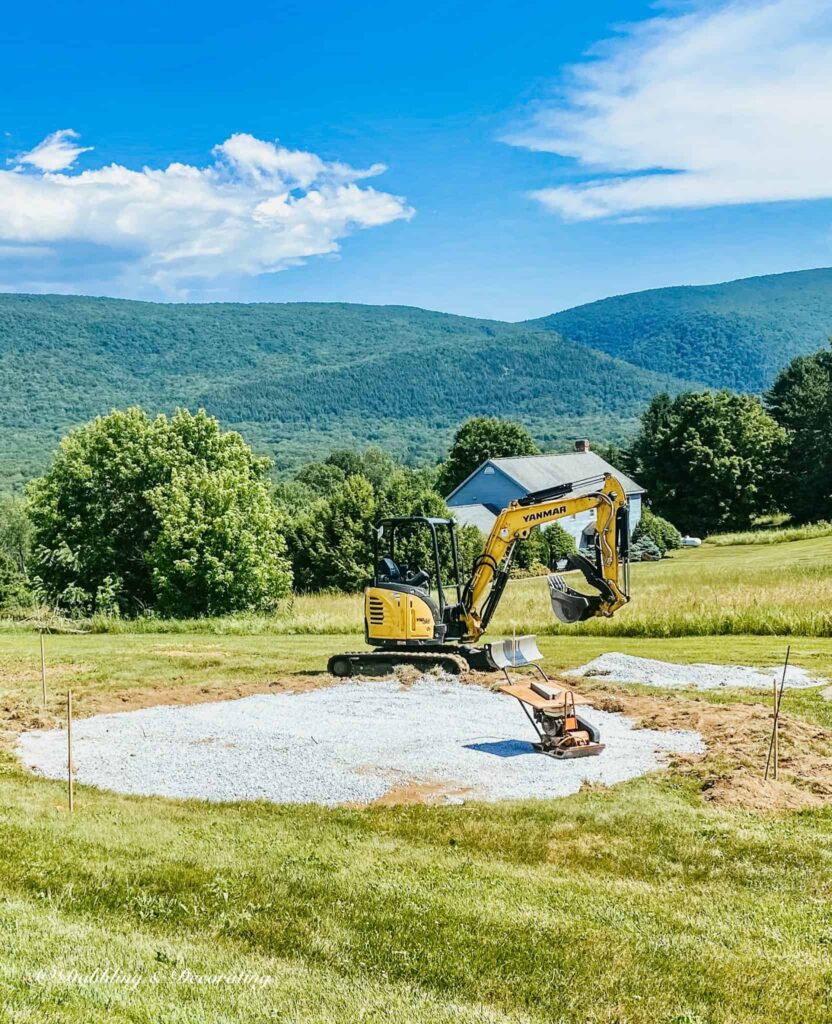
Before construction began, we calculated how much material we’d need to build a strong, weather-ready base. Here’s what went into creating this New England-style fire pit patio:
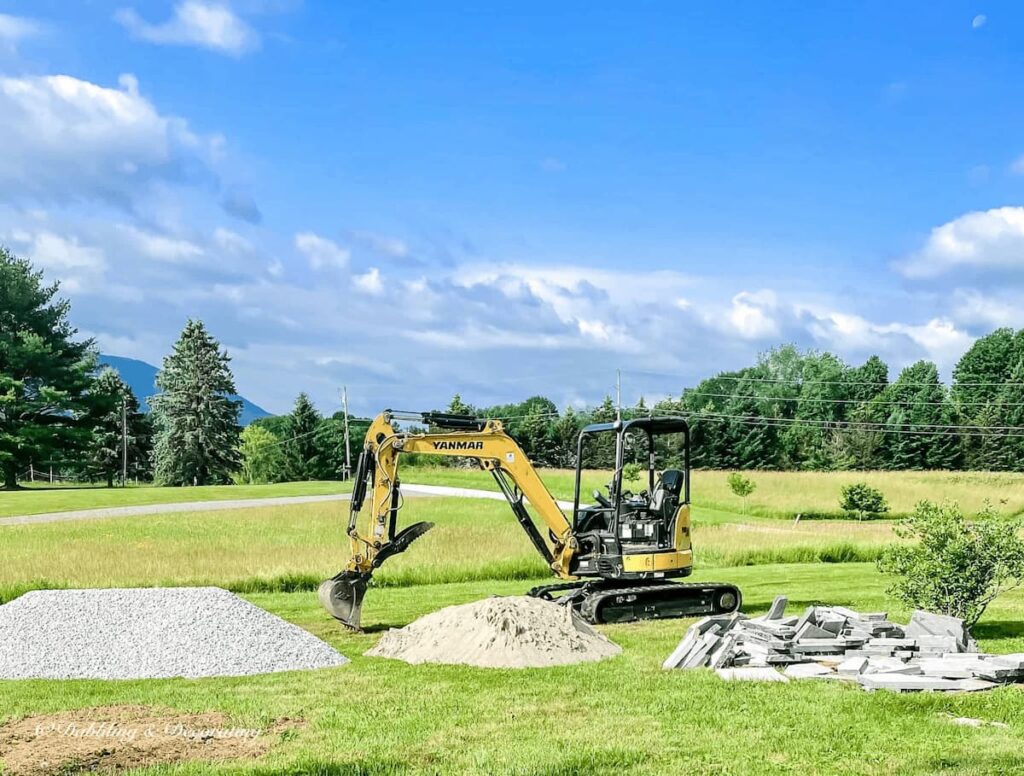
We had everything delivered to our lawn, where the bulldozer made quick work of spreading materials and shaping the base.
And yes — more crushed stone was needed and delivered the very next morning (isn’t that always the case?).
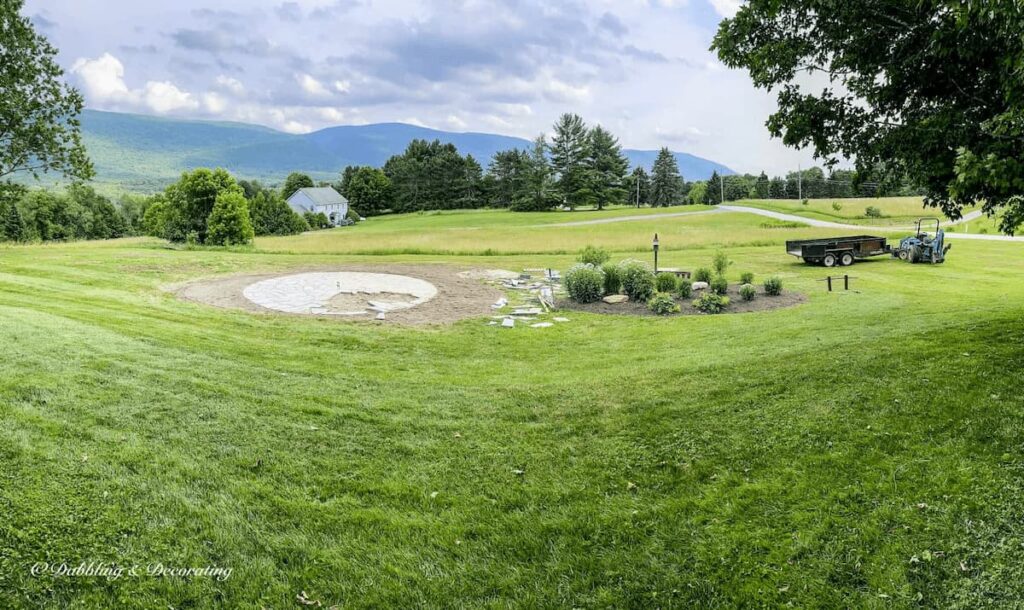
The work-in-progress photos show just how this patio started to take shape, framed by the mountains and the vision we had in mind.
Designing A Circle of Granite

Recommended Reading
You may also enjoy this Refreshing Weekend Junket Home to Vermont post to see more of this fire pit today.
Rounding the Corner: The Patio Comes to Life
By day seven, despite daily spring rains and full-on Vermont mud season, our round granite fire pit patio was nearly complete. The panoramic view captures the wide-open layout, with the mountains peeking through the clouds and the final granite pieces sliding into place. The rain didn’t slow us down — it just added some character (and a whole lot of mud) to the memory!
Finishing Touches: Grass, Hay, and Center Stage
We placed our Outdoor GreatRoom faux wood fire table right at the center — thanks to René, who left a small etched mark in the middle of the patio to help us align it perfectly every time.
This thoughtful detail is one of the many reasons working with a skilled local stonemason was so rewarding.
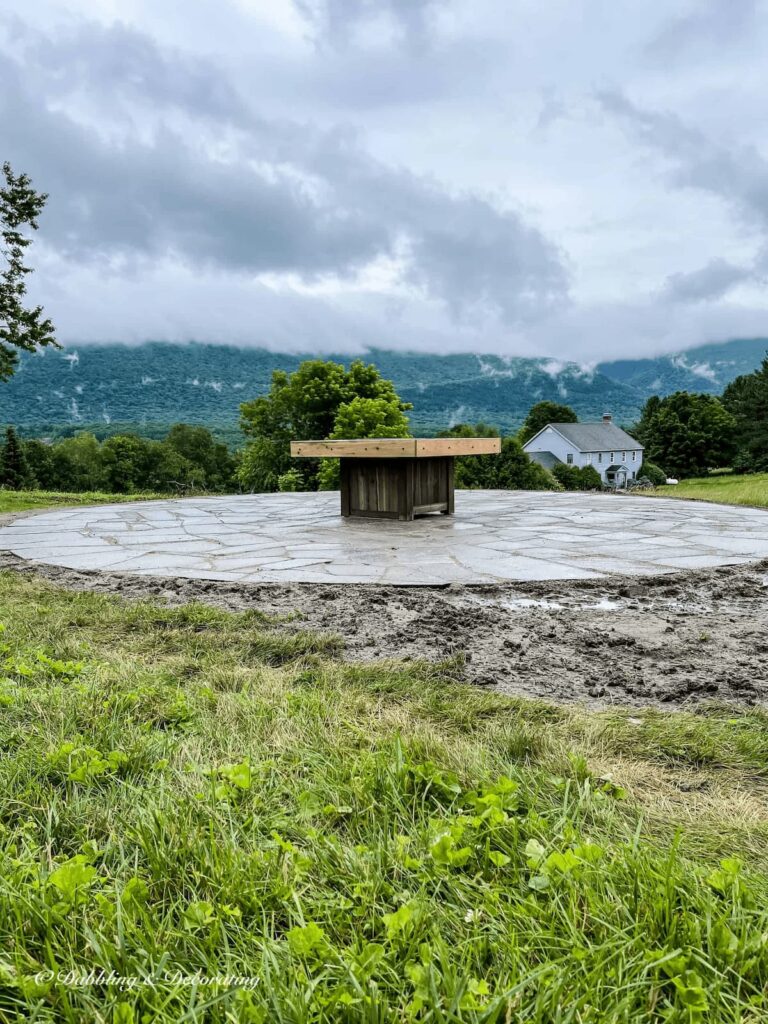
After the final stone was laid, we waited for the skies to clear. Then it was time to surround the patio with grass seed, topsoil, and hay to blend into the natural landscape.

Recommended Reading
Looking for an easy DIY patio design? You may enjoy this Pea Gravel Patio DIY: How to Build It This Weekend post.
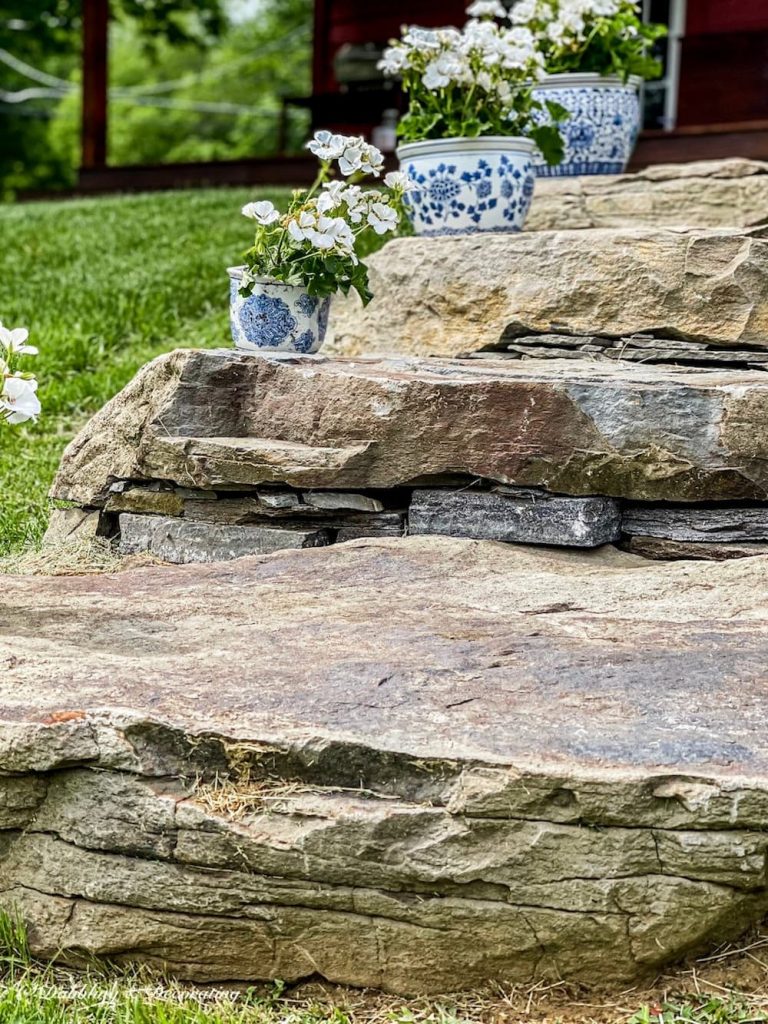
Adding Stone Steps to Complete the Patio Design
To make access to our new stone fire pit patio easier, we also worked with our stonemason to install a set of natural granite steps leading down from the house. These oversized stones were set into the slope for a natural look that flows with the landscape and blends beautifully with the patio below.
We go into more detail on the full stone step styling and landscaping in the second post of this two-part blog series — but here’s a sneak peek.
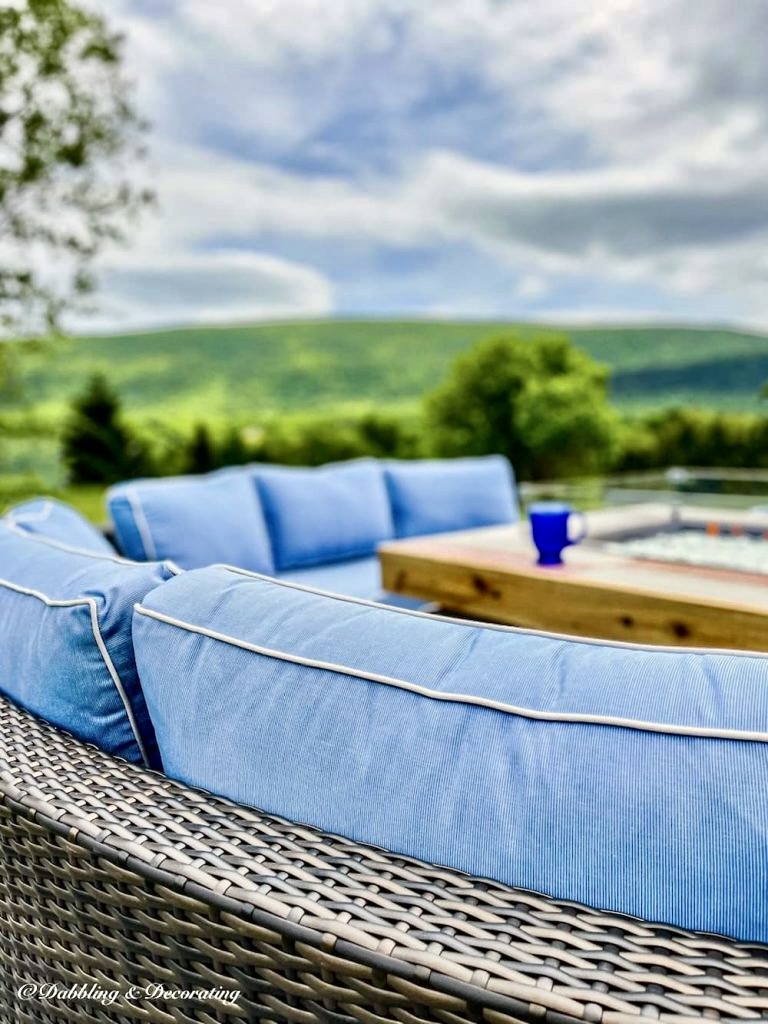
See the Full Backyard Reveal: Outdoor Living with Style
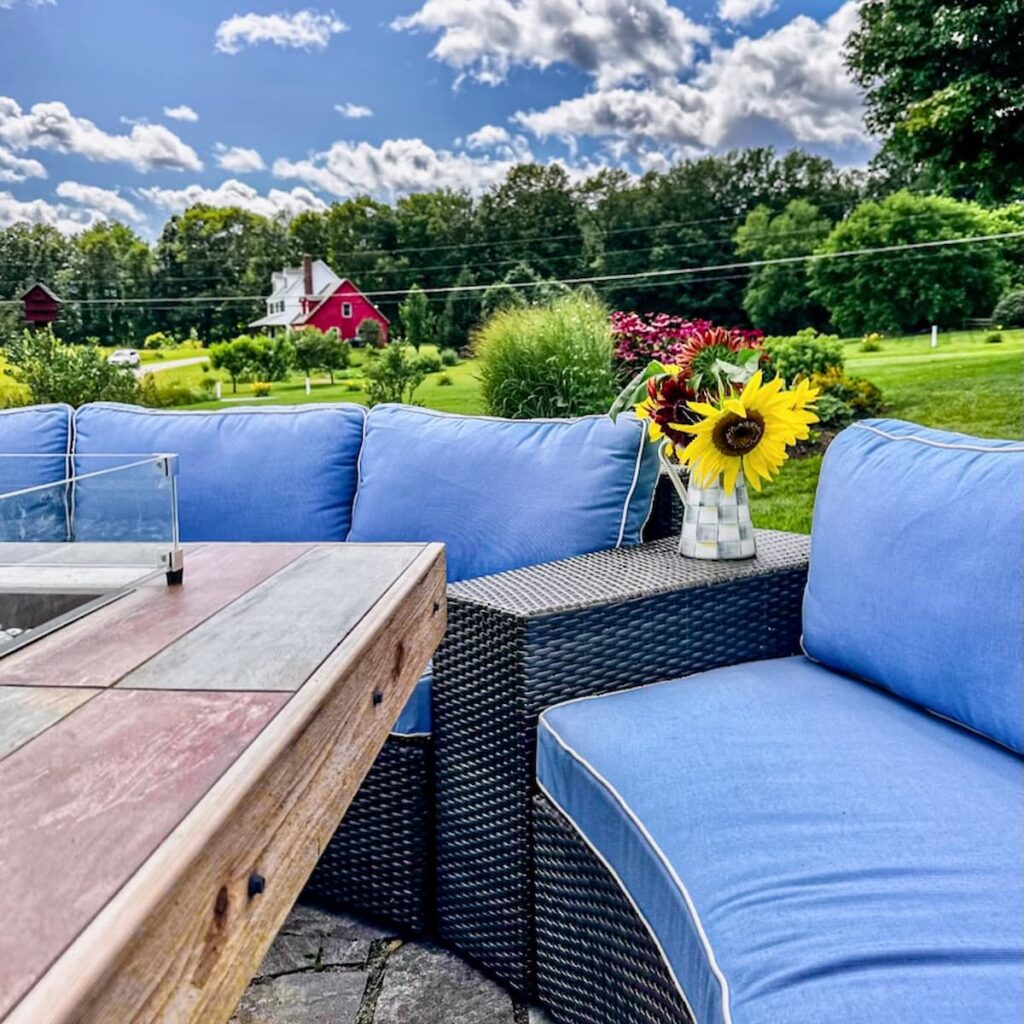
From the fire pit installation to cozy conversation seating, we brought our backyard vision to life in part two of this outdoor living series. You’ll see how we styled the space with our Frontgate sectional and vibrant blue cushions, added thoughtful touches like my mother’s blue quilt, and shared entertaining ideas with McKenzie-Childs’ Sterling Check enamelware. And of course, Ella makes a few appearances, keeping things cozy and perfectly New England.
→ Click here for the complete backyard patio reveal: Backyard Fire Pit and Stone Patio Ideas for New England Living post.
Frequently Asked Questions About Stone Patio and Fire Pit
What is the best type of stone for a backyard patio with a fire pit?
How big should a patio be around a fire pit?
What materials do I need to build a stone patio?
Can I install a fire pit patio myself, or should I hire a professional?
Join the Vintage Circle — It’s Cozy Here~
Love decorating with vintage finds, thrifted treasures, and one-of-a-kind style? Leave a comment below to share your thoughts, pass this post along to a vintage-loving friend, or subscribe to join our Seasonal Vintage Decor Styling Challenge for seasonal decorating prompts to inspire your thrifted style. You’ll get weekly cozy ideas, vintage inspiration, and behind-the-scenes peeks delivered straight to your inbox.
Pin forLater!


I can see myself out there having some wine with you Ann! Love it!
Me too😉
Hi Ann,
I have been watching this entire project on my daily walks…even met the guys and their very friendly German Shepard. This project looks amazing! It’s been raining here…ugh, but the work goes on. Can’t wait to see the finished fire pit. What fun it will be to sit on your lawn and enjoy the spectacular view! Enjoy!💕
We can’t wait to have you over this fall Susan!!
This is such a beautiful project Ann! I’m so excited to follow along. It will be such a gorgeous space to take in your amazing views and enjoy the evenings! I love it!
I’m sharing your post with my followers in my Sunday From My Neck of the Woods round up.
Thank you so much, Kristin!
That view… I would spend all day everyday just taking it all in!
It’s why we bought the house for sure! Thanks so much Cara🙌🏻
I could sit out there all day and enjoy this view. Your firepit will be so fun when finished and looks amazing.
I’m so glad you like it, Marlene!!
Lovely!
Thank you Karen🙌🏻
Wow! It is beautiful, Ann! Thanks for sharing all of your tips. I’d love to have a spot like this in my backyard someday.
Thanks so much Jen. I can’t wait to add the seating next🙌🏻