

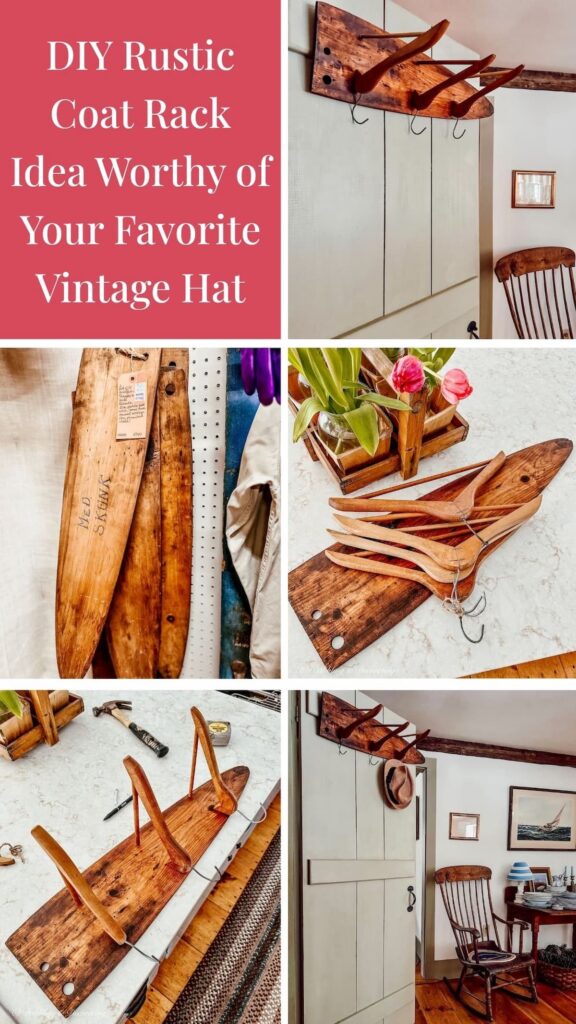
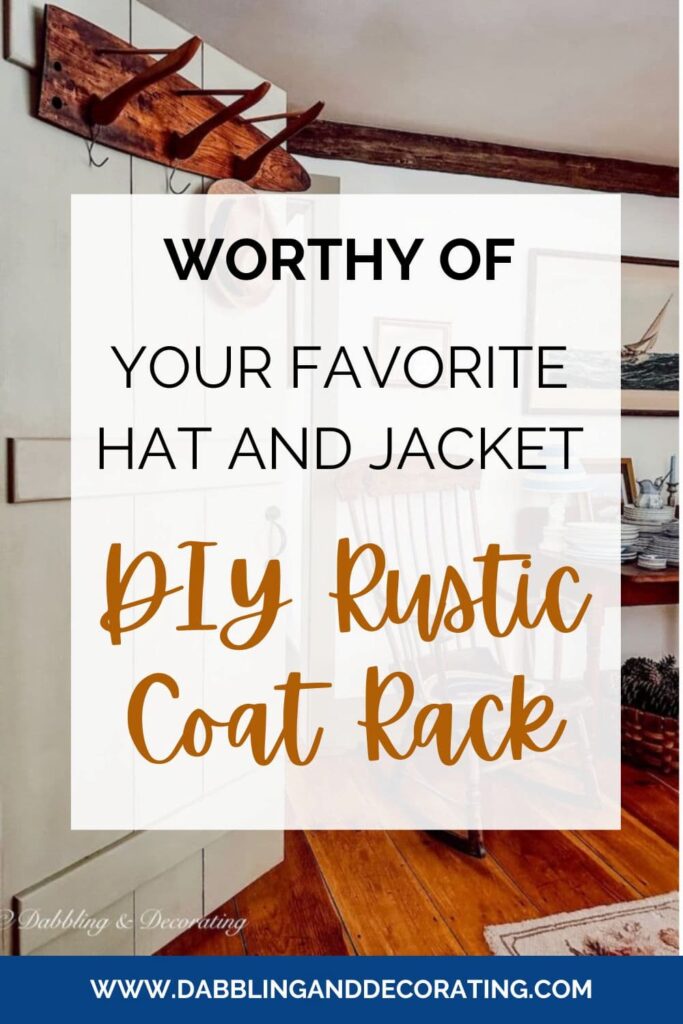
Looking for a DIY rustic coat rack that’s equal parts charming and creative? See how to turn a few vintage clothes hangers and an antique wood board into a one-of-a-kind rack worthy of your favorite vintage hat.
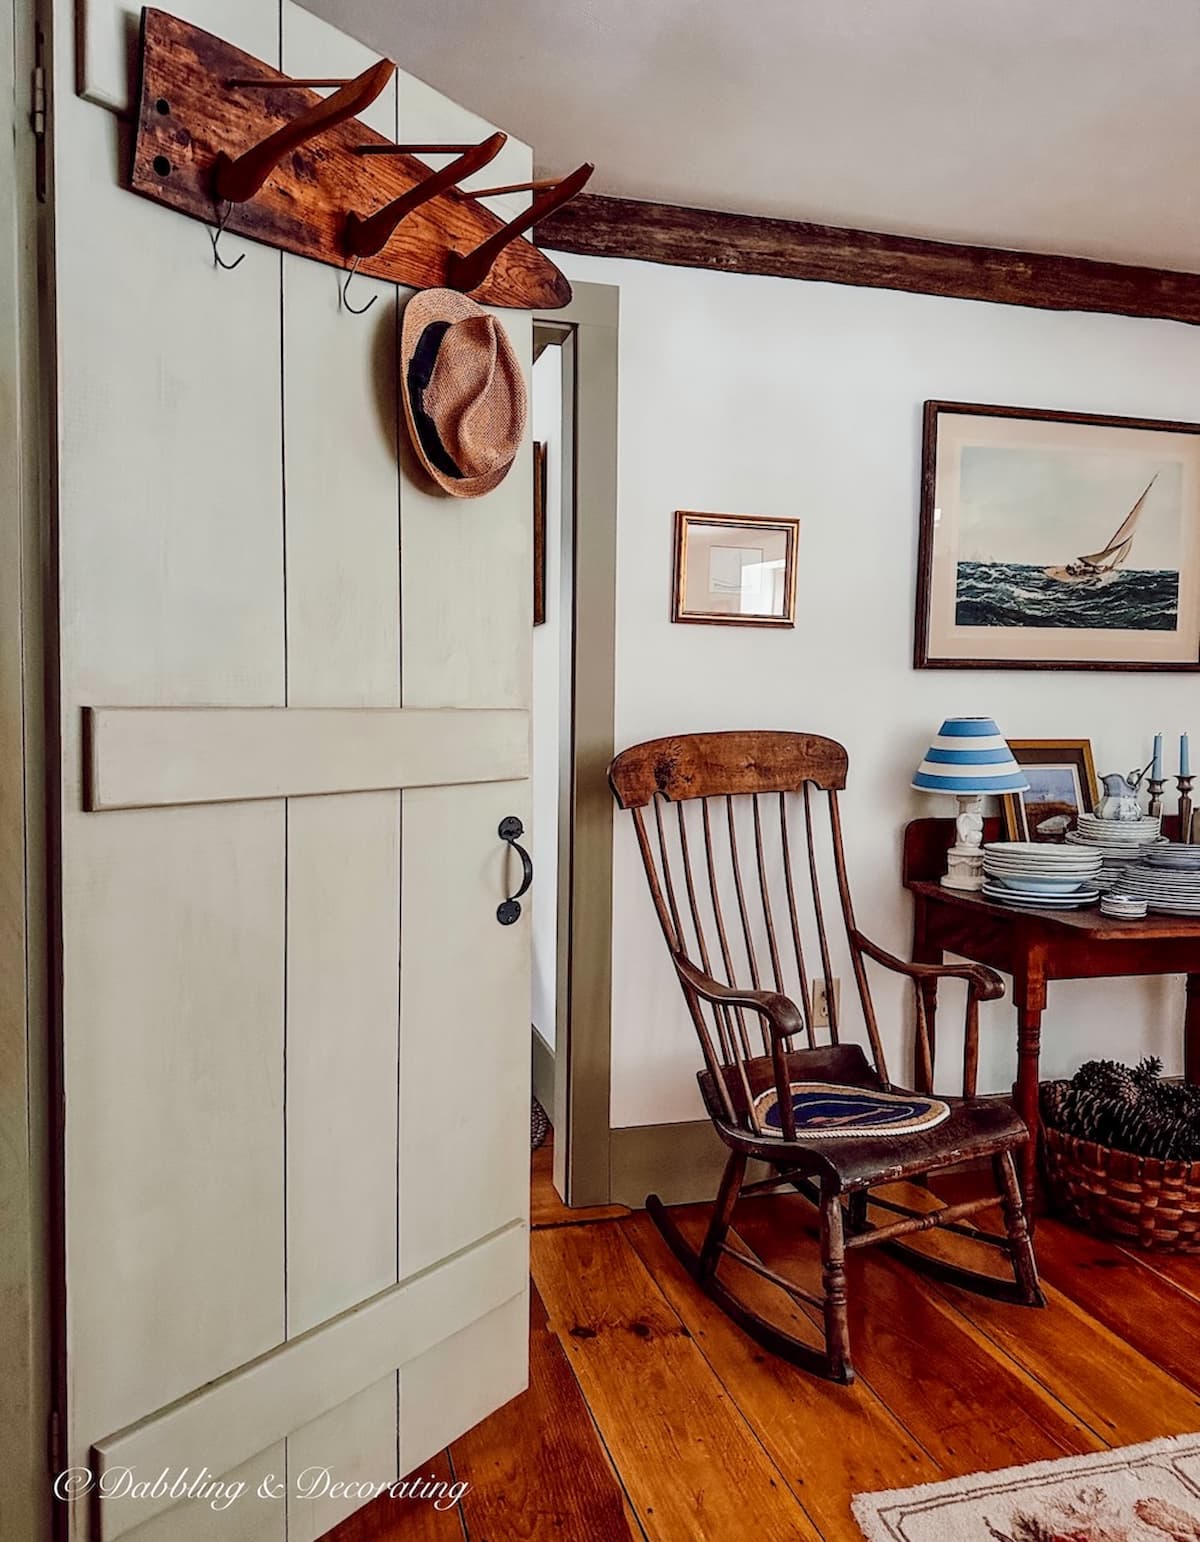
Looking for a DIY rustic coat rack with a whimsical twist? This one started with a stack of vintage clothes hangers and an antique fur trapper board I picked up at Stone House Antiques in Vermont. I wasn’t sure what I’d use them for at first, but a little Pinterest inspiration turned them into something unexpected, a charming wall rack for coats, hats, or whatever needs a home. It now hangs on the back of a pantry door in our Maine house, adding just the right touch of vintage personality.
Easy DIY Home Decor Projects with Vintage Style
Explore our easy DIY home decor guide with vintage style, using thrifted and repurposed finds. Simple, beginner-friendly ideas to decorate your home with charm.
The Vintage Finds That Sparked This DIY Rustic Coat Rack Idea
How This DIY Rustic Coat Rack Came to Life
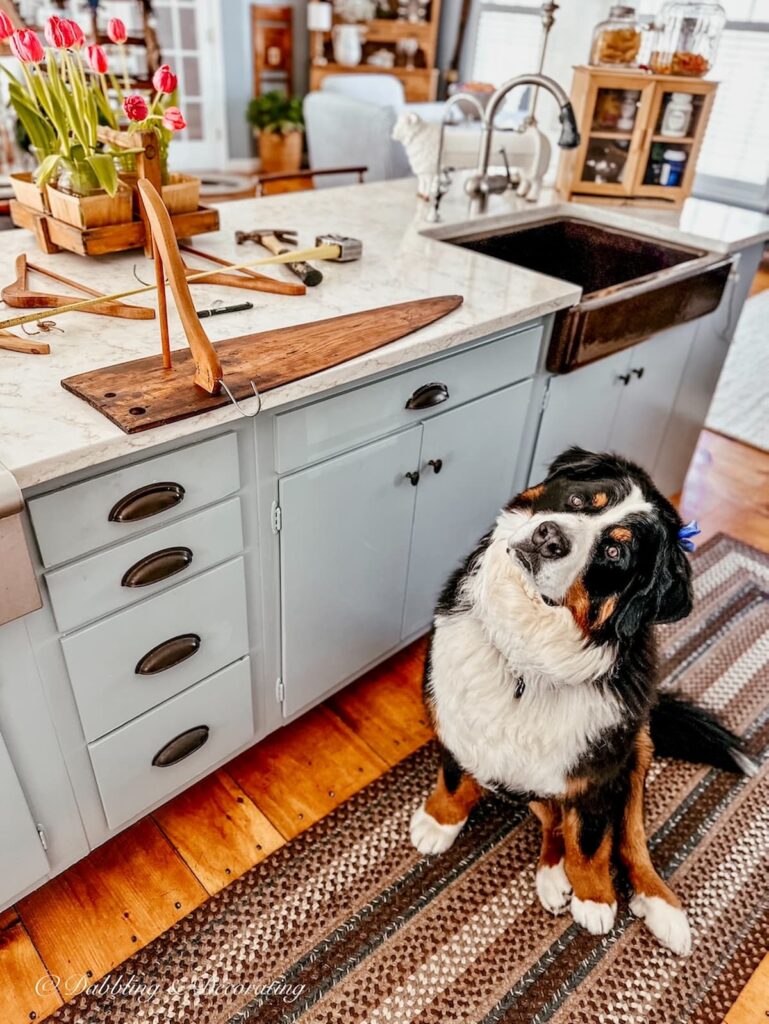
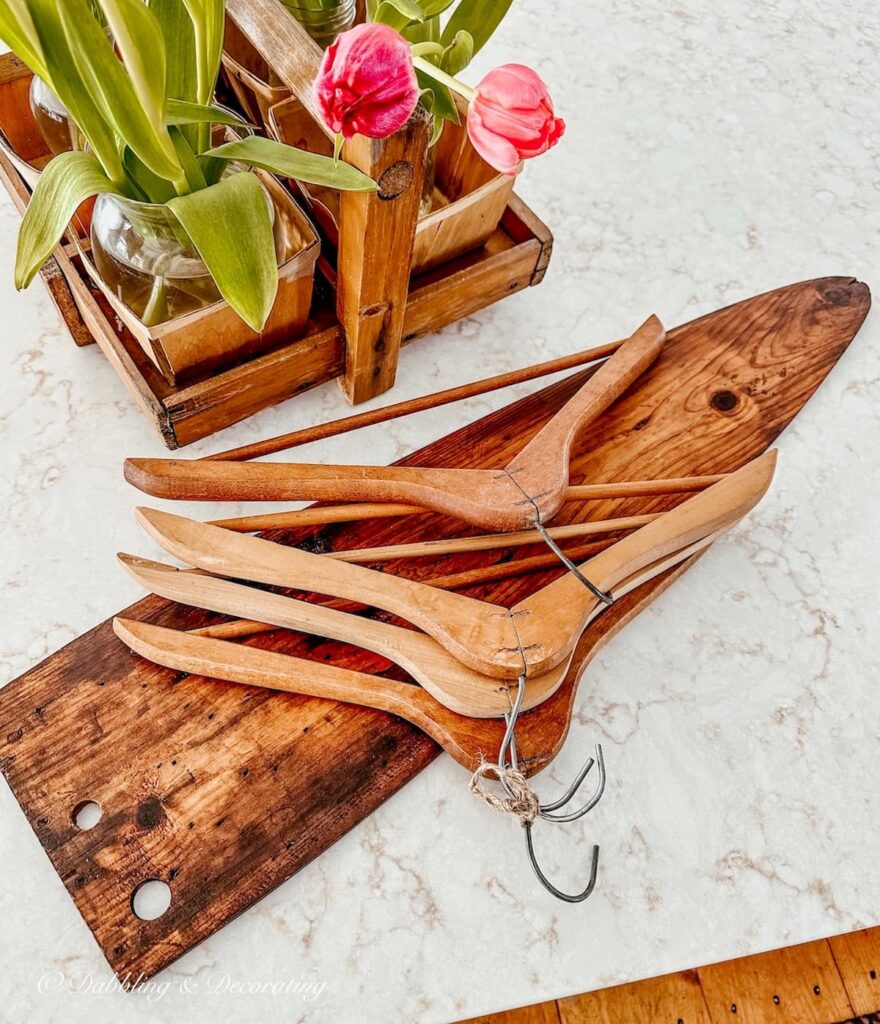
While antiquing at one of my favorite Vermont stops, Stonehouse Antiques, I came across a bundle of old fur trapper boards, also called hide stretchers. They had that raw, weathered wood look I can never resist. Five of them for $45? Into the car they went.

At the time, I wasn’t quite sure how I’d use them. But the rustic grain of the wood and the narrow shape had so much character, I knew inspiration would strike eventually.
Later, while scrolling Pinterest, I spotted a whimsical towel rack made from an old ironing board and vintage clothes hangers. It immediately sparked an idea: why not create my own DIY rustic coat rack using the fur trapper boards and some old wooden hangers I already had on hand?
Inspired by this wall mount towel rack by Recyclart made from an old ironing board and wooden clothes hangers.
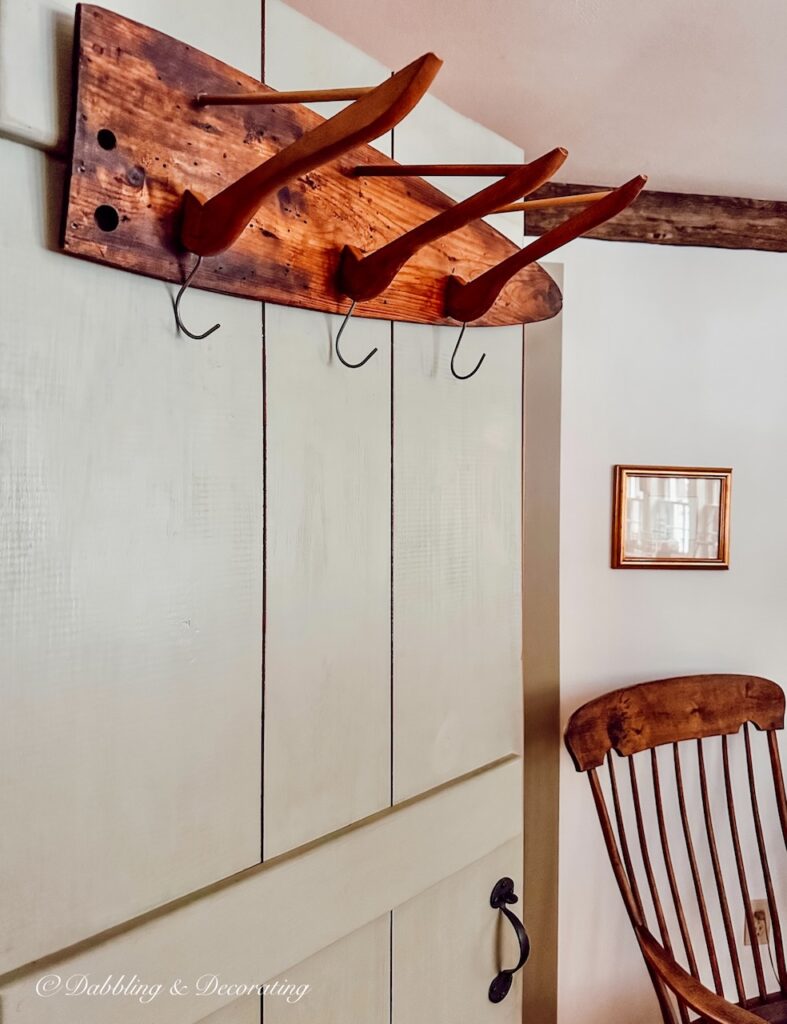
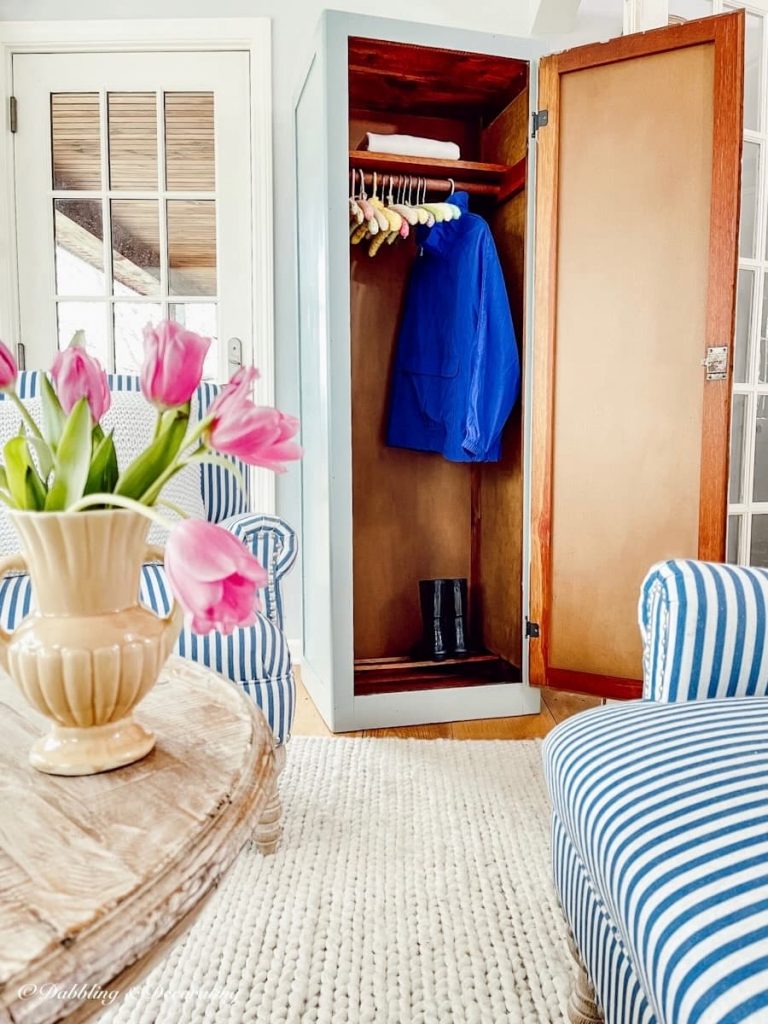
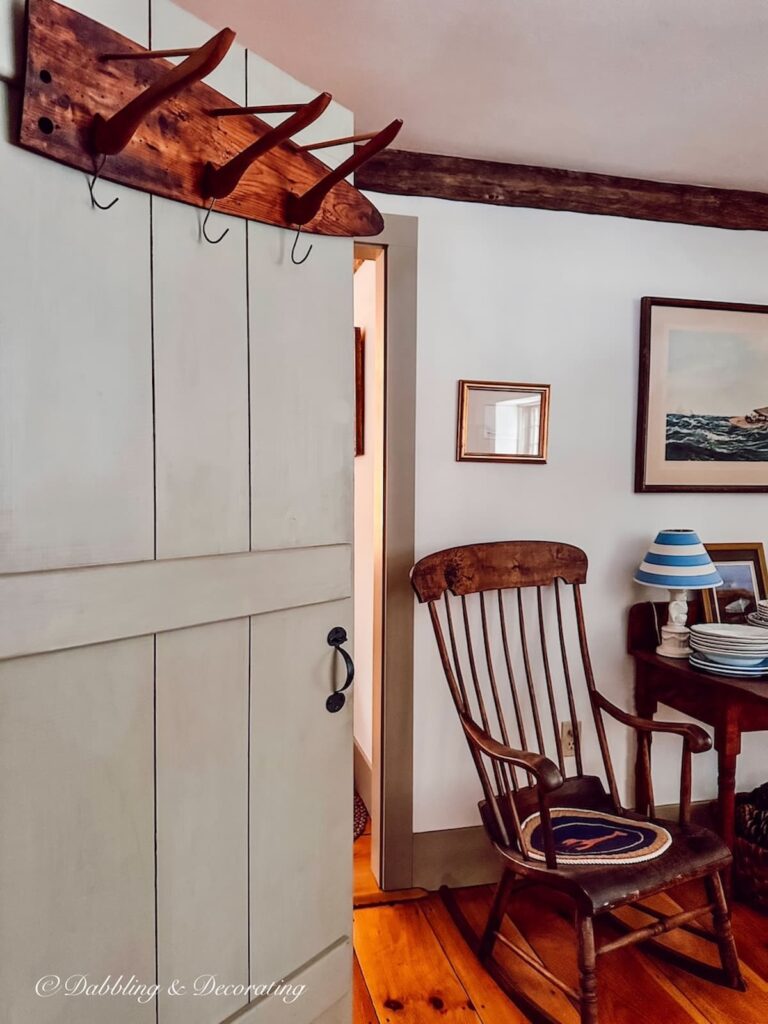
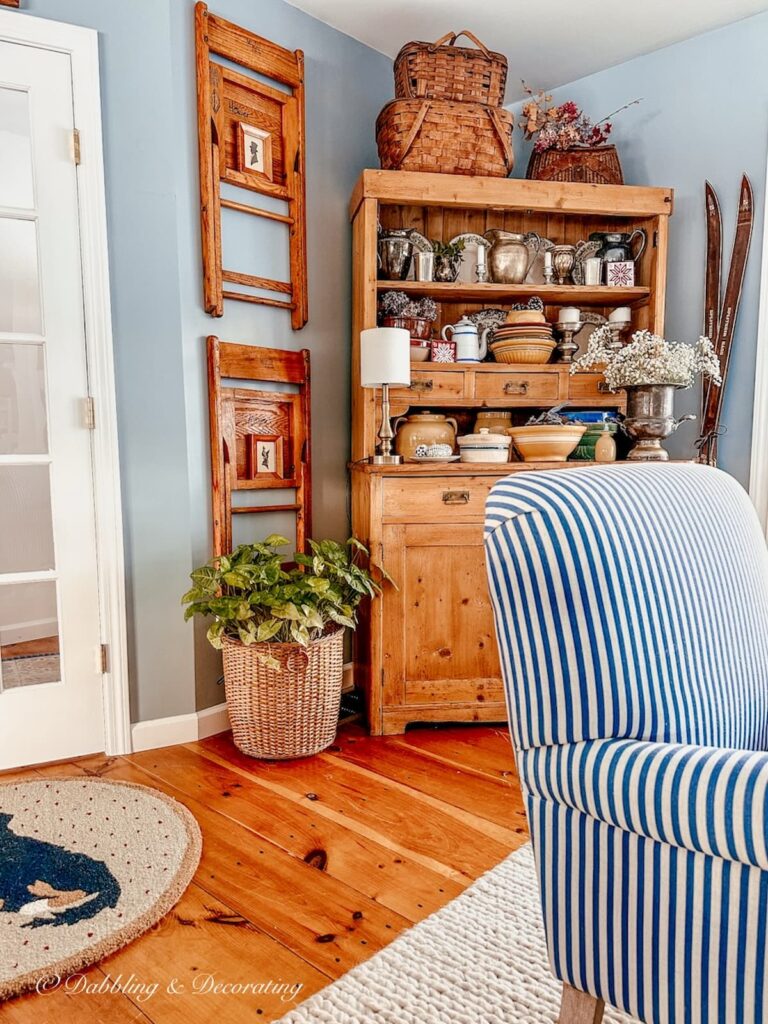
So I did just that, and styled it on the back of a closet door in one of the attic bedrooms of our Maine home. It’s the kind of project that could easily work in a pantry, a guest room, or even an open hallway, anywhere you want to add a little rustic charm with vintage flair.
Where to Find Fur Trapper Boards
I found my boards at Stonehouse Antiques, but once you start looking, these wooden beauties pop up everywhere. Try:
You don’t need fur boards specifically, either; this DIY rustic coat rack could easily be created with any long, narrow wooden board or even an old ironing board if that’s what you find first.

Pro Tip
No trapper board? Try using an old ironing board, barn wood, or even reclaimed shiplap to make your own rustic coat rack. It’s all about using what you love.
Vintage Wooden Clothes Hangers as Hooks
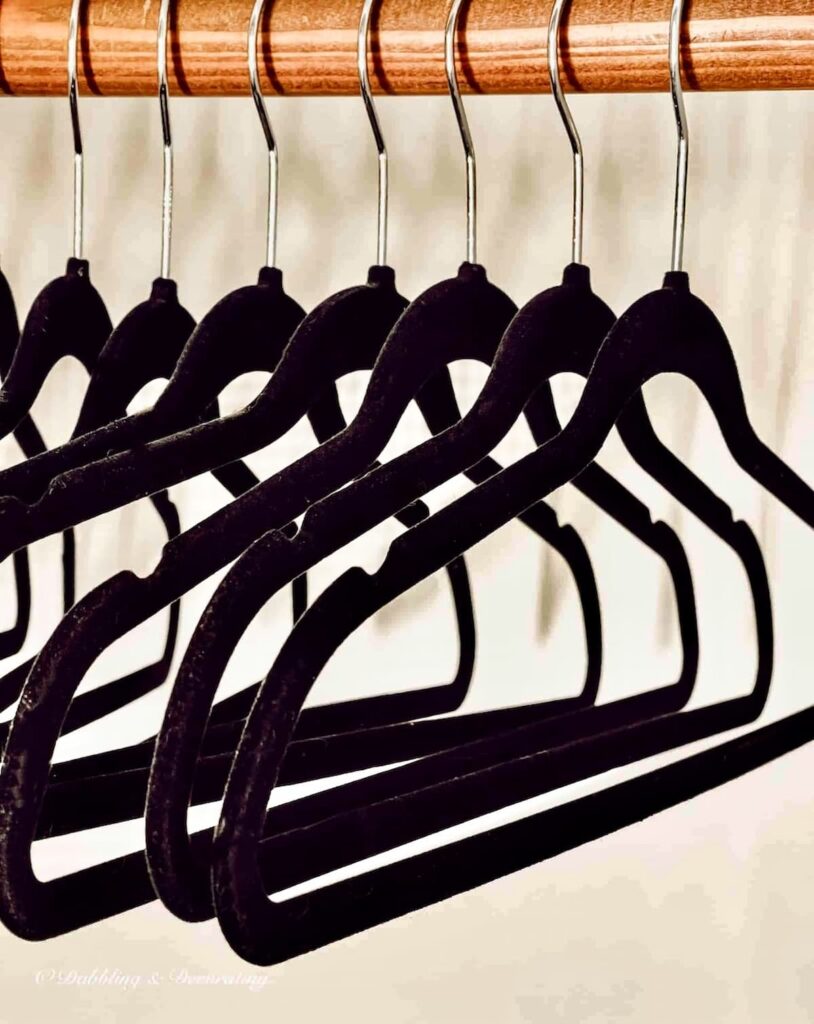
I’ve always loved vintage wooden clothes hangers; they’re practical and pretty, especially when used as unexpected decor. Whether they’re hanging behind a door or styled in an open wardrobe, they add warmth and nostalgia to a space.

Repurposing them as hooks was not only easy, it made the whole coat rack feel intentional and thoughtful. Each hanger adds sculptural interest and a soft-spoken charm that metal hooks just can’t replicate.
Where to find fur stretching boards?
I found mine at an antique store, but you can shop for these wooden beauties on Etsy, eBay, flea markets, thrift shops, second-hand stores, Facebook Marketplace, yard sales, and antique shops. Shop vintage wooden clothes hangers on Etsy.
This post may contain affiliate links, which won’t change your price but will share some commission.
What You’ll Need to Make This DIY Rustic Coat Rack
To create your own DIY rustic coat rack, here’s what you’ll need to get started:
- 1 wooden board (I used an antique fur trapper board, but any reclaimed or rustic wood will do)
- 3 vintage wooden clothes hangers
- Circular saw (for cutting the hangers into hooks)
- Measuring tape (to evenly space your hooks)
- Nails or screws (depending on your board’s thickness)
- Wood glue or hot glue (optional, for added stability)
- 2 sawtooth hooks (or preferred hanging hardware for wall mounting)
These simple supplies come together to create a one-of-a-kind coat rack full of vintage character and charm. Looking for more inspiration on how to decorate with vintage clothes hangers or create unique closet and storage solutions with vintage charm? From open wardrobe styling to no-closet guest room ideas, these posts offer even more ways to bring character and creativity into your home.

Antiquing & Thrifting New England Shopping Guides: Vintage Stores, Markets & Must-Visit Stops
Join me as I explore the best antique and thrift stores from Maine to Vermont, and even Paris and Canada. It’s your go-to guide for planning your next treasure-hunting adventure.
Step-by-Step: DIY Rustic Coat Rack You Can Make with Vintage Clothes Hangers
Creating Coat Hooks with Vintage Clothes Hangers
For the hooks on this DIY rustic coat rack, I chose a few vintage wooden clothes hangers I already had in my stash. Their soft curves, warm wood tones, and old-fashioned shapes brought just the right touch of personality to this rustic wall piece.
Beyond their charming, timeworn appeal, vintage clothes hangers are surprisingly practical. Their sturdy design works well for holding coats, hats, scarves, or simply adding a bit of visual interest. And paired with the aged patina of the trapper board, they give the whole piece a collected, heirloom feel that’s anything but ordinary.

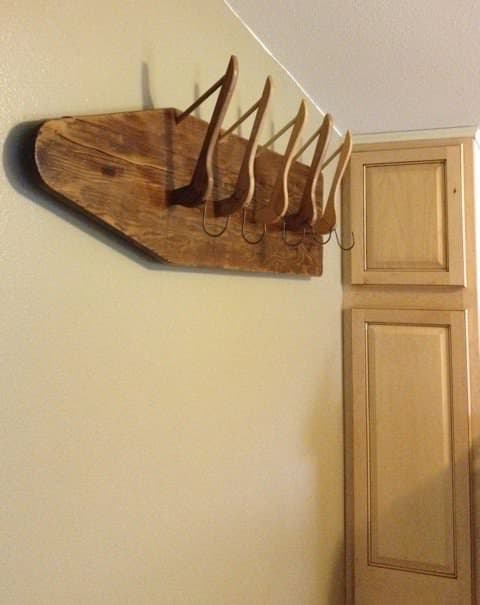
By cutting them in half and attaching them to the antique trapper fur stretcher board, we were able to create a functional and stylish DIY coat rack that blends perfectly with the antique aesthetic of our home.
Step 1: How to Turn Vintage Clothes Hangers into Coat Hooks
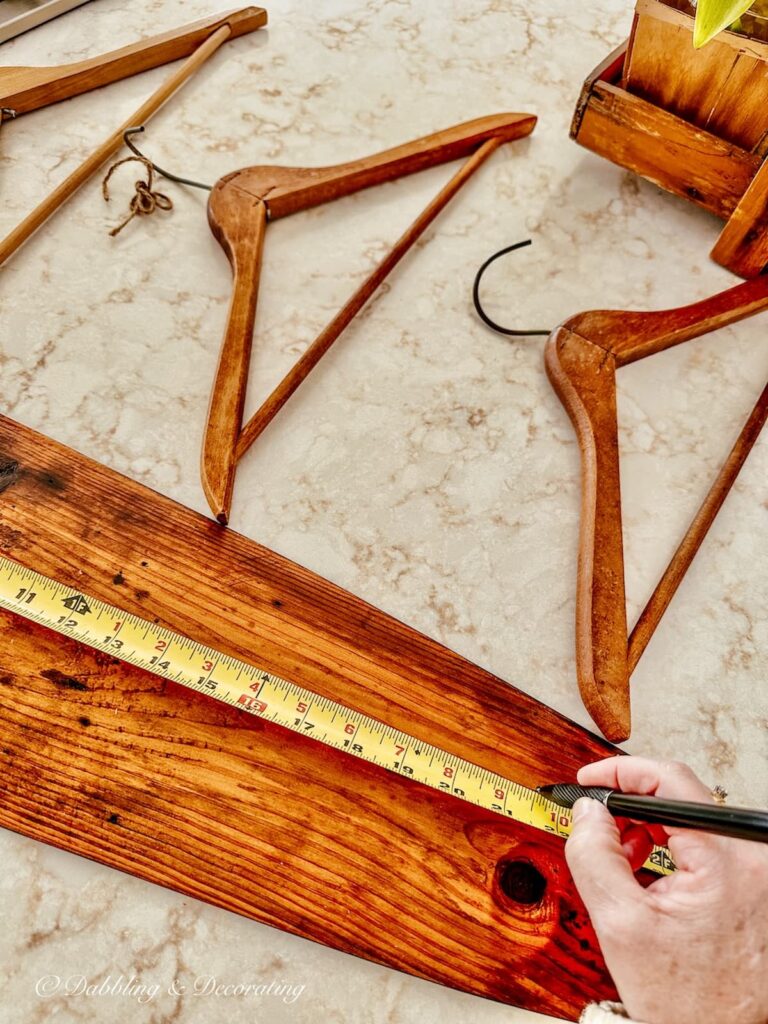
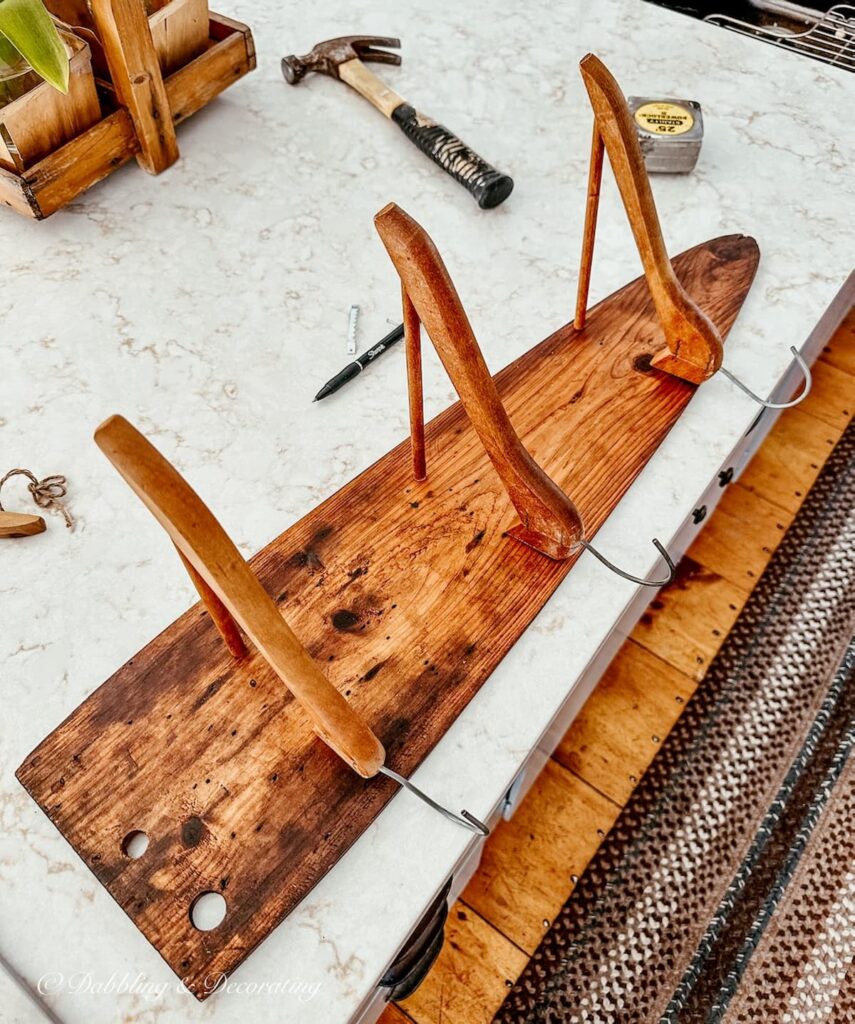
To start this DIY rustic coat rack, first decide how many hooks you’ll need based on the length of your board. My antique trapper’s board measured 30 inches, so I chose three vintage wooden clothes hangers and spaced them evenly at 7.5 inches apart for a balanced, symmetrical look.
Now for the fun part—cutting the clothes hangers.
Using a circular saw, carefully cut each wooden hanger in half. The trick is to position the hanger upside down before cutting. This flips the hanging wire into a natural hook shape, making it perfect for holding coats, hats, scarves, or towels once mounted.
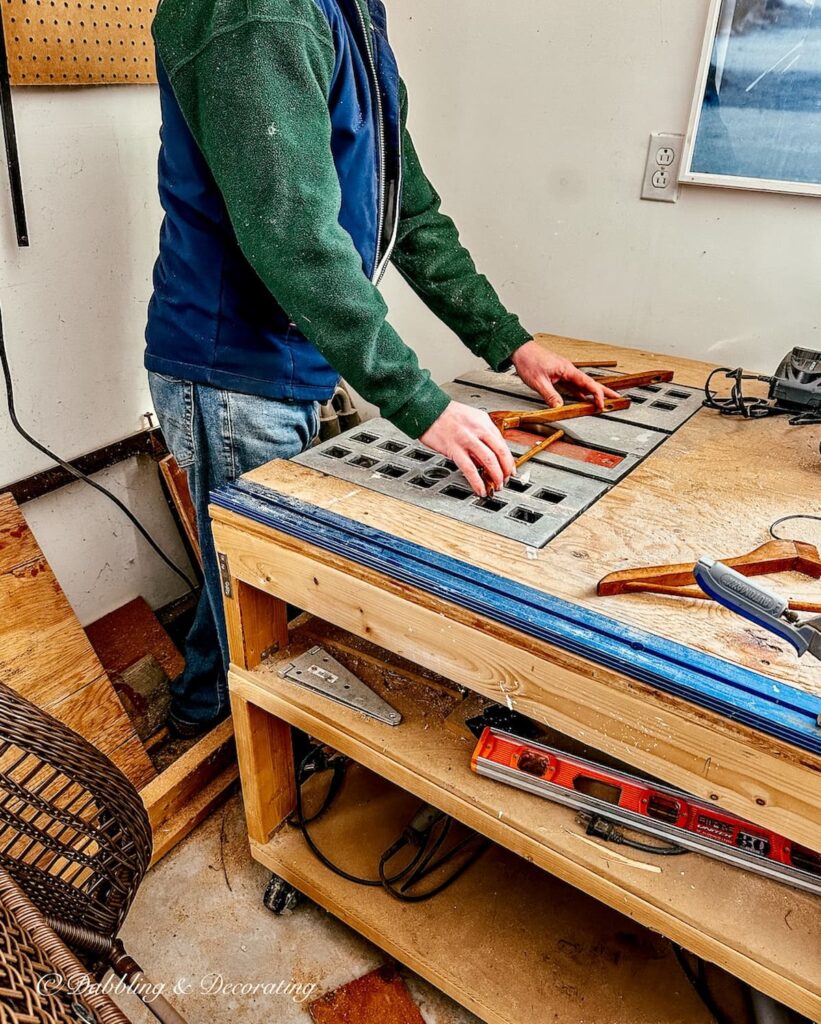
I’ve included step-by-step photos and a quick video below so you can see exactly how we made the cuts and prepped the pieces for mounting.
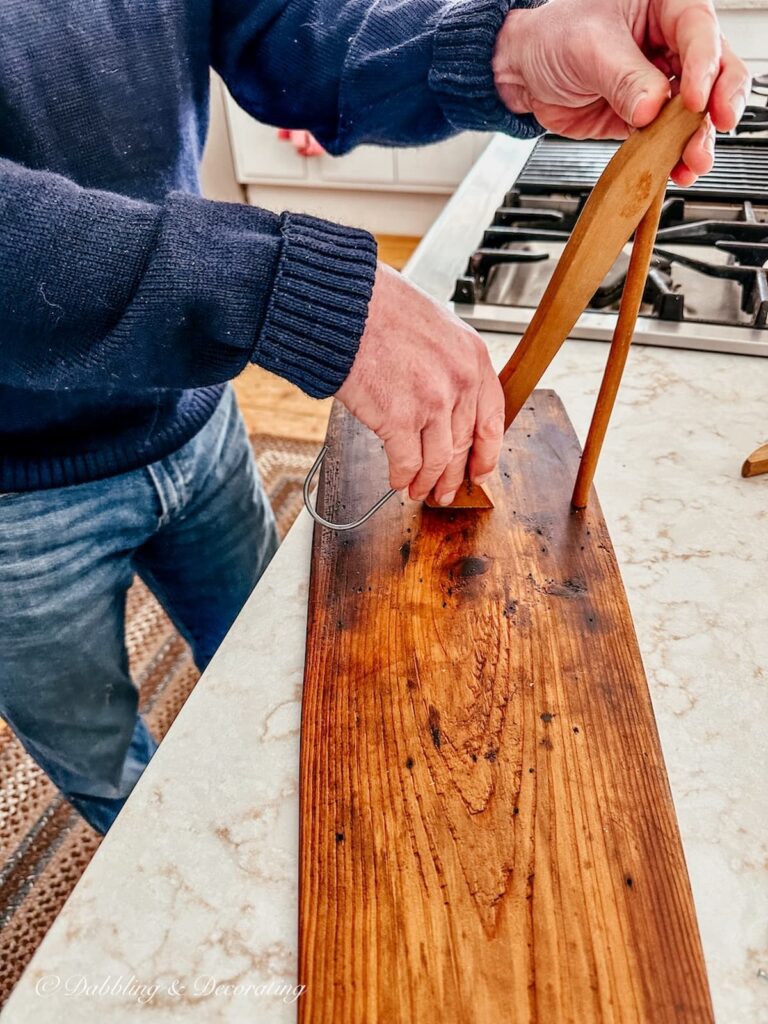
Step 2: How to Attach the Cut Vintage Clothes Hangers to the Trapper Board
Once you’ve measured and spaced out your cut hangers, it’s time to attach them to your board and bring this DIY rustic coat rack to life. Start by securing the top of each hanger, drive a small nail or screw through the back of the board into the hanger’s dowel. This keeps the curved hook upright and ready for use.
Then, fasten the bottom of the hanger with another small nail or screw from the front or underside, depending on your board’s depth. This second anchor helps stabilize the hook so it can hold weight without wobbling.
Want extra reinforcement? A dab of wood glue or hot glue works wonders for long-term hold.
In our case, the antique trapper board was quite narrow, so we opted for finishing nails instead of screws. If your board allows, you could also drill a small countersunk hole to rest the dowel into, securing it neatly with glue for an even sturdier finish.
The Secret Cupboard: One-Day Seasonal Vintage Decorating Ideas
The Secret Cupboard is filled with one-day vintage decorating ideas. You’ll find what to look for, how to style it, and what it might cost, perfect for gathering ideas and decorating with confidence.
Step 3: How to Hang Your New DIY Rustic Coat Rack
To finish your DIY rustic coat rack, flip the board over and attach two saw-tooth hooks, one on each upper corner of the back. This creates a stable and balanced hold when mounting it on the wall.
Sawtooth hangers are easy to install and give you more flexibility when it comes to centering your rack exactly where you want it. And trust me, once you start adding coats, hats, or scarves, things can shift. This little detail helps keep everything level and looking just right.

Try a Styling Tip!
Looking for simple, vintage-inspired decorating ideas you can try in an afternoon? Explore all my Styling Tips for easy seasonal projects, quick DIYs, and creative ways to style your home with charm.
Where to Style Your DIY Rustic Coat Rack
One of the best parts of a DIY rustic coat rack like this is how versatile it can be in your home. Whether you use it functionally or simply as a charming vintage accent, there are so many places where this little project can shine.
Here are a few styling ideas to inspire you:
- Inside a Pantry Door: Just like we did in our Maine home, hang it on the inside of a pantry or utility closet door for an unexpected touch of vintage charm. I styled ours with a favorite vintage hat, and it adds the sweetest detail every time I open the door.
- Back of a Bedroom or Closet Door: Perfect for robes, scarves, or hanging tomorrow’s outfit.
- Entryway or Mudroom: A welcoming and practical place for guests to hang coats, bags, or hats.
- Laundry Room: Add personality to a utilitarian space while keeping lightweight items within reach.
- Guest Room: A thoughtful touch for hanging towels, bags, or even a welcome sign.
- Bathroom Door or Wall: Ideal for hanging hand towels or bathrobes with vintage flair.
- Hallway Nook: Use it as a decorative focal point with empty hangers or a rotating mix of seasonal accessories.
This coat rack doesn’t just hold things; it tells a story. Whether you’re displaying your favorite hat or creating a soft-spoken moment of texture and charm, it’s a beautiful way to repurpose vintage finds into something useful and full of character.

In My Mother’s Maine Home
Step inside our inherited coastal Maine home where antiques, thrifted treasures, and family memories come together. Explore the full series for room-by-room decorating ideas, restoration updates, and the story behind this special place.
More Vintage Wall Decor Ideas to Inspire Your Next Project
This DIY rustic coat rack was such a fun way to repurpose vintage finds into something charming and useful, and I hope it sparked a few ideas for your own space. Whether you style it in a pantry, bedroom, or entryway, little projects like this can bring so much character and story to your walls.
The Vintage Posts Readers Love Most
Start with the posts readers come back to again and again. These vintage decorating ideas are rooted in New England, styled with thrifted and antique finds, and filled with real-life tips you can use in your own home. Familiar Finds, Styled Your Way.
Eclectic Decorating Style Guide: How to Layer Vintage, Antique, and Thrifted Decor
How to Start a Vintage Booth: Tips, Display Ideas, and Lessons Learned
7 Things I’ll Never Thrift Again—and the Vintage Decor I Buy Now Instead
Scandinavian Spring Homes: 10 Light and Airy Cottage Tours to Inspire
Easy DIY Wicker Basket Makeover with a Leather Belt That Adds Instant Charm
Looking for more inspiration? Explore some of my favorite vintage wall decor ideas below, from antique chair displays to styled cutting boards and creative gallery walls, each one full of warmth, texture, and timeworn beauty.


Frequently Asked Questions About DIY Rustic Coat Rack
To recreate this DIY rustic coat rack, you’ll need a wooden board (like an antique fur trapper board or ironing board), vintage clothes hangers, a circular saw, nails or screws, and optional wood glue for extra hold. Sawtooth hooks or other hardware can be used for hanging.
To repurpose vintage clothes hangers into coat hooks, cut them in half using a circular saw, with the wire hook facing downward. When attached to the board, the wire curves function like standard hooks—perfect for holding coats, hats, or towels.
You can use any sturdy, narrow wooden board, antique fur trapper boards, ironing boards, or reclaimed wood; all work beautifully. Look for wood with a weathered finish to enhance the rustic look.
This type of coat rack is perfect for a pantry door, entryway, guest room, bedroom, laundry room, or hallway. It’s both decorative and functional, especially when styled with vintage charm.
Absolutely. While vintage pieces add character, you can easily recreate this DIY rustic coat rack using new materials with an aged finish. Try distressing a newer board or using reproduction clothes hangers for a similar effect.
Join the Vintage Circle — Familiar Finds, Styled Your Way™
Love vintage treasures, thrifted gems, and a home that tells your story? Leave a comment, share this post with a kindred spirit, or head to my Start Here page to explore more. Want fresh prompts and timeless ideas? Subscribe to join our Seasonal Vintage Decor Styling Challenge for weekly inspiration and behind-the-scenes peeks.
Pin forLater!


Maybe a old apron .
Yes, I love that idea!
I wonder how a child’s ironing board would look like maybe in the kitchen with towels and pot holders?
What an amazing idea! Love it!
Ann that is the coolest coat rack that I have seen in awhile !!
I use the hangers in my wardrobes but now I am rethinking…
I’m so glad you like it Sharon! I love old hangers and I thought this was fun too. Thanks for your sweet note!
Ann
Such a clever idea and it turned out great.
I can’t believe how clever you are and how amazing your coat rack turned out! Great job. I would have never thought to do that. Love the charcuterie board idea as well. Glad you brought all of them home. pinned
Thanks so much Cindy, I’m so glad you like them!! Thanks for stopping by today!
Thanks so much Cindy, it’s always such a pleasure when you stop by and say hello. See you soon, wink!
Hi Ann,
Soooo cute. What a clever idea. Not only are they functional, but adorable also. And a conversation piece!!
Xo
Cara
Thanks so much Cara, I’m so glad you like it!