

Get cedar shake mailbox inspiration and installation tips. Learn how we installed ours and used it to create major curb appeal that complements our home’s exterior.
There’s something special about spotting a cedar shake mailbox that looks like it belongs to the home behind it. The kind that stops you mid-drive and makes you smile before you even reach the front door.
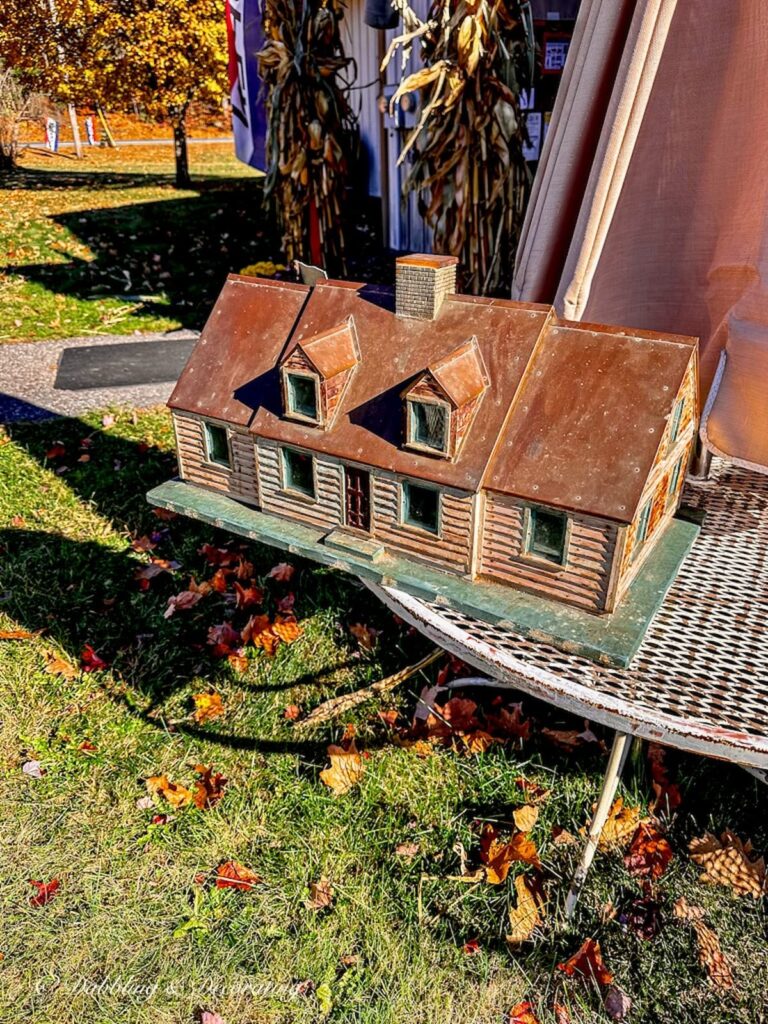
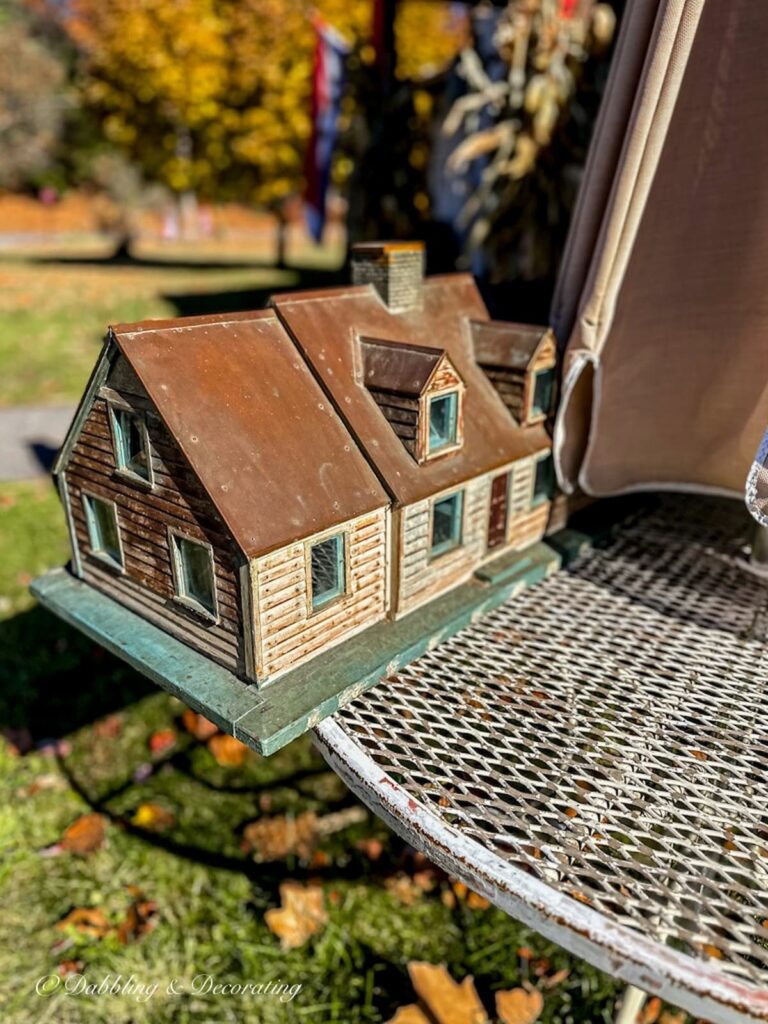
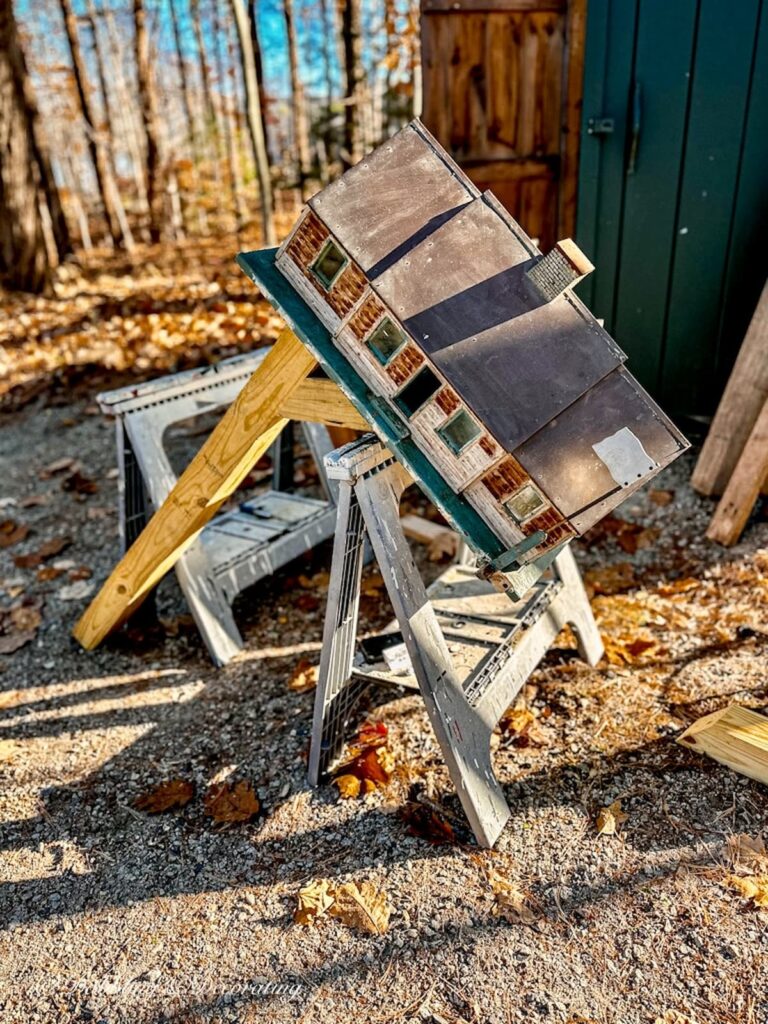
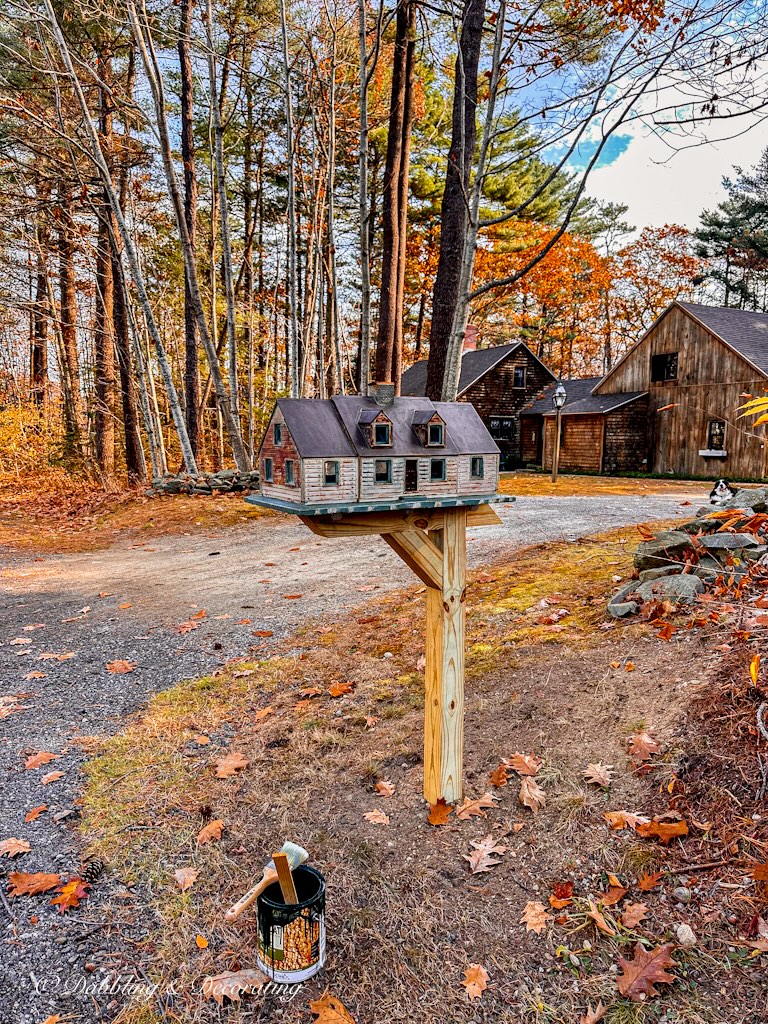
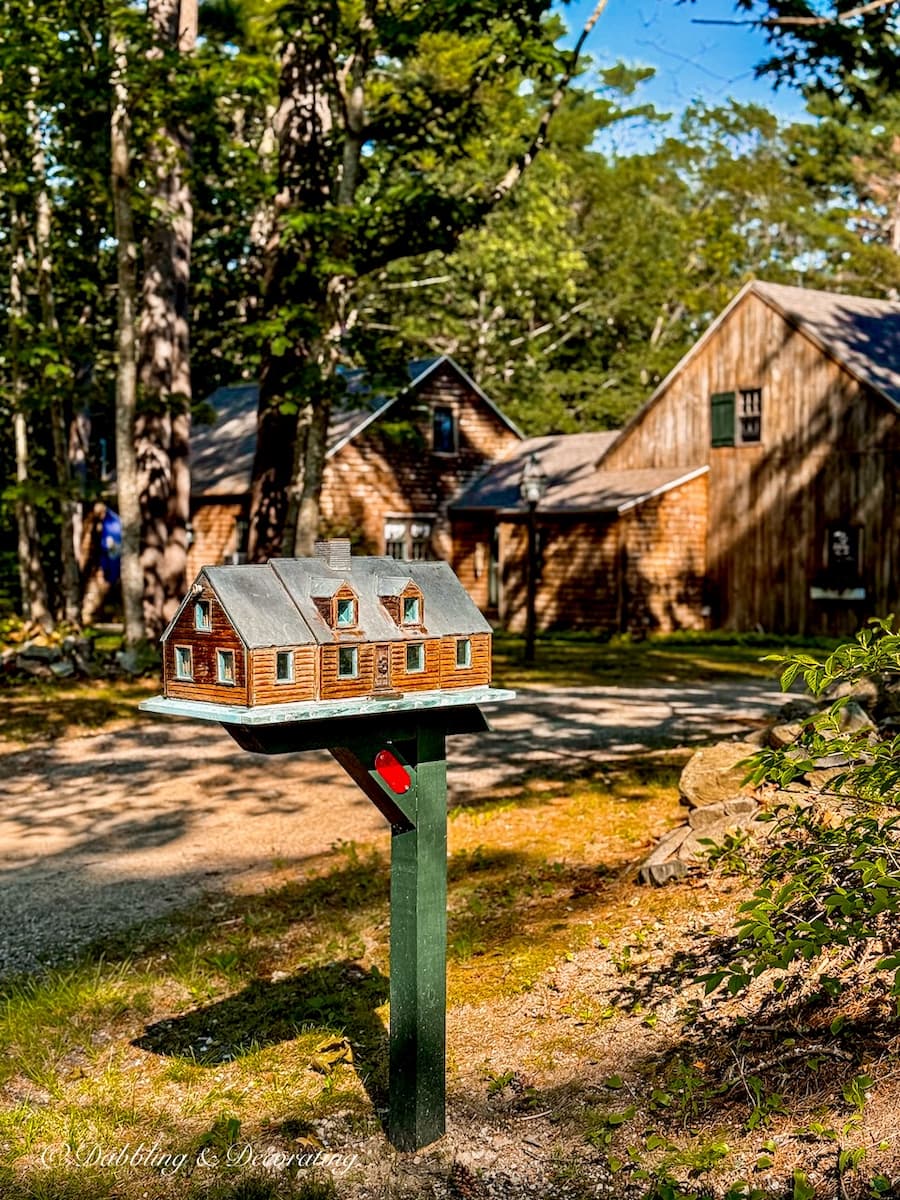
We recently discovered our own cedar shake mailbox while antiquing, a handcrafted wooden design built like a miniature cedar shake cottage with a copper roof and green patina trim. Full of rustic character and vintage charm, it now adds major curb appeal and perfectly complements our Maine home’s exterior.


In My Mother’s Maine Home
Step inside our inherited coastal Maine home where antiques, thrifted treasures, and family memories come together. Explore the full series for room-by-room decorating ideas, restoration updates, and the story behind this special place.
The Story Behind Our Cedar Shake Mailbox
This cedar shake mailbox wasn’t something we planned. It found us.
One early morning while I was sipping coffee at home, one of you sent me a Facebook Marketplace listing for a handcrafted wooden mailbox that immediately caught my eye. Built like a miniature cedar shake cottage with a copper roof and green trim, it looked strikingly similar to our Maine home.
The listing originally showed it for sale in Connecticut, nearly three and a half hours away. After a few messages with the seller, I learned it had been moved to New Hampshire and was sitting at Flying Pigs Antiques, just about an hour from our Vermont place. That felt like a sign.
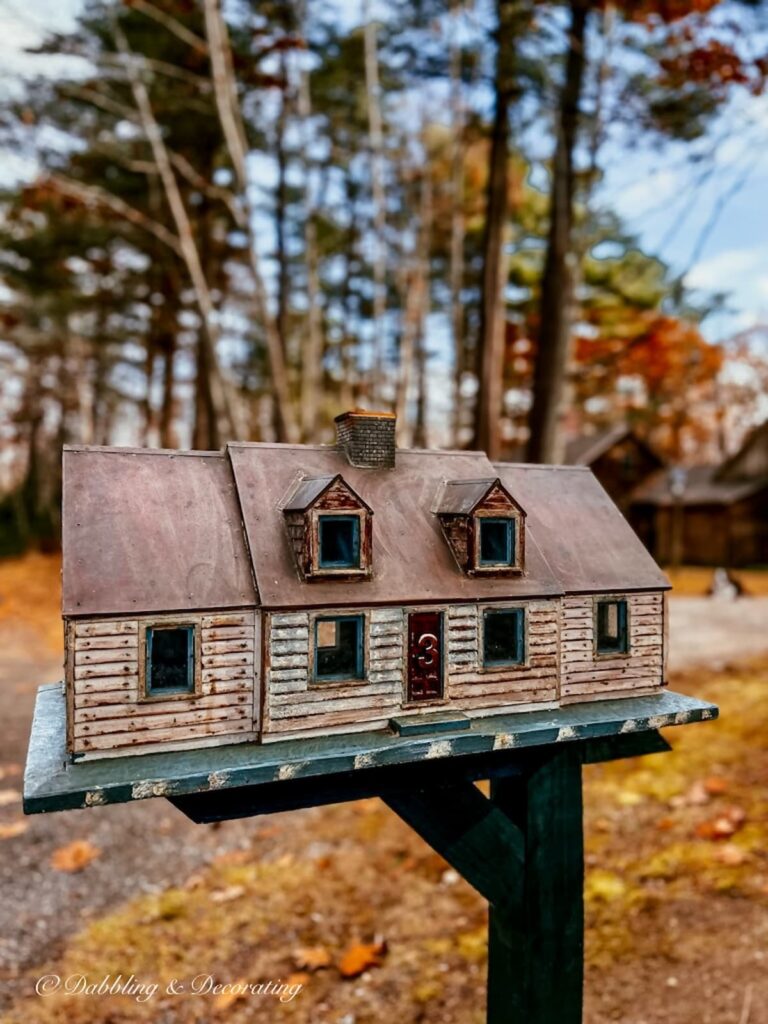
The photos online didn’t do it justice, so I decided I had to see this cedar shake mailbox in person. And as I suspected, it was far better than the listing suggested. The craftsmanship, the texture of the cedar shakes, the aged copper roof, all of it felt substantial and thoughtfully built.
It wasn’t inexpensive. In fact, I learned it had originally been listed for $895. Yikes. But after a little negotiating, I was able to bring it home for a much better price.
Its unique design and the way it mirrored our own exterior made it impossible to leave behind. Before long, this cedar shake mailbox was headed to Maine, ready to add instant curb appeal to our front yard.
Why a Cedar Shake Mailbox Makes a Statement
A cedar shake mailbox does more than hold your mail. It becomes part of your home’s architecture.
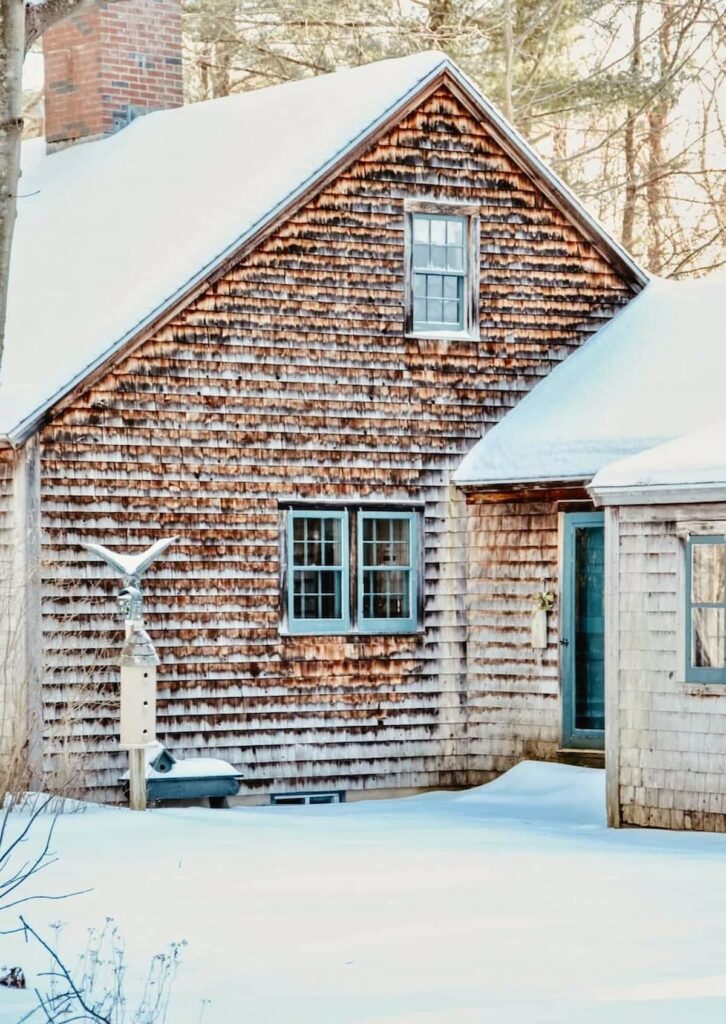
Because it mirrors the texture and material of cedar shake siding, it feels intentional rather than added on. Instead of standing apart from the house, it visually connects to it. That subtle coordination is what instantly elevates curb appeal.
When materials repeat from the home to the exterior details, the entire property feels thoughtfully designed. In our case, the cedar shakes and copper roof echo the character of our home, making the mailbox feel like a miniature extension of the house itself.
4 Ways to Make Your Mailbox Feel Architecturally Intentional
A well-chosen cedar shake mailbox sets the tone before anyone reaches your front door. When exterior details reflect the character of your home, curb appeal feels effortless rather than forced.
Easy DIY Home Decor Projects with Vintage Style
Explore our easy DIY home decor guide with vintage style, using thrifted and repurposed finds. Simple, beginner-friendly ideas to decorate your home with charm.
How We Installed Our Cedar Shake Mailbox
After bringing our cedar shake mailbox home, the next step was installation. Replacing our old, weathered mailbox was a simple exterior update, but it made an immediate difference in curb appeal. Here’s what our setup looked like before the transformation and how we installed the new mailbox in its place.
What to Know Before Installing Unique Mailboxes: Rules & Regulations
The U.S. Postal Service has official guidelines concerning the size, placement, and installation of a new mailbox outside your home. Before installing a unique mailbox, it’s essential to consult your local regulations and guidelines, too. Some areas have specific requirements regarding mailbox size, placement, and visibility to ensure compliance with postal regulations.
Before Installing Our Cedar Shake Mailbox
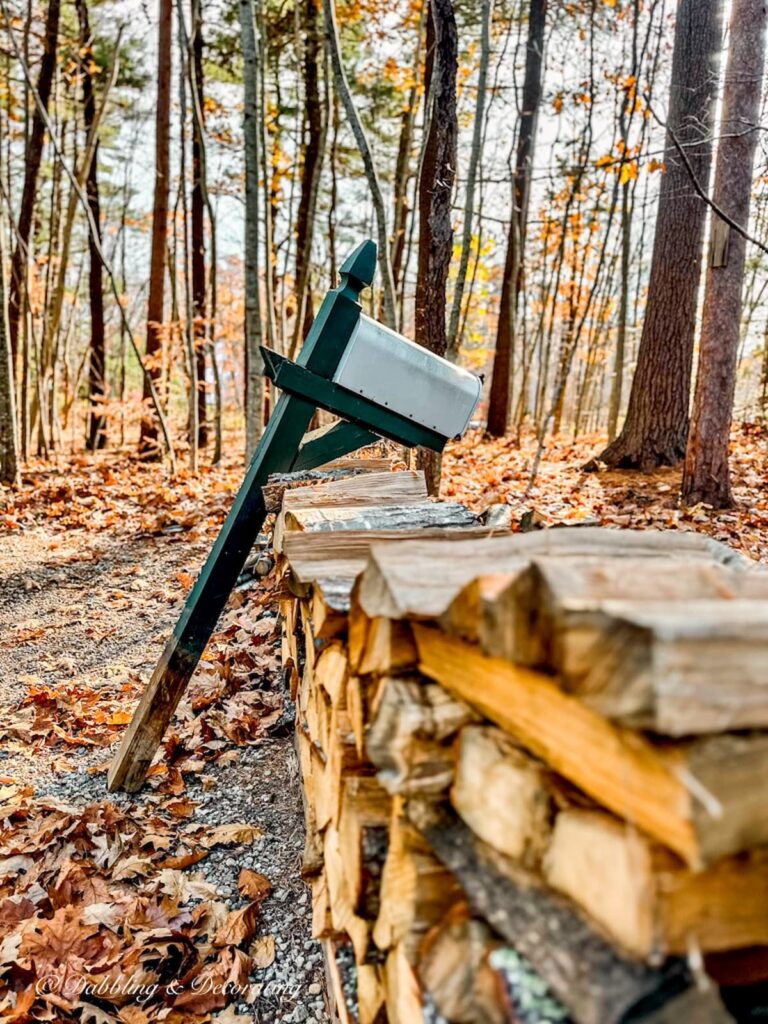
Before this cedar shake mailbox upgrade, our mailbox setup was fairly traditional. It sat on a standard post painted Essex Green to match our home’s trim, but over time, the post had begun leaning forward, and the mailbox itself was weathered and worn.
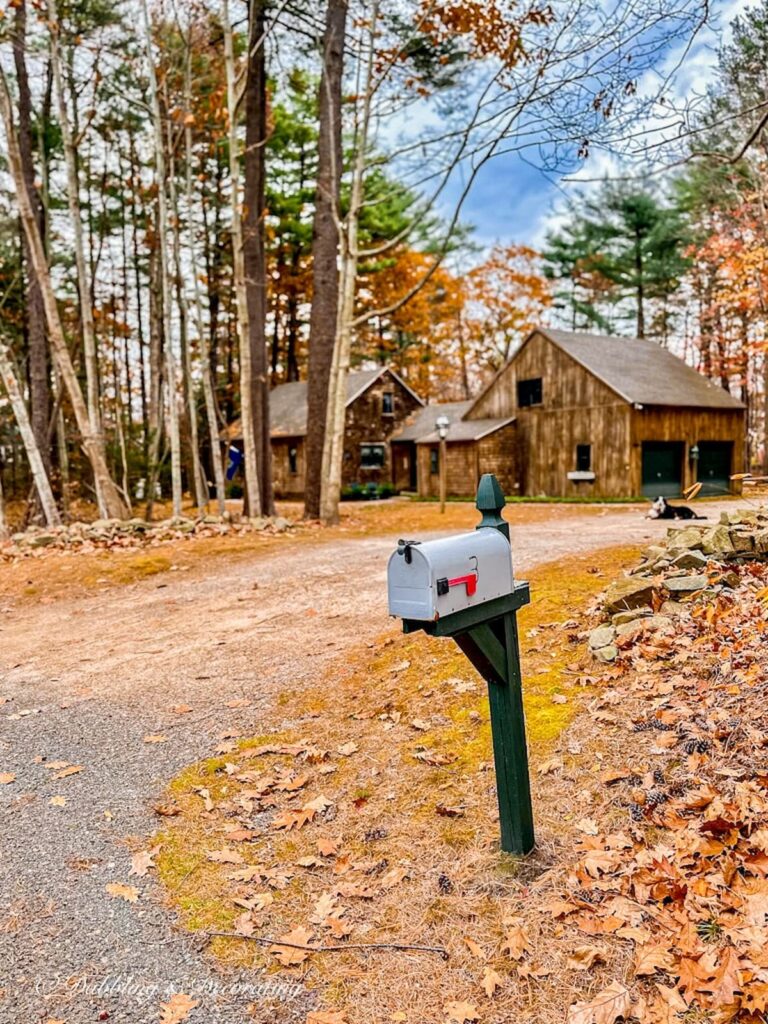
In true family fashion, my father had written the number 3 on the side with a black marker. It worked, but let’s just say curb appeal wasn’t the goal at the time.
Functionally, it did its job, but visually, it didn’t reflect the character of our cedar shake exterior. That’s what made the new mailbox such a meaningful exterior refresh.
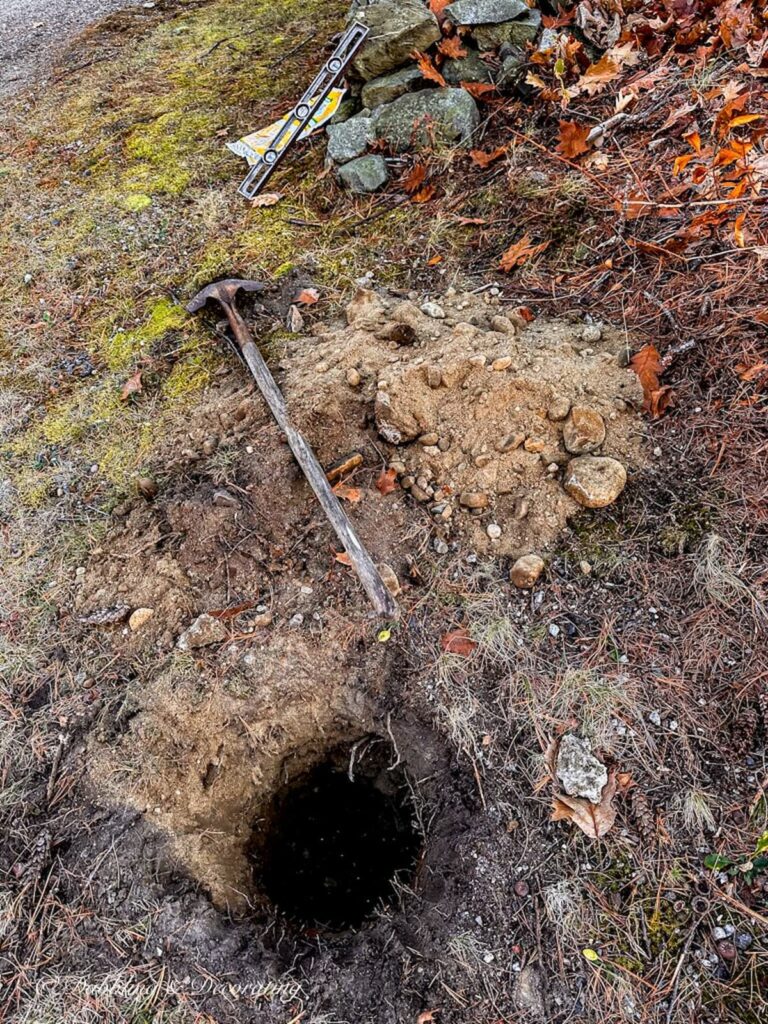
Removing the Old Mailbox Post Before Installing Our Cedar Shake Mailbox
Because our cedar shake mailbox is larger and heavier than a standard mailbox, we needed to replace the existing post with a sturdier one from our local hardware store. Fortunately, the original post was not set in concrete, which made removal much easier than expected.
If you’re upgrading to a cedar shake mailbox or replacing an old, leaning post, here’s a simple overview of how to remove a mailbox post safely and effectively.
Tools Needed to Remove a Mailbox Post
Step-by-Step Mailbox Post Removal
- Check Whether the Post Is Set in Concrete: Before digging, determine if the mailbox post is set in concrete. This will impact how much effort is required.
- Loosen the Soil Around the Base: Use a shovel to dig around the post and loosen the surrounding soil. If the ground is compacted, adding water can help soften it.
- Rock and Lift the Post: For posts that are not cemented in, gently rock the post back and forth to loosen it further. With enough movement, you may be able to pull it straight out.
- Removing a Post Set in Concrete: If your mailbox post is anchored in concrete, dig down to expose the base as much as possible. Use a pry bar for leverage, or loop a rope or chain around the post to assist in lifting it out. In some cases, cutting a wooden post at ground level and removing the base separately may be easier.
In our case, removal was straightforward since the post was not cemented in place. That allowed us to move quickly into installing the new support post for our cedar shake mailbox and begin the transformation.

The Secret Cupboard: One-Day Seasonal Vintage Decorating Ideas
The Secret Cupboard is filled with one-day vintage decorating ideas. You’ll find what to look for, how to style it, and what it might cost, perfect for gathering ideas and decorating with confidence.
Choosing the Right Mailbox Post for a Cedar Shake Mailbox
Once we removed the old post, the next step in installing our cedar shake mailbox was selecting a new mailbox post that would support both the size and style of the design. Mailbox posts come in a variety of materials and price points, but the key is choosing one that complements your home’s exterior and provides proper structural support.
Popular Mailbox Post Materials to Consider:
1. Wood Mailbox Posts: Wood remains a classic choice, especially for homes with cedar shake siding or traditional architecture. Pressure-treated lumber or cedar posts typically range from $20 to $150, depending on quality and design. Wood offers flexibility for painting or staining to match trim colors.
2. Metal Mailbox Posts: Metal posts made from aluminum, steel, or wrought iron provide durability and a more decorative look. Prices generally range from $30 to $200. Powder-coated finishes help resist corrosion in harsher climates.
3. Vinyl Mailbox Posts: Vinyl posts are low maintenance and provide a clean, crisp appearance. Expect to pay between $25 and $100. Higher-end versions often mimic painted wood without the upkeep.
4. Plastic Posts: These unique mailbox posts are lightweight and resistant to weathering. They are often made to mimic wood or metal finishes. They are also a less expensive option, going for around $15 to $80.
5. Stone or Masonry Mailbox Posts: For a permanent, substantial look, stone or brick mailbox posts offer dramatic curb appeal. These are often custom-built and typically start around $200, increasing significantly with custom stonework.
6. Combination Mailbox Posts: Some designs blend materials such as metal with wood accents for added visual interest. These can range from $50 to $250, depending on complexity.
When choosing a mailbox post, consider:
• The weight of your mailbox
• Your climate and weather exposure
• Whether you want the post to blend in or make a statement
• Local regulations or HOA requirements
For our cedar shake mailbox installation, we selected a standard wooden mailbox post from our local hardware store. It provided the strength we needed while allowing the mailbox itself to remain the focal point of our curb appeal upgrade.
Thrifting with the Gals
Love the thrill of the hunt? Thrifting with the Gals is a blog series packed with secondhand scores, vintage styling ideas, and real-time thrift adventures you won’t want to miss.
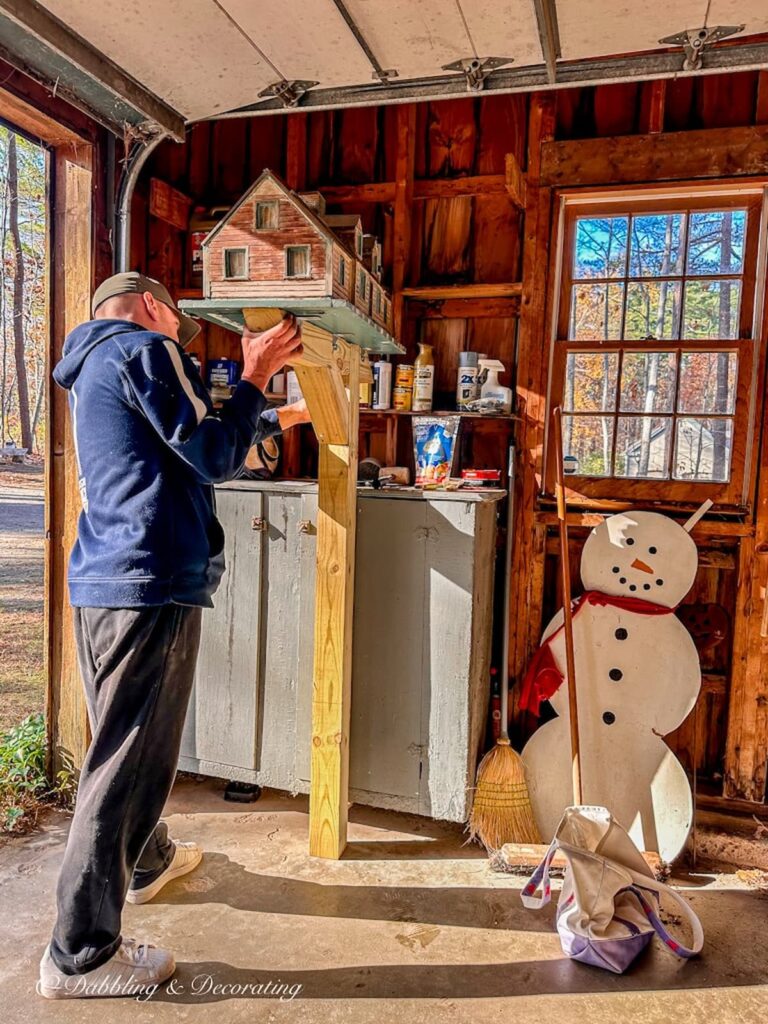
Installing Our Cedar Shake Mailbox on the New Post
Once we brought the new wooden mailbox post home, we needed to modify it slightly so our cedar shake mailbox would sit securely and level. Because the post had a decorative top detail, we used a chainsaw to carefully trim it down. This allowed the bottom beams of the cedar shake mailbox to rest flat against the top of the post without obstruction.
Mounting a Cedar Shake Mailbox Securely
With the post prepped, we positioned the mailbox in place and secured it using three L-brackets on each side. The brackets were attached to both the base of the mailbox and the post, providing strong structural support while keeping the hardware discreet.
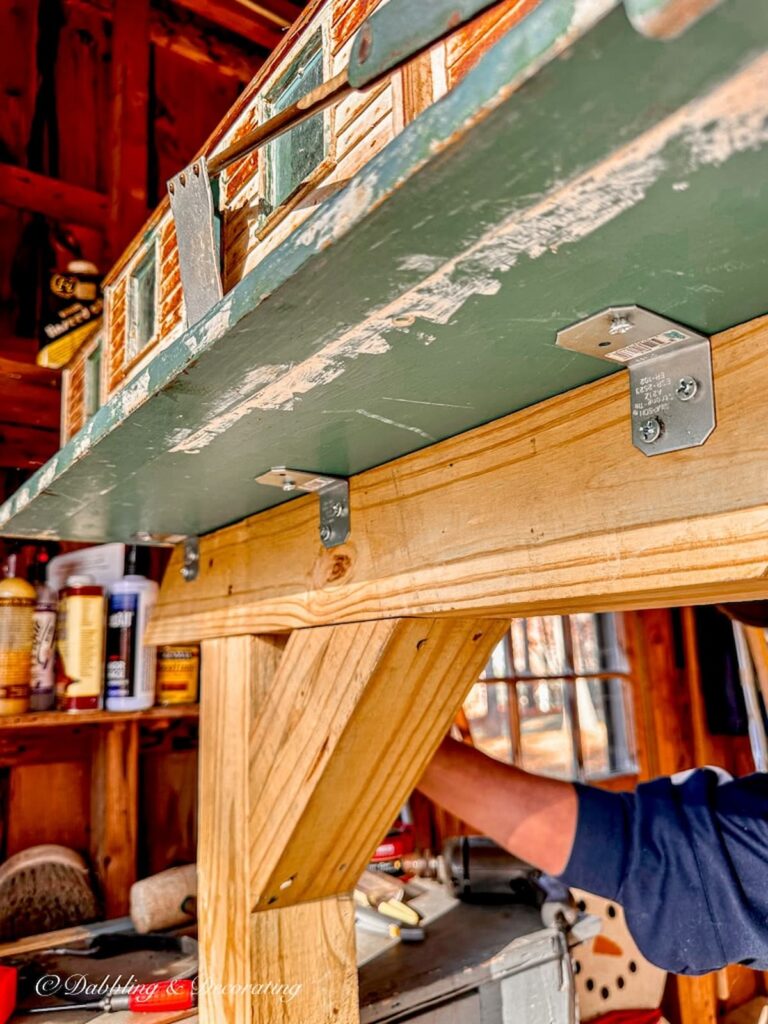
When installing a heavier mailbox like this cedar shake design, stability is key. Proper mounting ensures it will withstand wind, weather, and daily use without shifting.
Once the mailbox was secured to the post, we moved on to setting the post firmly into the ground.
Vintage Coastal New England Decorating Ideas
Looking for vintage coastal decor ideas? Explore timeless New England decorating inspiration, thrifted finds, and creative ways to style your coastal home.
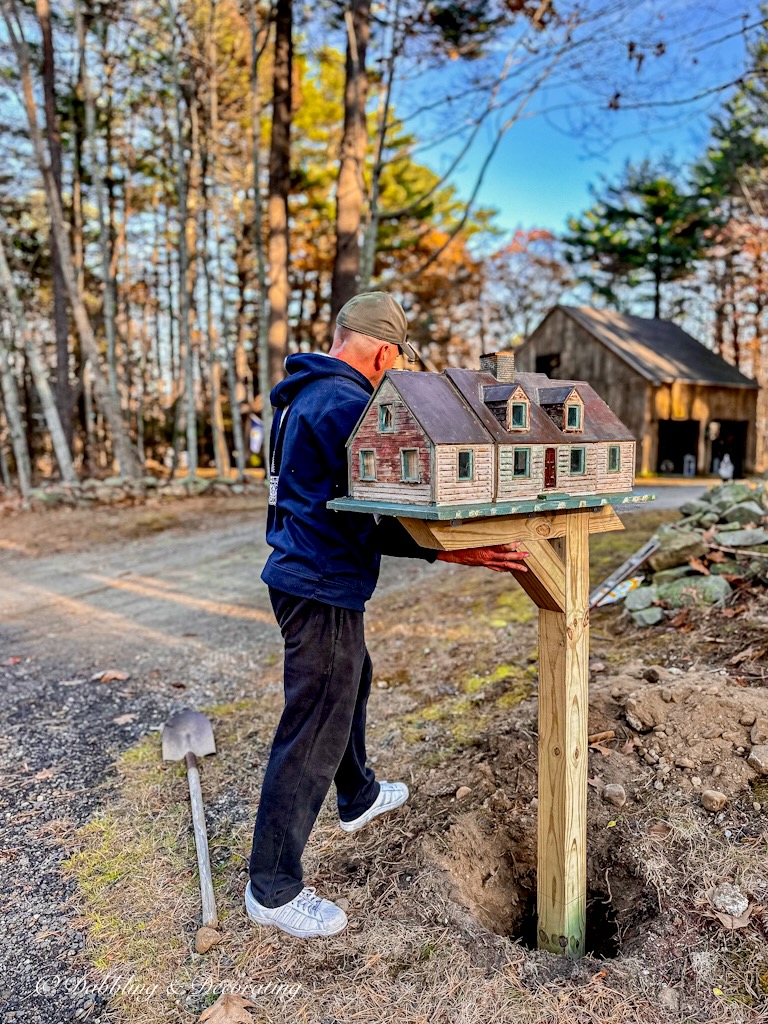
Setting the Mailbox Post at the Proper Height
According to USPS guidelines, a mailbox should be mounted so the bottom of the box sits 41 to 45 inches above the road surface. The front of the mailbox should be positioned 6 to 8 inches back from the curb or road edge to allow safe mail delivery. For stability, a post hole depth of approximately 24 inches is generally recommended, though this may vary depending on soil conditions.
Because we were replacing an existing mailbox, our original hole already met these requirements, which simplified the process considerably.
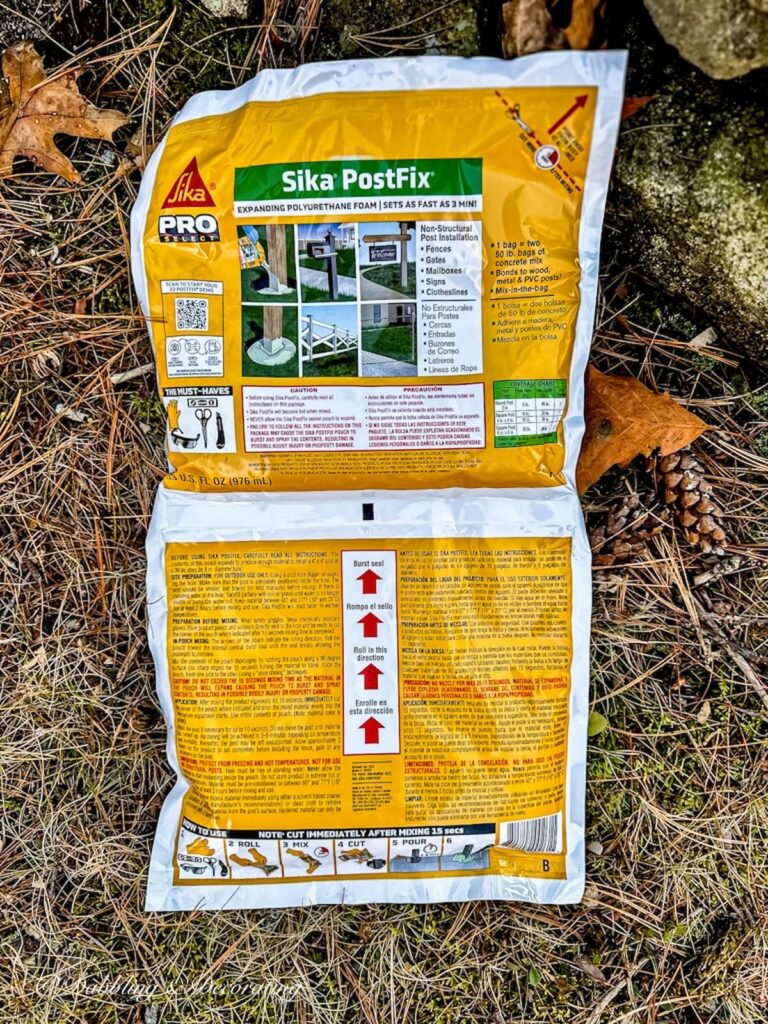
Cementing the Mailbox Post for Stability
While cement isn’t always required, it provides added durability, especially in areas with loose or sandy soil. We used Sika Polyurethane Fence Post Mix to secure the post in place. After leveling the post, we mixed the solution directly in the bag according to the instructions and poured it into the hole. The mixture sets quickly, firming up in just a few minutes and fully curing within a couple of hours.
To add extra stability, we placed several larger rocks around the base while the post dried. Once cured, we filled the remaining space with soil and packed it firmly around the base.
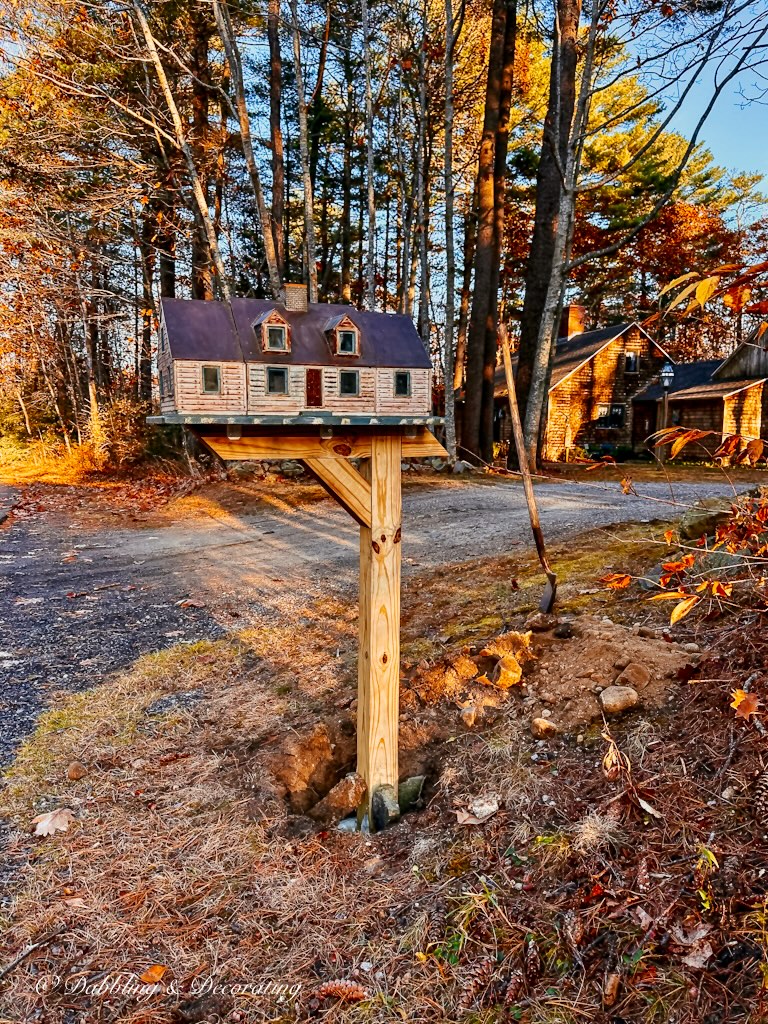
Finishing the Installation for Curb Appeal
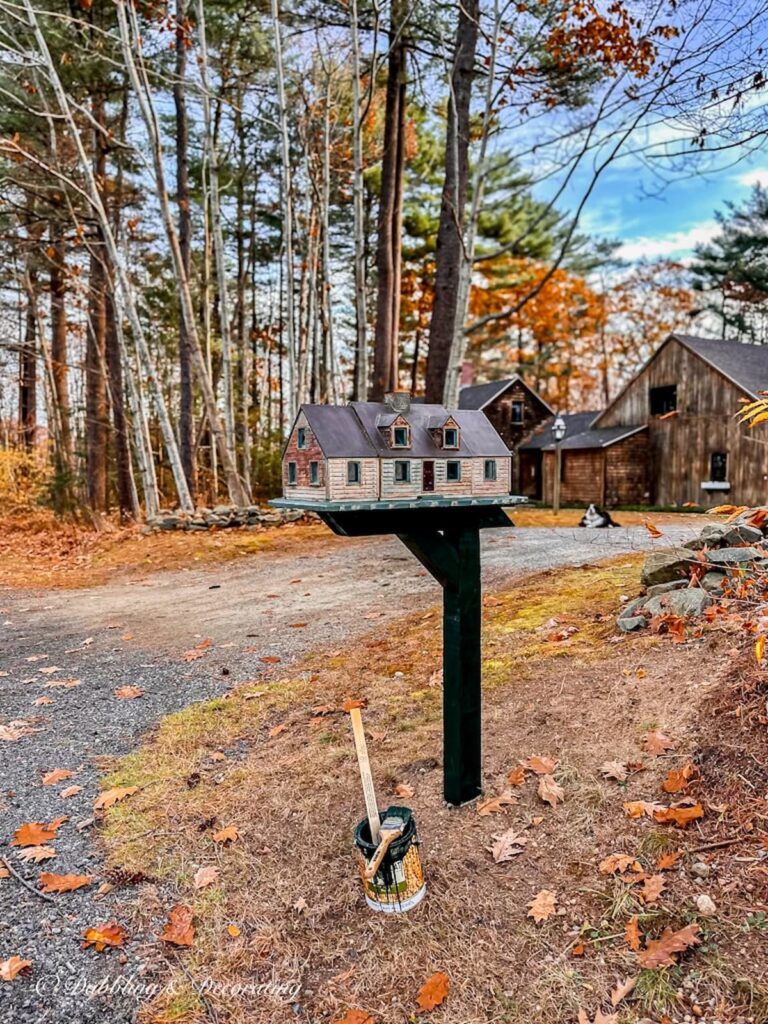
After the post was fully secured, we were ready for the final details. A fresh coat of paint and simple landscaping around the base helped the cedar shake mailbox feel fully integrated into our front yard design.
Pro Tip
Many people choose not to paint their wooden mailbox posts and instead let them weather into that natural gray color. But I chose to add a fresh coat of paint in Essex Green, which matches the trim on our cedar shake home.
Custom Details That Add Charm to a Cedar Shake Mailbox
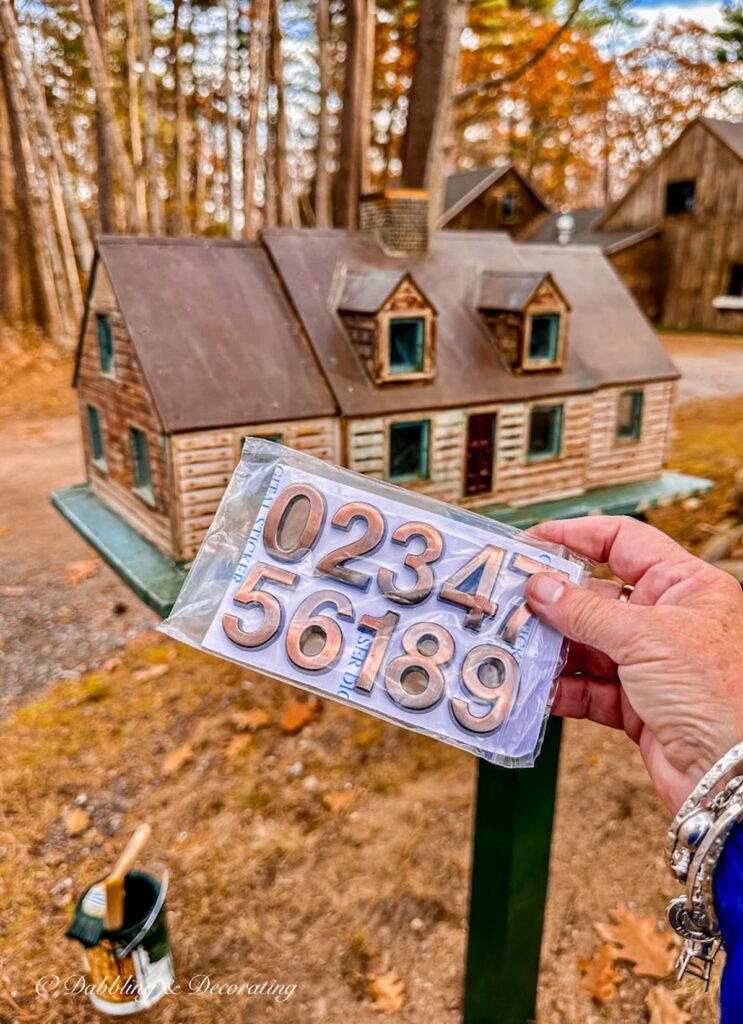
Once our cedar shake mailbox was securely installed, it was time to add the finishing touches that would make it feel truly complete. We attached a 3D bronze house number directly to the small door on the mailbox. The raised metal lettering adds dimension and makes the address clearly visible while complementing the copper roof and cedar shake texture. It’s a small detail, but it gives the mailbox a more intentional, architectural feel.
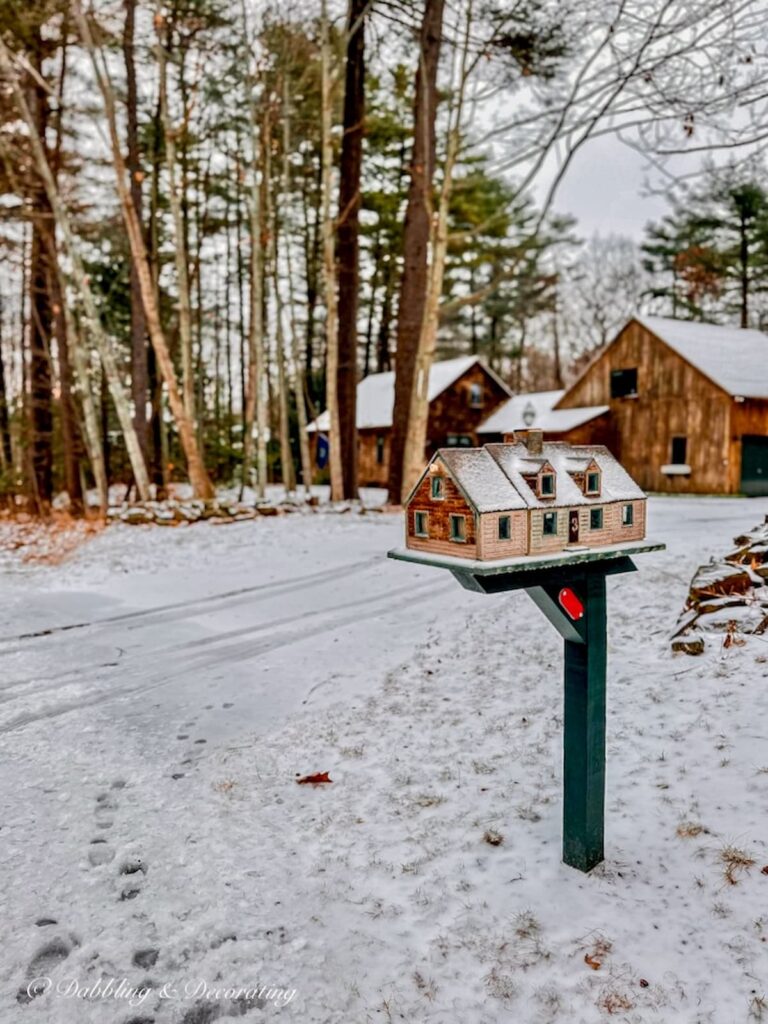
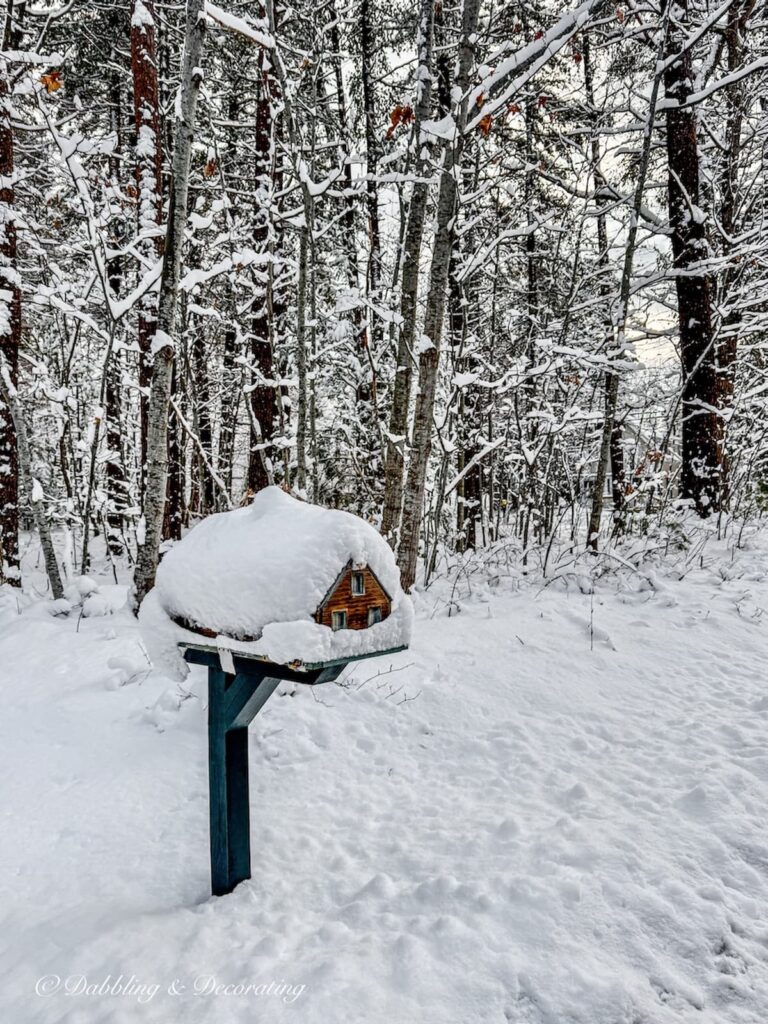
To prepare for the winter months, we also added a discreet reflector to the mailbox post. Living in Maine, snowplows are part of life, and visibility matters. The reflector helps ensure the cedar shake mailbox is clearly seen during heavy snowfall and darker afternoons.
And for those who always ask, no, the snowplow has never hit it. The post is cemented securely into the ground and built to withstand winter weather. Even after multiple seasons, it remains sturdy and beautifully intact.
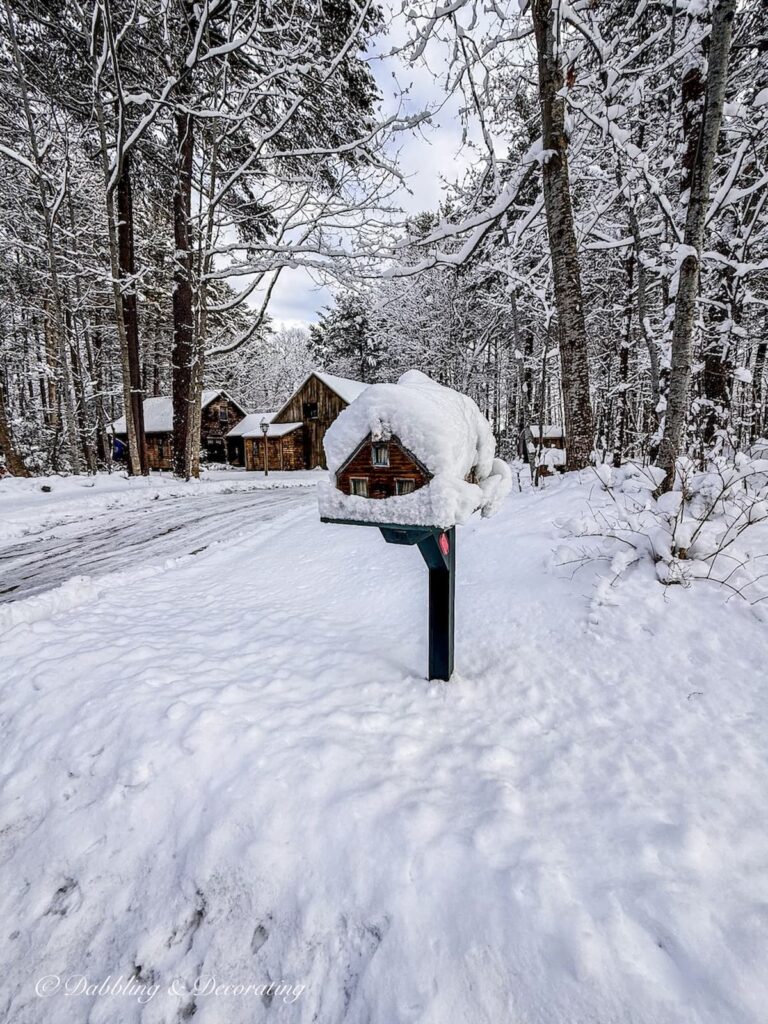
In fact, the cedar shake mailbox might look its best in winter. Covered in fresh snow with the copper roof catching soft light, it feels like a miniature extension of our home, standing strong against the Maine landscape.
The Vintage Posts Readers Love Most
Start with the posts readers come back to again and again. These vintage decorating ideas are rooted in New England, styled with thrifted and antique finds, and filled with real-life tips you can use in your own home. Familiar Finds, Styled Your Way.
How to Start a Vintage Booth: Tips, Display Ideas, and Lessons Learned
Eclectic Decorating Style Guide: How to Layer Vintage, Antique, and Thrifted Decor
9 Vintage Booth Displays That Made Me Stop (And What You Can Learn From Them)
Scandinavian Spring Homes: 10 Light and Airy Cottage Tours to Inspire
Beyond the Flag: What to Look for in Antique Stores for Heritage Americana Decor
Why a Cedar Shake Mailbox Is Worth the Upgrade
A cedar shake mailbox may seem like a small exterior detail, but it has the power to completely transform your home’s first impression. By choosing materials that reflect your architecture and installing them securely, you create a design element that feels intentional rather than added on.
For us, this cedar shake mailbox brought warmth, character, and instant curb appeal to our front yard. It mirrors the texture of our home, holds up beautifully through Maine winters, and feels like a natural extension of the house itself. Sometimes the most charming upgrades are the simplest ones. When exterior details echo the style of your home, curb appeal comes together effortlessly.
If you love simple exterior upgrades that make a big impact, you may also enjoy these curb appeal ideas and home exterior projects that add character without a full renovation:

Frequently Asked Questions About Cedar Shake Mailbox
A cedar shake mailbox is a decorative wooden mailbox designed with real or faux cedar shake siding to mimic the look of a cedar shake home. Often paired with architectural details like a copper roof or painted trim, it creates a cohesive exterior feature that enhances curb appeal.
Yes, when properly sealed and securely installed, a cedar shake mailbox can withstand snow, wind, and seasonal temperature changes. Using a cemented post and durable materials like copper roofing helps ensure stability through harsh winter conditions.
According to USPS guidelines, the bottom of a mailbox should be mounted 41 to 45 inches above the road surface. The front of the mailbox should sit 6 to 8 inches back from the curb. Proper installation ensures safe and consistent mail delivery.
Choosing a mailbox that reflects your home’s exterior materials or architectural style creates a more intentional and polished look. A cedar shake mailbox works especially well for homes with cedar siding or traditional New England design elements.
A heavier wooden mailbox should be mounted with sturdy brackets or hardware to ensure stability. Setting the post at least 24 inches into the ground and using concrete or post mix provides added support, especially in areas with snow or high winds.
Cement is not always required, but it is recommended for added durability and long-term stability. In loose or sandy soil, cement helps prevent leaning and protects the mailbox from shifting over time.

Join the Vintage Circle — Familiar Finds, Styled Your Way™
Love vintage treasures, thrifted gems, and a home that tells your story? Leave a comment, share this post with a kindred spirit, or head to my Start Here page to explore more. Want fresh prompts and timeless ideas? Subscribe to join our Seasonal Vintage Decor Styling Challenge for weekly inspiration and behind-the-scenes peeks.
Pin forLater!


Wow, it looks so great, Ann! My mailbox just keeled over this week. I don’t know if the metal post snapped on its own (it was corroded) or if it had some help. My mailbox is situated across the street since we are a “rural” delivery route (all mailboxes on one side of the road), so I am not worried about curb appeal. I got a simple wooden post and will have to hire someone to install. What a pain!
I’m so glad you like it Molly! Oh no, that’s a bummer hopefully you have a handyman nearby. Now I want a new mailbox in Vermont…
I love it! The perfect addition to your beautiful Maine home.
Thanks so much Karen, I wasn’t that happy with the photos, it’s so much cuter in person. But I’m so glad you like it!
Too nice to leave outdoors. I hope it survives NE winter! Snow plows are brutal.
I hope so too Melissa. We’ve never had any problems in 30 years so fingers crossed.