


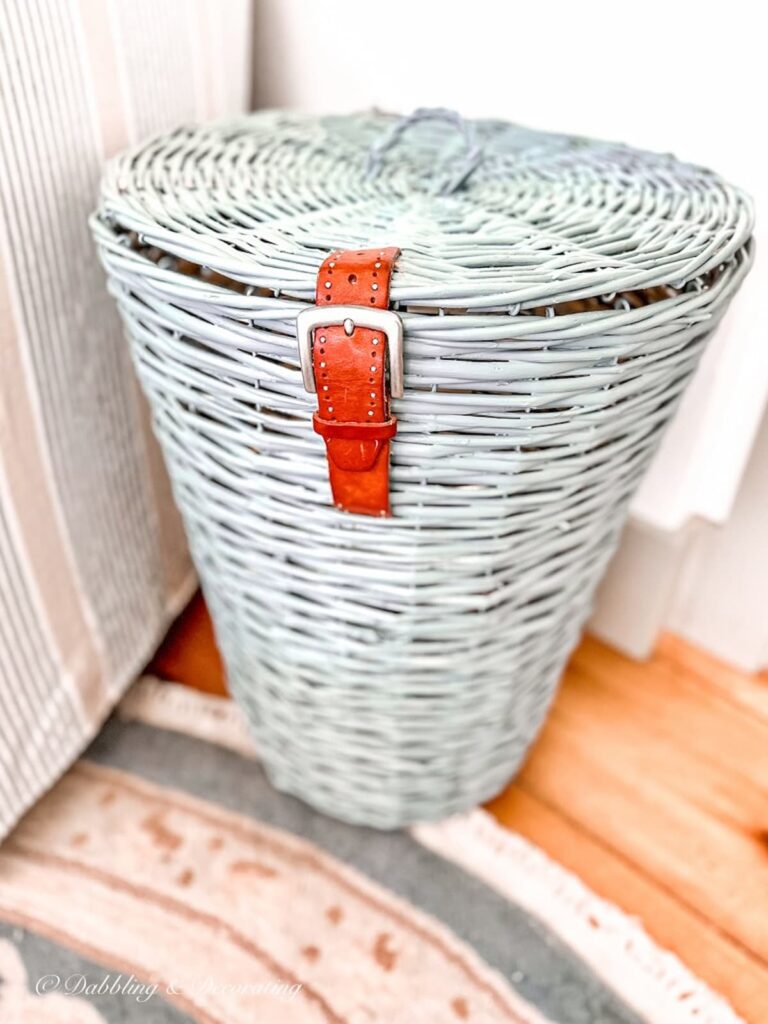
Turn an ordinary basket into a stylish statement! This easy DIY wicker basket makeover with a leather belt adds instant charm and vintage-inspired flair.
Looking for a simple DIY that makes a big impact? This easy DIY wicker basket makeover is as charming as it is clever, just add a leather belt!
Whether you’re styling a living room corner or organizing in vintage style, this upcycled wicker basket adds texture, personality, and that unexpected finishing touch. And the best part? It’s affordable, fun, and totally one-of-a-kind.
Inspired by my friend Nancy of Simply Styled Inspo basket DIY, this simple project packs a decor punch. A perfect project for a hot summer day that I knew I needed to try and share with you.
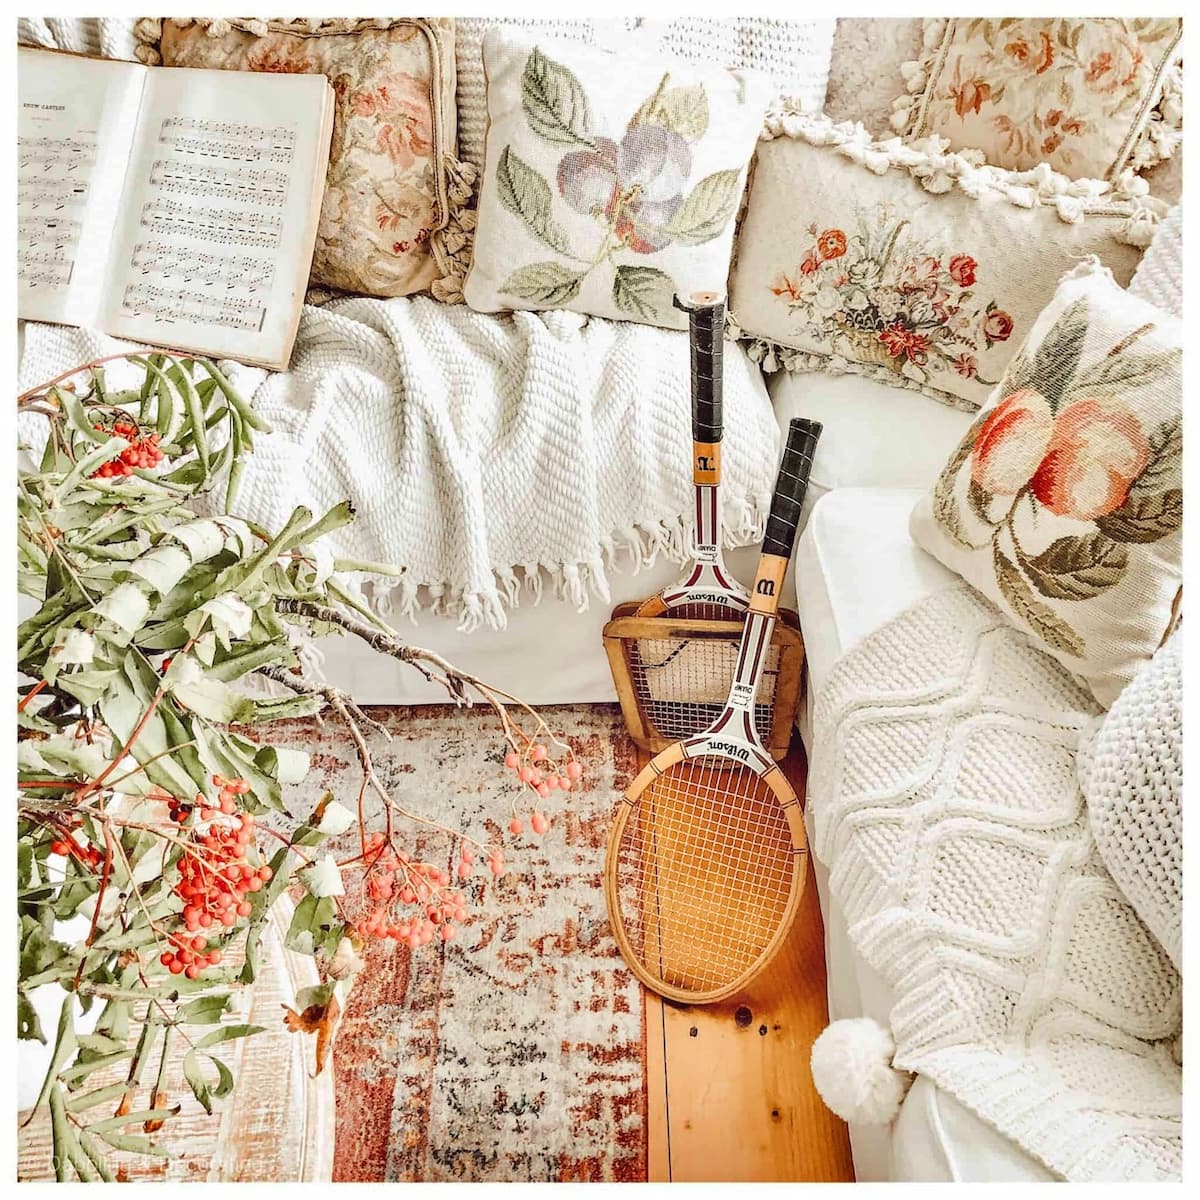
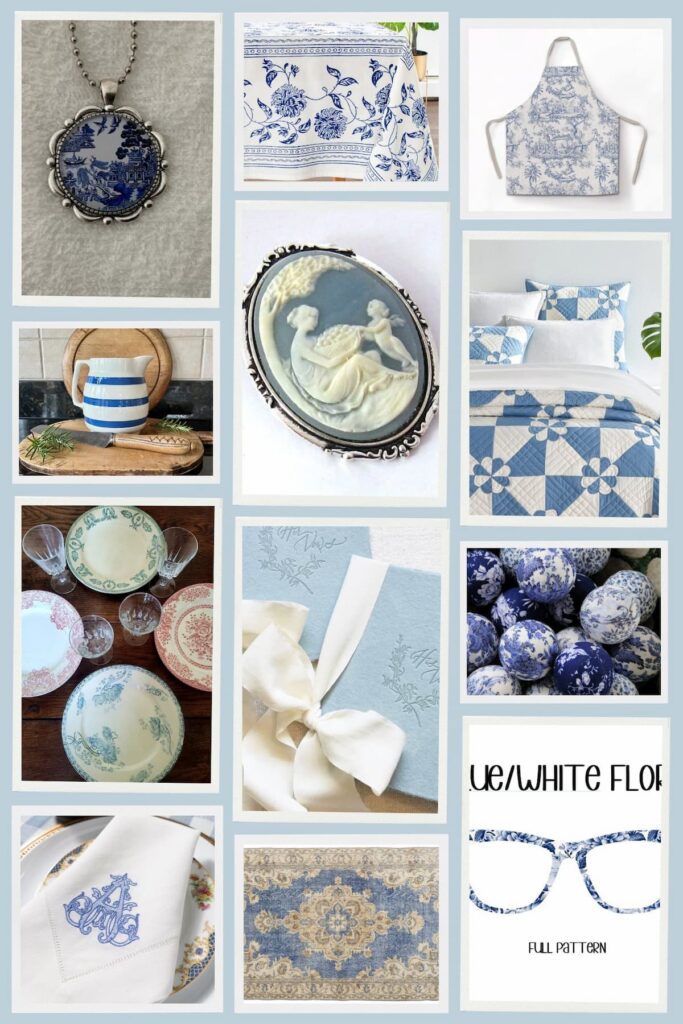
Antique Basket Styling Guide
Discover timeless ways to style, display, and collect vintage and antique baskets with our comprehensive Antique Baskets Guide, your go-to resource for adding cozy, storied charm to every room.
“Ann Couser Kittredge, founder of interiors blog, Dabbling and Decorating, explains, ‘I’ve always loved collecting vintage and antique baskets, and even a few newer ones. I look for all shapes and sizes, and I especially love it when they have a bit of wear or history to them.” — Home & Gardens
Easy DIY Wicker Basket With a Leather Belt Accent
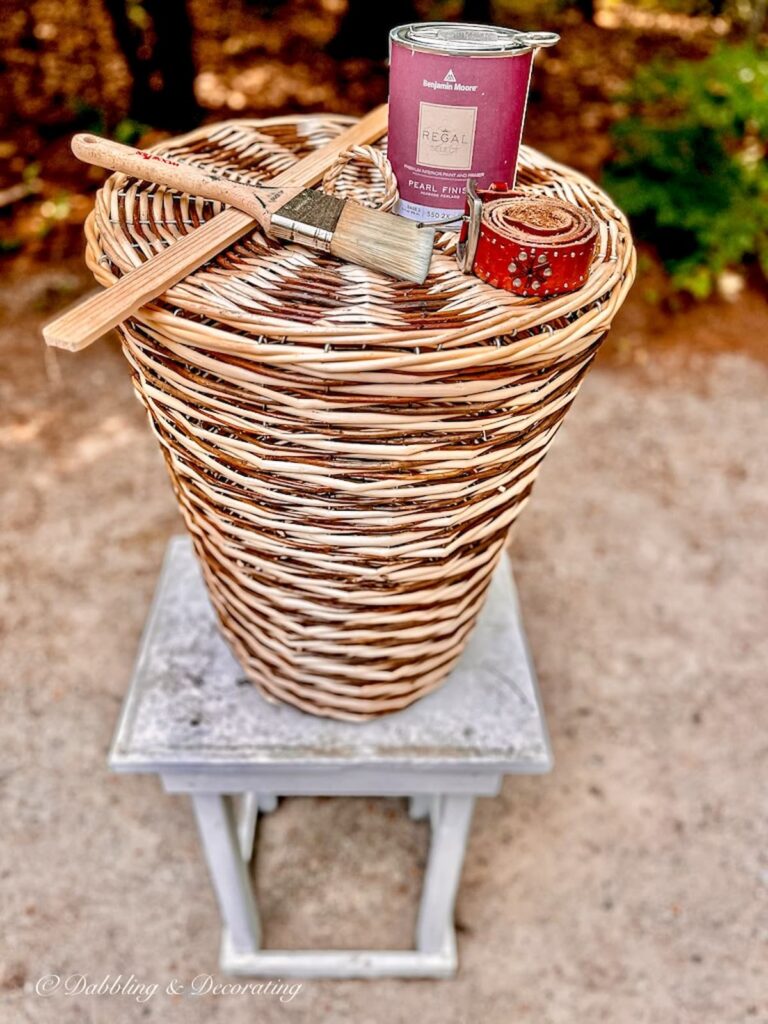
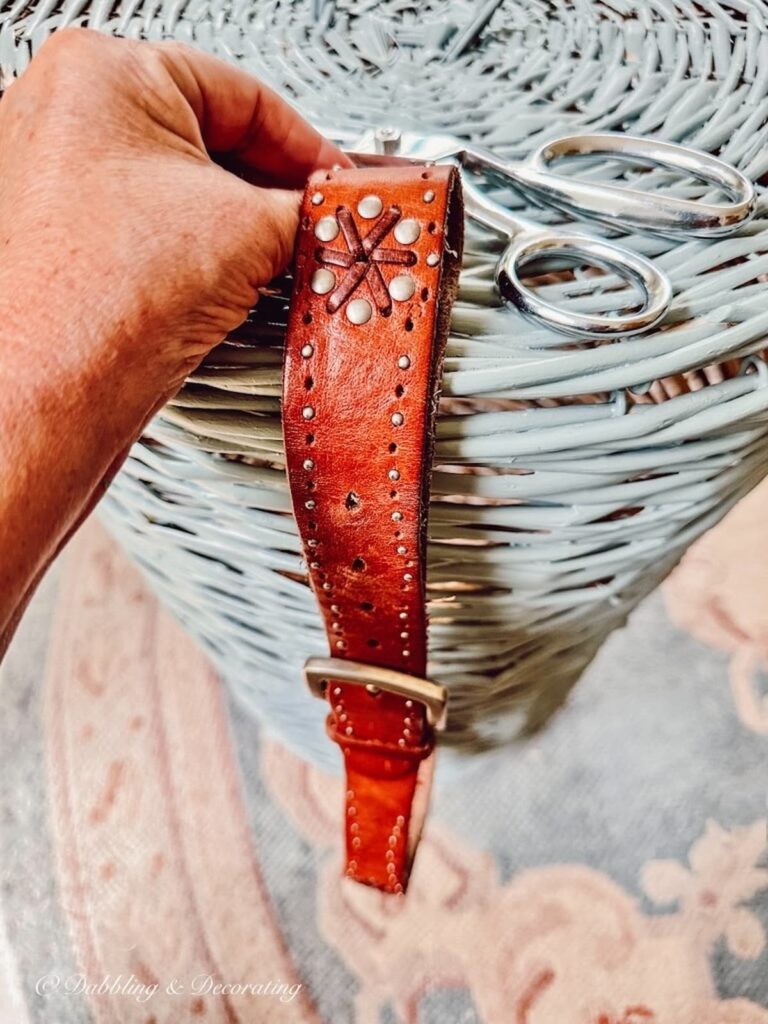
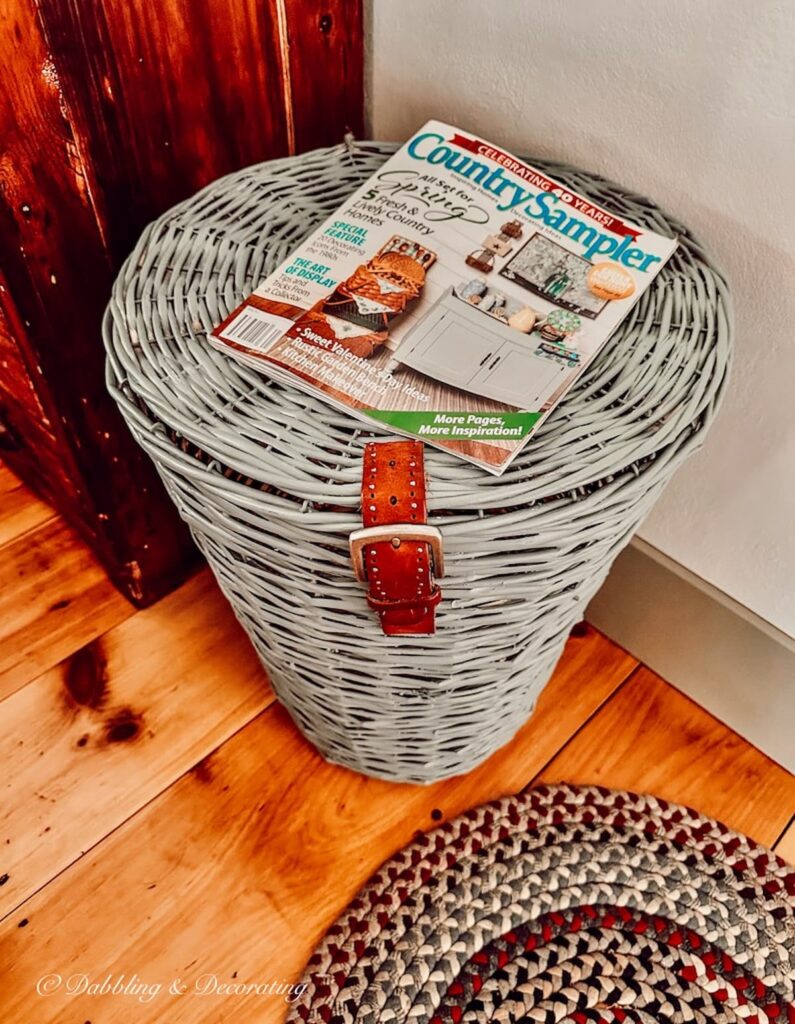
Thrifted Leather Belt for a One-of-a-Kind Basket DIY
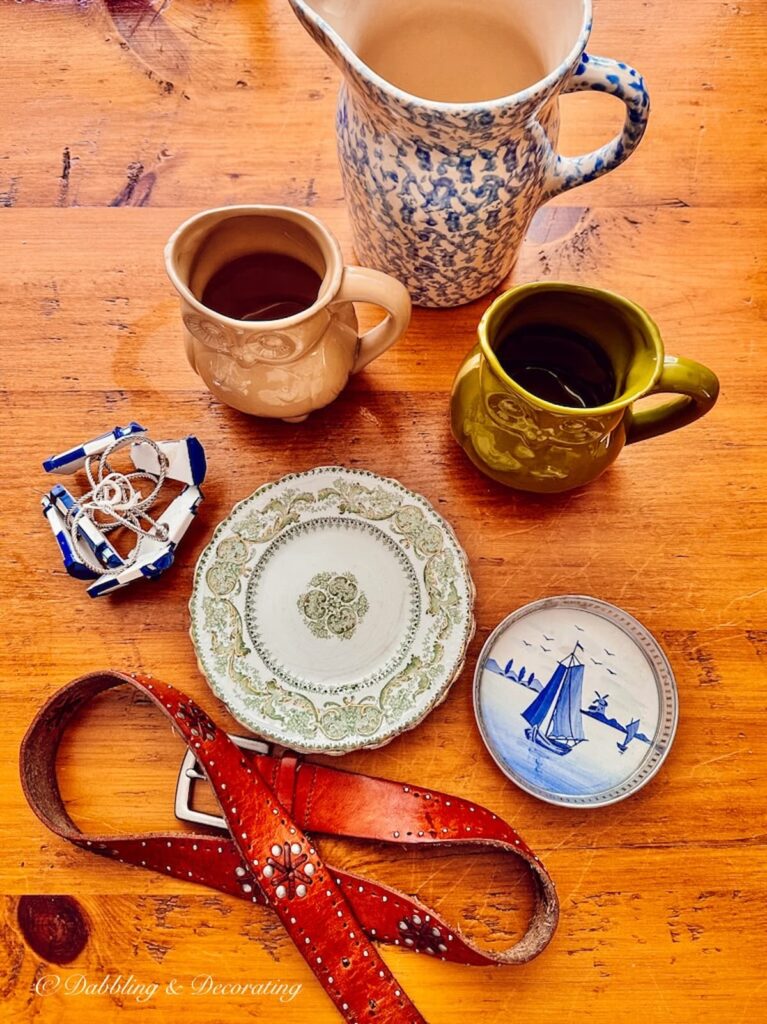
I found this beautiful leather belt while out Thrifting with the Gals at Sage Farm Antiques, such a perfect vintage find! It adds a personal and unexpected twist to this easy wicker basket DIY. Now all I needed was the right basket with a lid to bring the whole look together.
Finding the Right Wicker Basket for This DIY
I found my basket at HomeGoods, but tracking down one with a lid in good condition took a little patience. If you’re up for the hunt, check your local thrift stores or flea markets, you can often score a lidded wicker basket for under $10.
When choosing a basket for this DIY, look for one with a woven structure. You’ll want a basket with enough space between the weave so the leather belt can thread easily through the top and side, just like this one. It makes all the difference in pulling off this charming and functional upgrade.
Choosing a Paint Color for Your DIY Wicker Basket
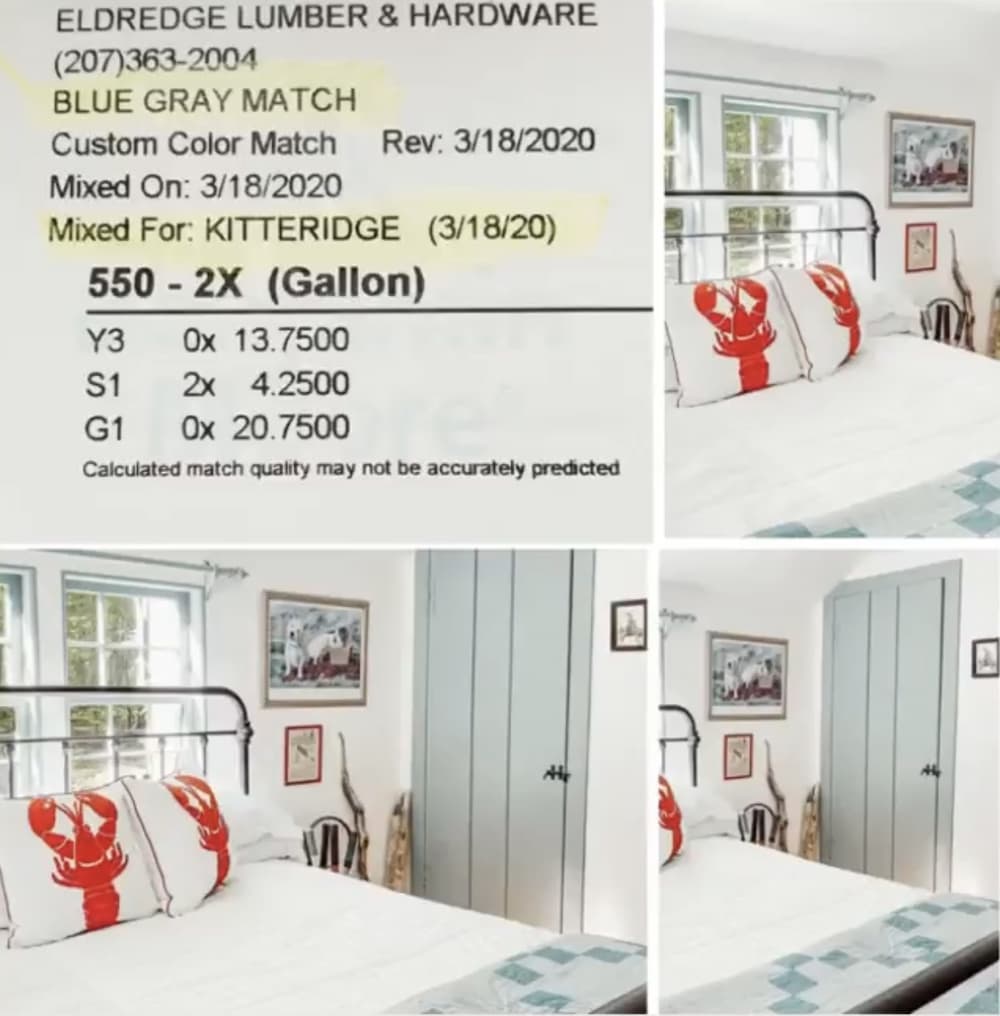
To finish off this DIY wicker basket makeover, I needed the perfect paint color to complement our home decor. I went with my favorite vintage-style blue-gray, a soft, muted tone that adds charm without overpowering the space. This is the same custom paint formula I’ve used in our bedrooms, and it works beautifully on wicker.
It’s not a standard paint name, but a custom formula I’ll share it here in case you’d like to try it on your own basket project.
Easy DIY Home Decor Projects with Vintage Style
Explore our easy DIY home decor guide with vintage style, using thrifted and repurposed finds. Simple, beginner-friendly ideas to decorate your home with charm.
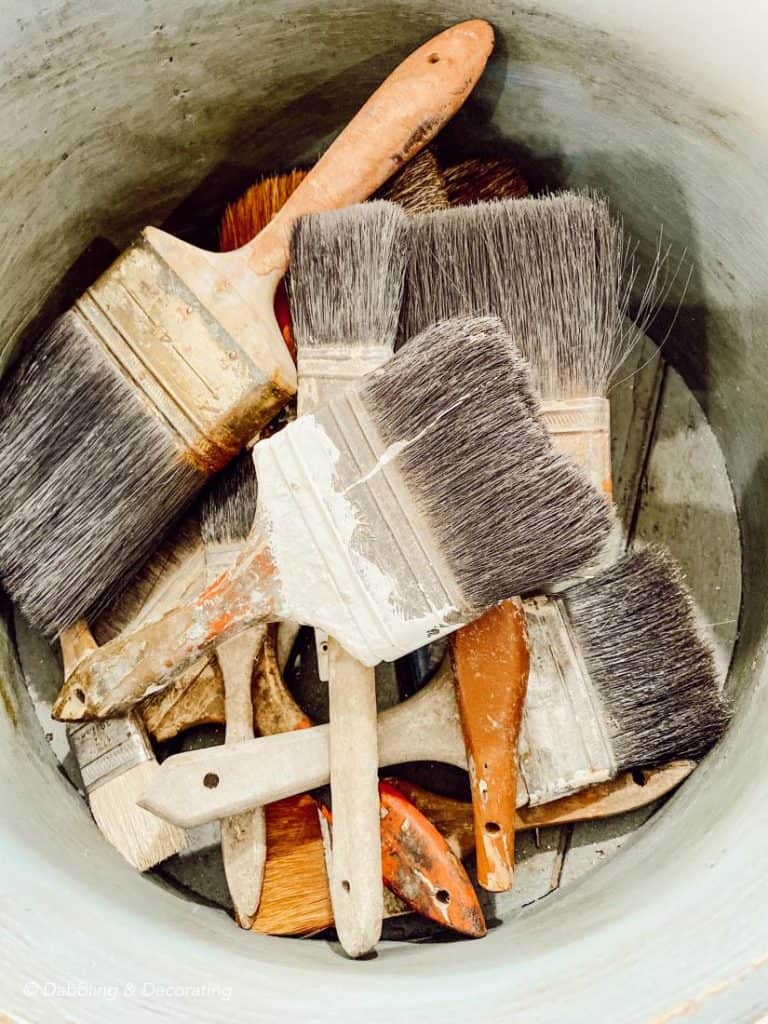
Supplies You’ll Need for This DIY Wicker Basket Makeover
Gather everything you need to turn a basic wicker basket into a charming, one-of-a-kind piece with this easy DIY project.

This post may contain affiliate links, which won’t change your price but will share some commission.
*Not painting this wicker basket is also an option because this little belt detail will work well with many variations.

Thrifting with the Gals
Love the thrill of the hunt? Thrifting with the Gals is a blog series packed with secondhand scores, vintage styling ideas, and real-time thrift adventures you won’t want to miss.
Step-By-Step DIY Wicker Basket Tutorial with a Woven Leather Belt
This easy wicker basket makeover comes together in just a few simple steps. Follow along to transform your own basket using paint and a thrifted leather belt for a stylish, functional upgrade.
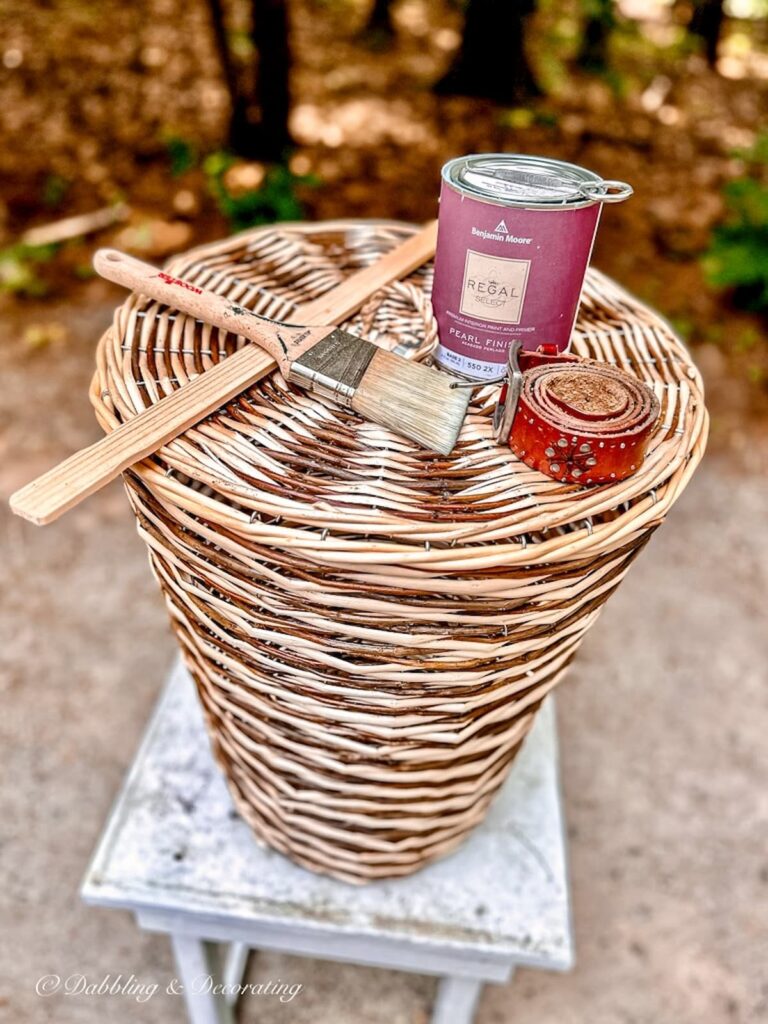
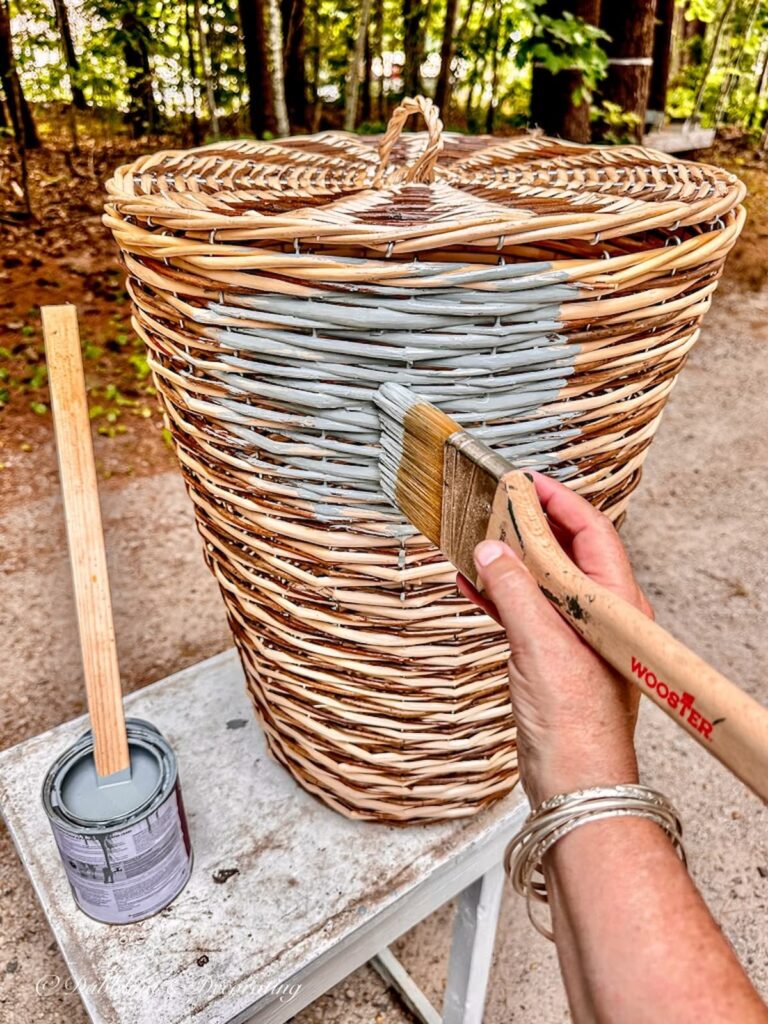
Step 1: Paint Your Wicker Basket
Start by painting the top and sides of your basket with either a paintbrush or spray paint, whichever you prefer!
Painting a Wicker Basket with a Brush:
Using a paintbrush gives you more control and lets you add texture and detail as you work with the basket’s weave. I personally prefer this method for DIY projects like this one; it’s just as easy as spray paint but allows you to highlight the natural grain and create subtle color variations.
If you’re painting a darker basket, a lighter color, or using paint on a material that might resist it, applying a coat of primer first will give you better coverage and longer-lasting results. Let it dry completely before moving on.
To finish, consider sealing the paint with a clear protective topcoat to add durability, especially if the basket will be handled often or placed in high-traffic areas. Follow the sealant’s drying instructions for best results.
Basket DIY with Spray Paint: Quick and Even Coverage
Spray painting a wicker basket is one of the fastest ways to refresh it with a clean, even finish. I love using this method when I want full coverage and quick results.
Hold the spray paint can about 12 to 18 inches away from the basket and apply the paint in light, even coats. Move the can steadily back and forth to avoid drips and ensure the paint reaches all the woven nooks and crannies.

Pro Tip
Tilt the basket or adjust your angle to get into tighter spots that are easy to miss on the first pass.
Let the first coat dry completely, usually around 20 to 30 minutes, then apply a second coat if needed for a richer color and better coverage.
Need more tips? Don’t miss my Paint Wicker Furniture: Step-by-Step Guide for extra painting tricks you can use on all kinds of vintage wicker pieces.
Once the paint is fully dry, your basket is ready for its final charm: the leather belt!
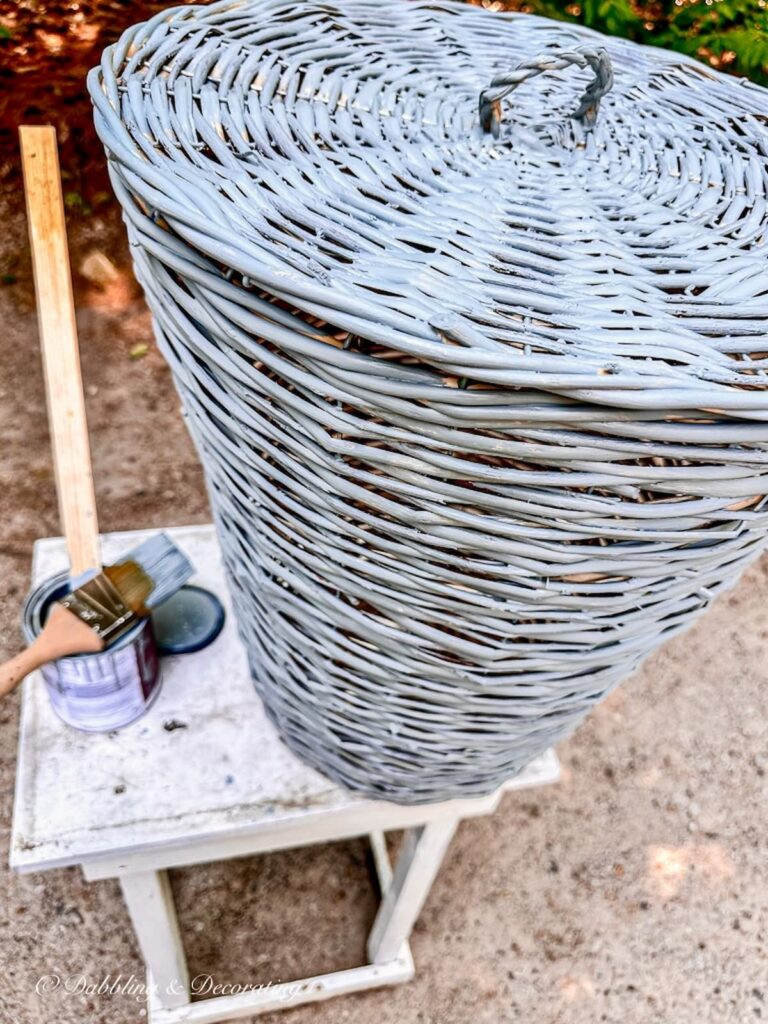
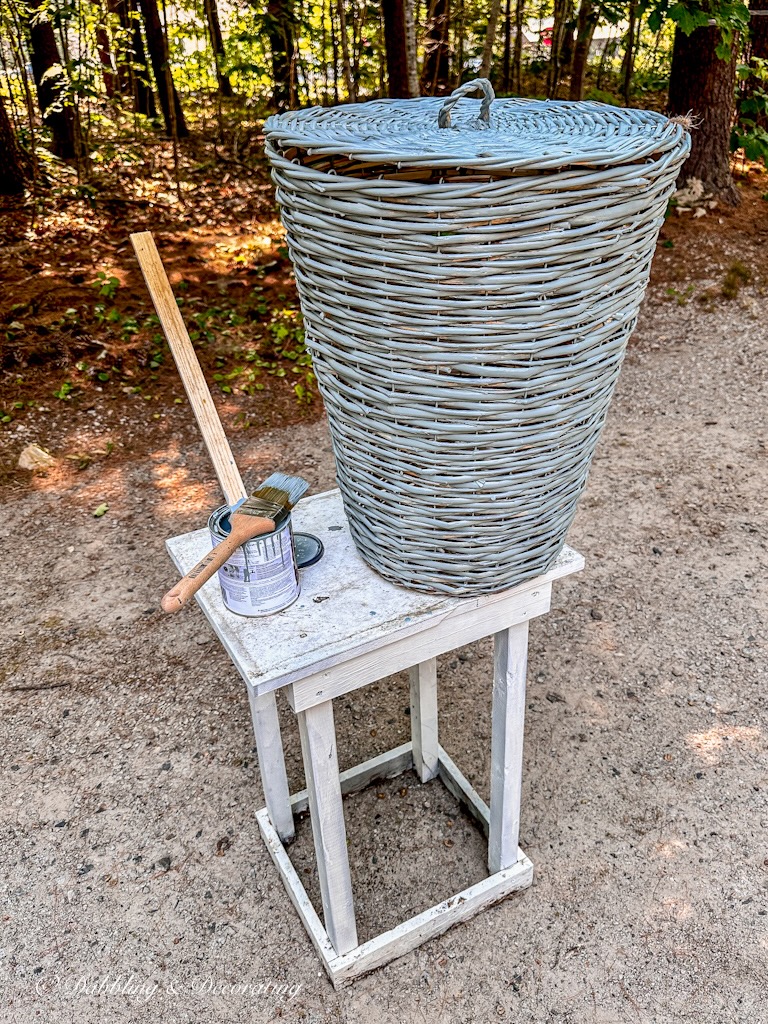
This was my basket after one coat of paint. I didn’t care for the coverage, so I continued with a second coat of paint covering the entire wicker basket.
The Vintage Posts Readers Love Most
Start with the posts readers come back to again and again. These vintage decorating ideas are rooted in New England, styled with thrifted and antique finds, and filled with real-life tips you can use in your own home. Familiar Finds, Styled Your Way.
Eclectic Decorating Style Guide: How to Layer Vintage, Antique, and Thrifted Decor
How to Start a Vintage Booth: Tips, Display Ideas, and Lessons Learned
7 Things I’ll Never Thrift Again—and the Vintage Decor I Buy Now Instead
Scandinavian Spring Homes: 10 Light and Airy Cottage Tours to Inspire
Easy DIY Wicker Basket Makeover with a Leather Belt That Adds Instant Charm
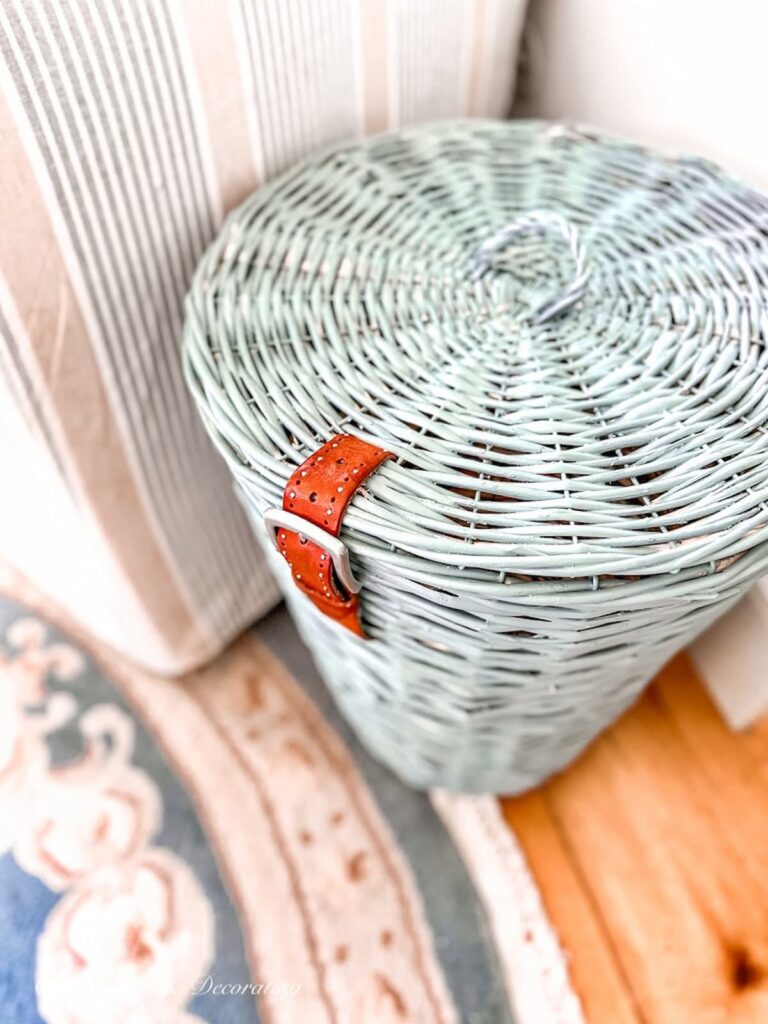
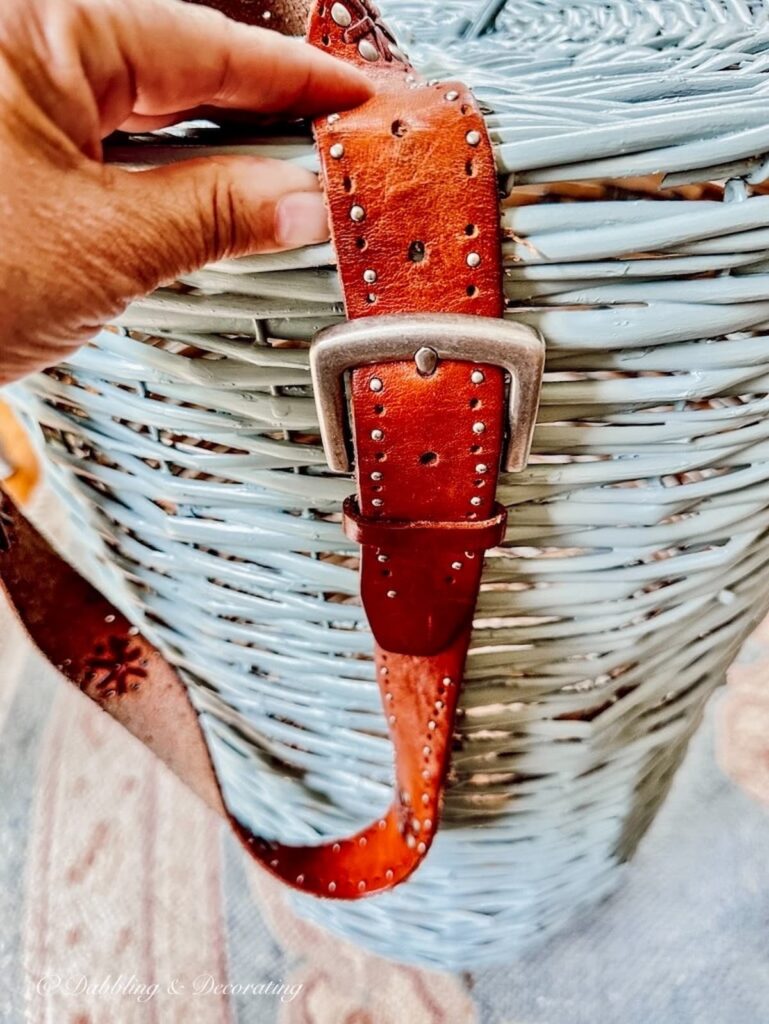
Weave the Leather Belt for a Buckled Basket Detail
Now for the fun part, adding the leather belt! This step gives your DIY wicker basket its unique, buckled charm and ties the whole look together.
Align the Belt First
Before cutting anything, wrap the leather belt around the top edge and side of your basket to decide exactly where you want it to sit. For this project, I wove the belt through the basket’s open weave to create a secure and decorative closure.
Take note of where the buckle will rest so it sits evenly when fastened. You can adjust the positioning slightly until it feels balanced and visually appealing.
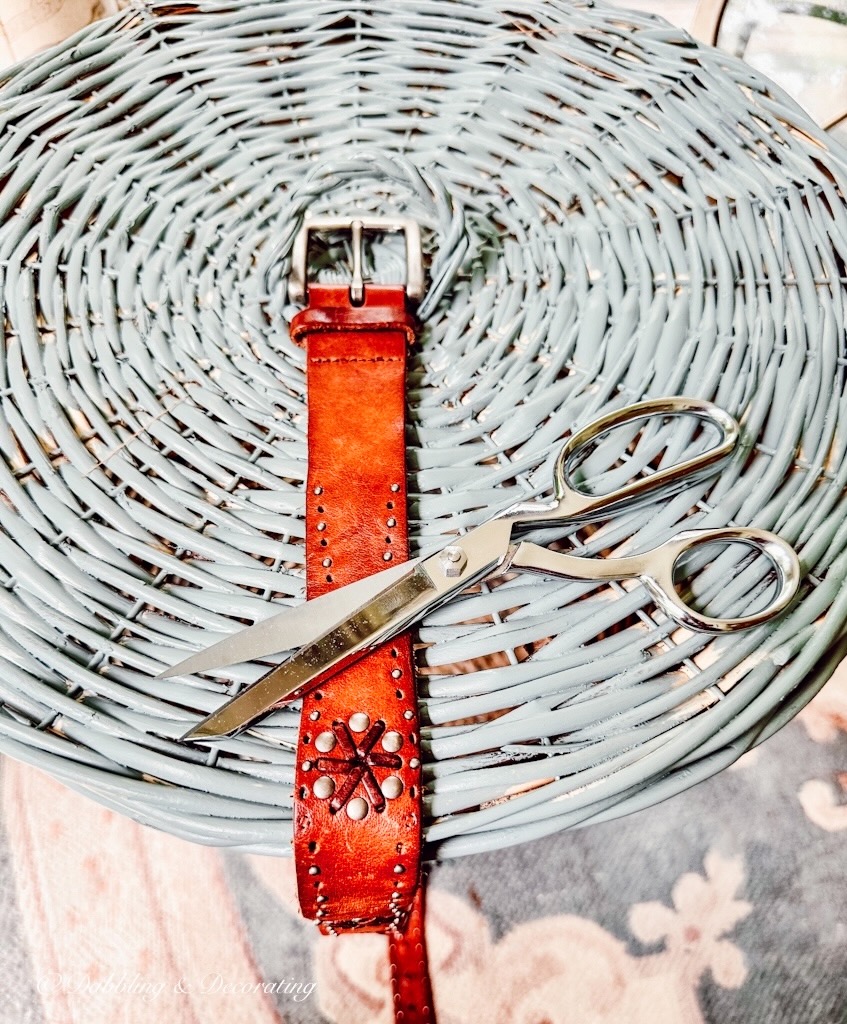
Once the belt is aligned just right, you’re ready to trim it and secure it in place.
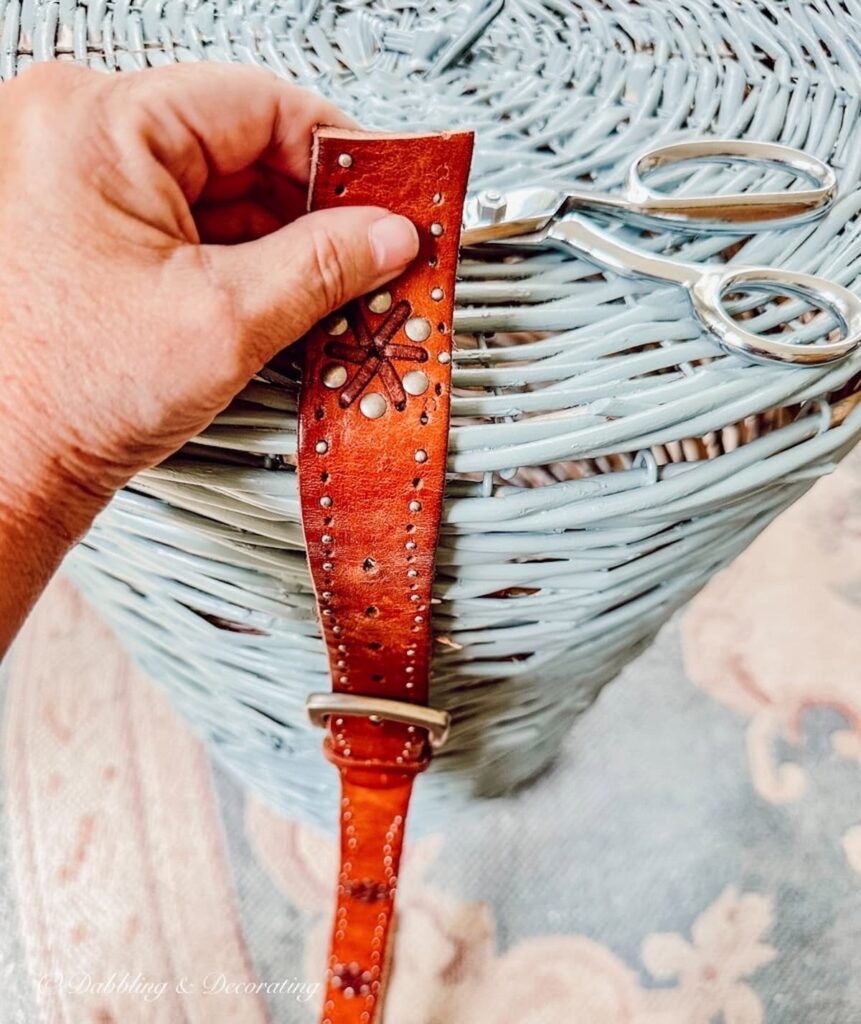
How to Cut and Prep the Belt for Your Wicker Basket
Once your belt is aligned, it’s time to cut it into two pieces, one for the basket lid and one for the body. This creates that signature wrapped look with a functional or decorative buckle detail.
Use a sharp pair of professional scissors or heavy-duty fabric shears; I’m using these Professional Heavy Duty Tailor Fabric Scissors to get a clean, even cut through the leather.
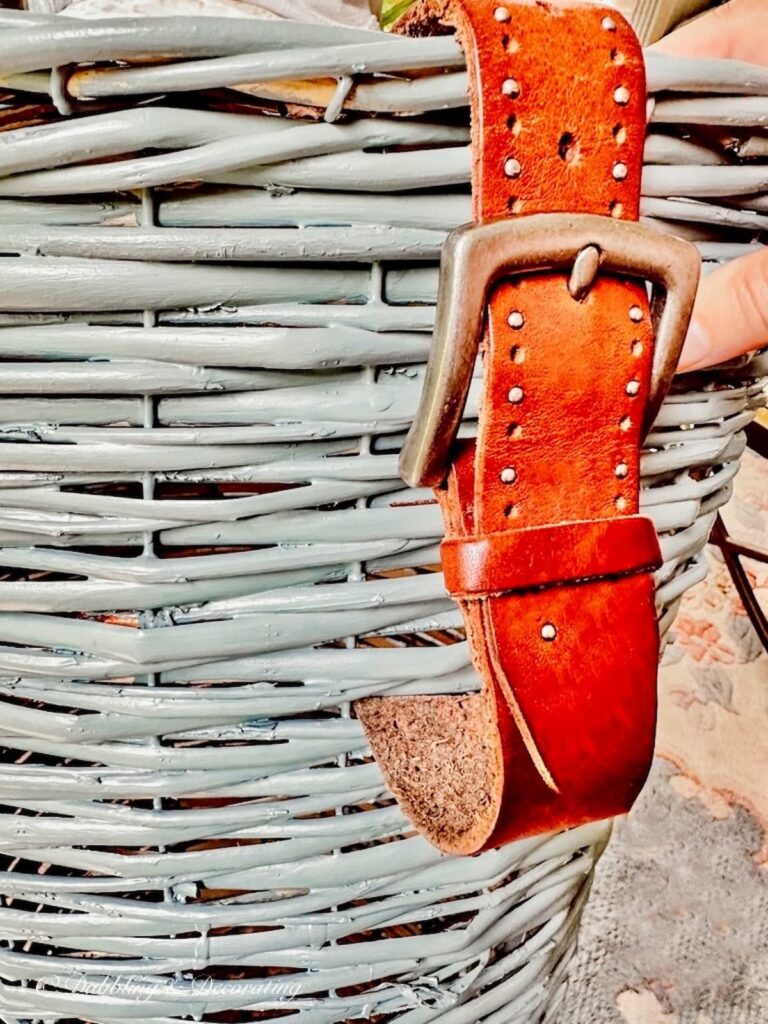
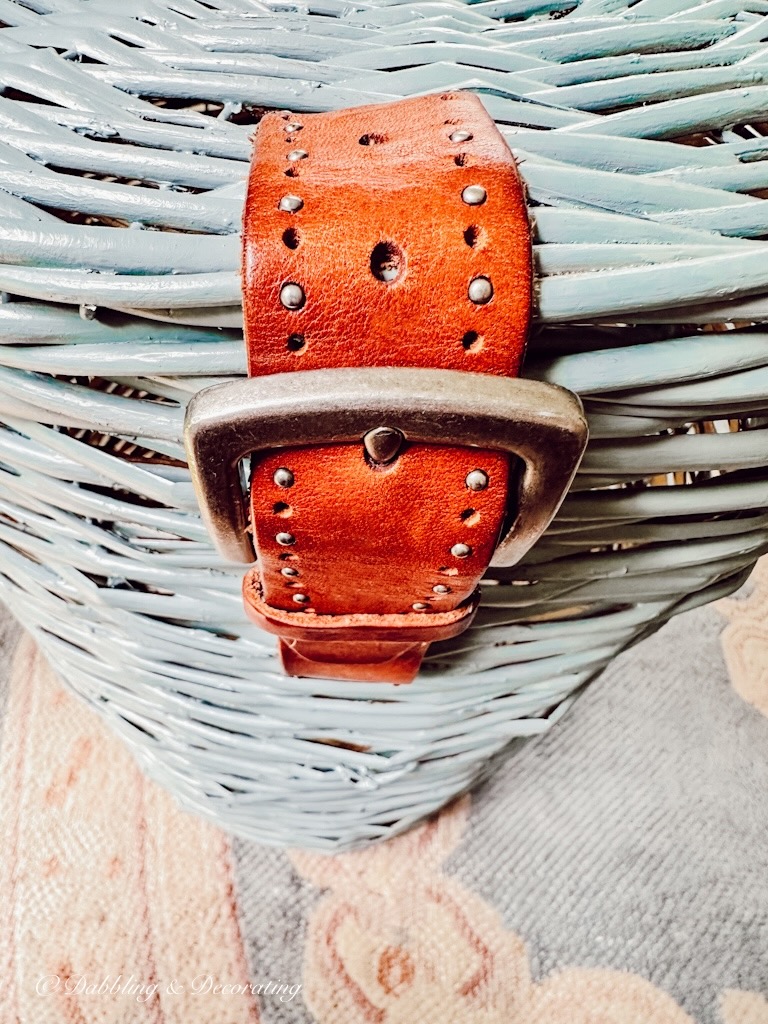
How to Weave the Belt Into the Wicker Basket
To create the buckled look, position the buckle section of the belt along the side of the basket and the holed end across the lid. This gives the illusion of a working closure while keeping things purely decorative and oh-so-stylish.
Follow the photo sequence below to see exactly how I wove the belt through the wicker pattern. Once it’s in place, pull it snug and trim off any extra leather from the inside. The tight weave of the basket should grip the belt well, no glue or hardware needed!

Want to have fun with it? Swap out the belt seasonally! Try a red belt for the holidays, navy for patriotic summer styling, or even a floral belt for spring. It’s such an easy way to refresh this DIY wicker basket all year long.
Vintage Home Decorating Guides and Styling Inspiration
Are you curious about vintage decor but don’t know where to start? These cornerstone guides are packed with seasonal styling tips, how-tos, and inspiration to help you confidently decorate with charm and character.
How to Style This Basket DIY in Your Home Decor
This easy wicker basket DIY adds instant charm, texture, and personality to any space. With just a coat of paint and a thrifted leather belt, you’ve created a versatile piece that can work in nearly every room of your home. From cozy corners to stylish storage, here are a few ways I’ve styled my belted basket makeover.
Try a Styling Tip!
Looking for simple, vintage-inspired decorating ideas you can try in an afternoon? Explore all my Styling Tips for easy seasonal projects, quick DIYs, and creative ways to style your home with charm.
DIY Basket Decor in the Sunroom
Add a subtle pop of color and personality to your sunroom with this painted wicker basket and leather belt accent. Tucked into a corner or placed under a side table, it blends beautifully with vintage and cottage-style decor. It’s the perfect mix of cozy function and eye-catching charm, and makes great storage for throws, books, or even Ella’s toys.
Recommended Reading
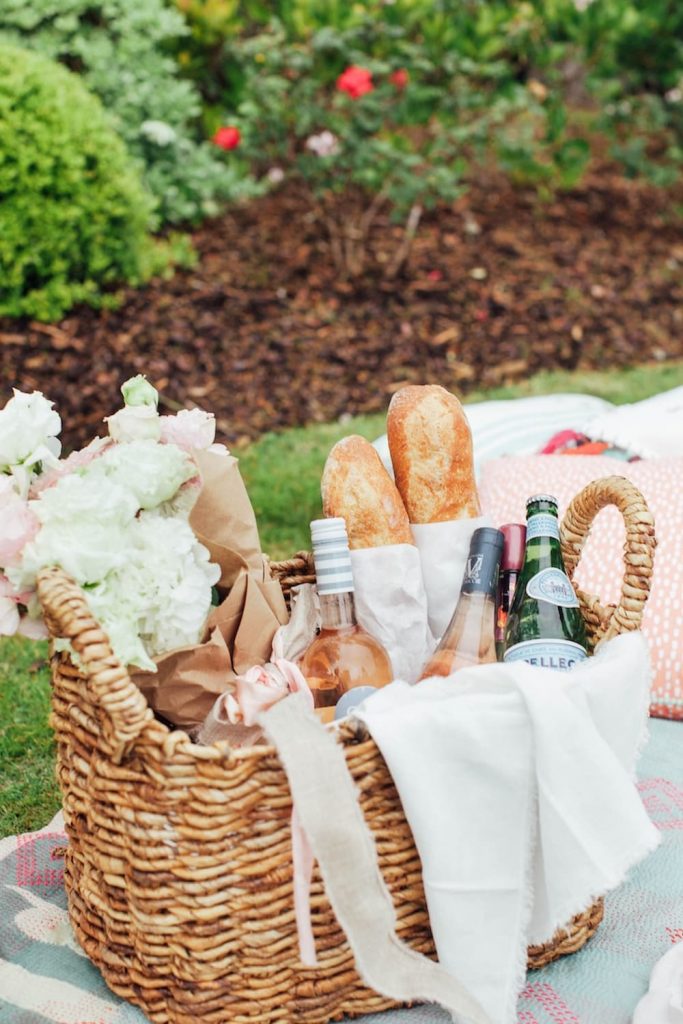
You may also find inspiration in this Vintage Picnic Baskets: Beyond the Picnic post.
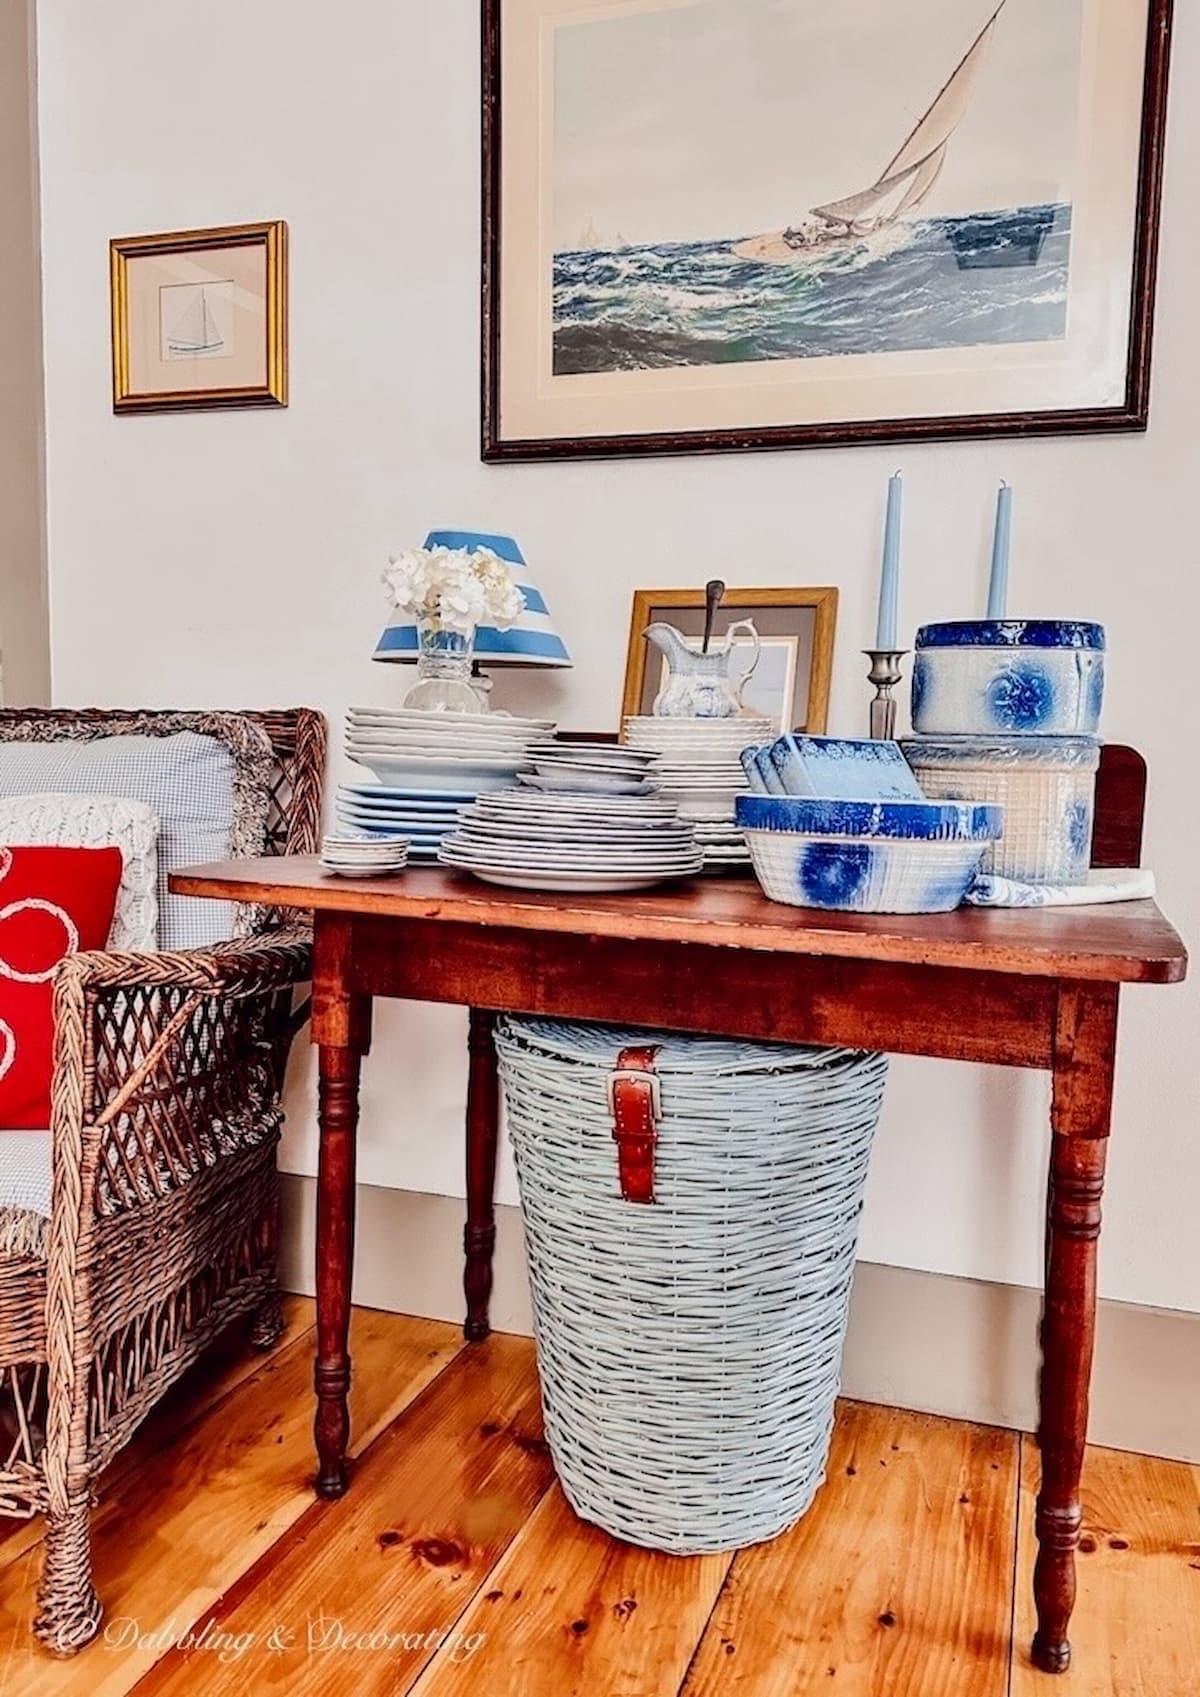
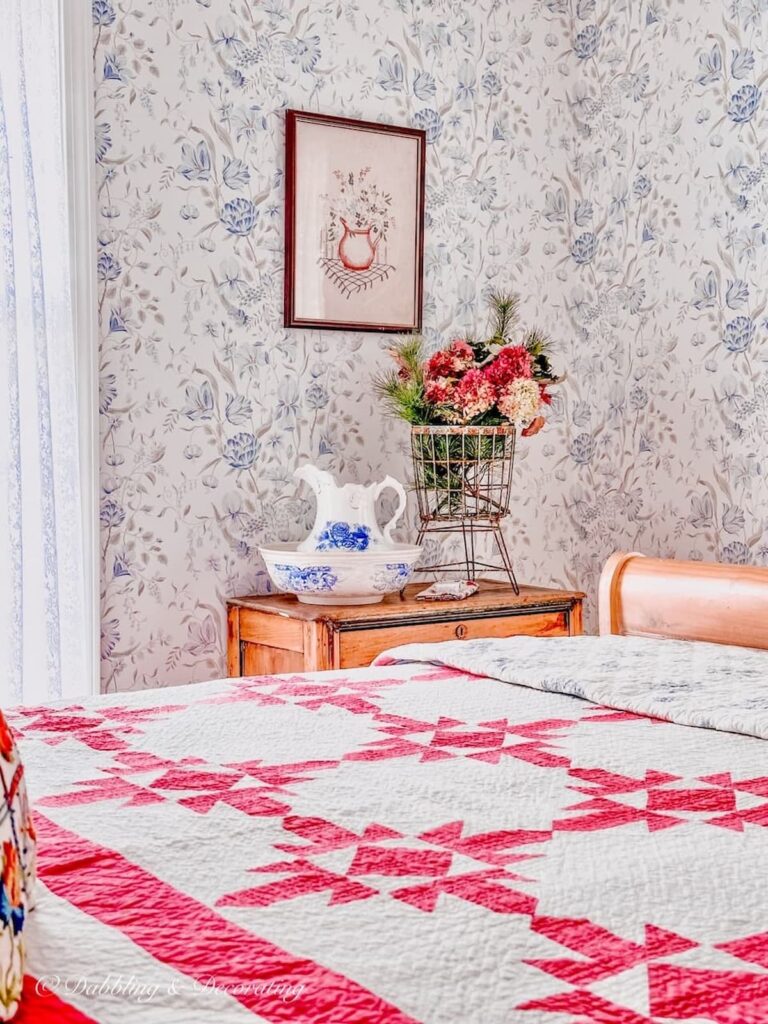
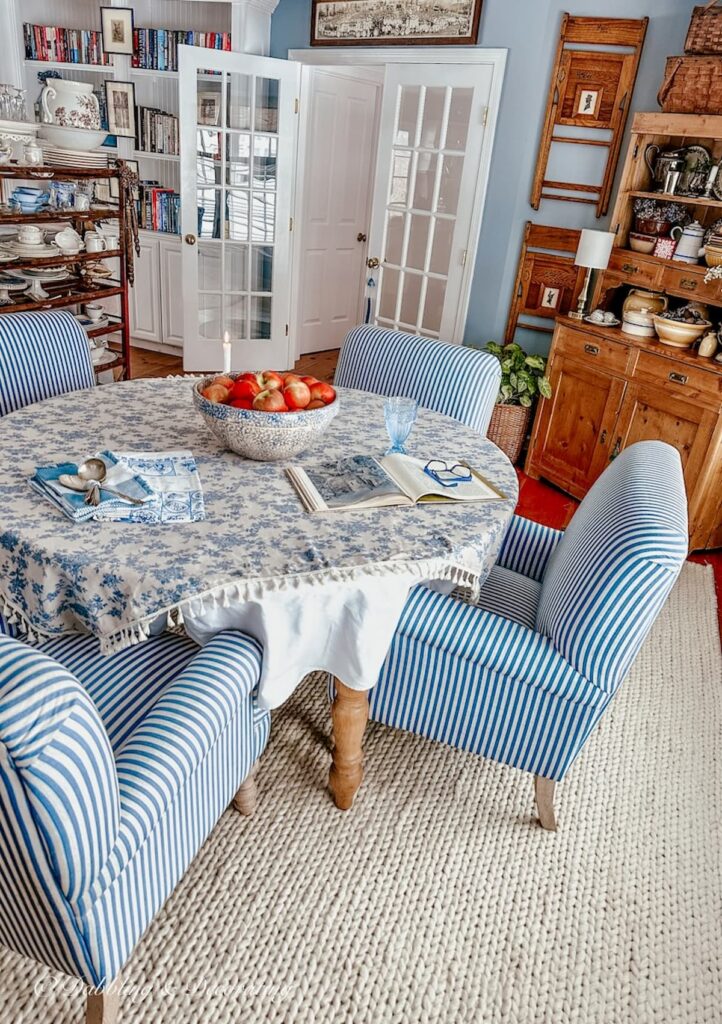
DIY Basket in a Corner Dining Room Nook
In our dining room, I styled this blue DIY wicker basket, complete with its charming leather belt detail, beneath a vintage table for an eye-catching focal point.
Paired with a collection of blue and white dishes, this handmade piece adds a touch of vintage elegance while blending seamlessly with the room’s classic New England style. It’s a simple way to add texture and personality to an overlooked corner.
Recommended Reading
Find fall inspiration in this DIY Autumn Flower Arrangements: Vermont Foraged Flower Arranging Ideas post.
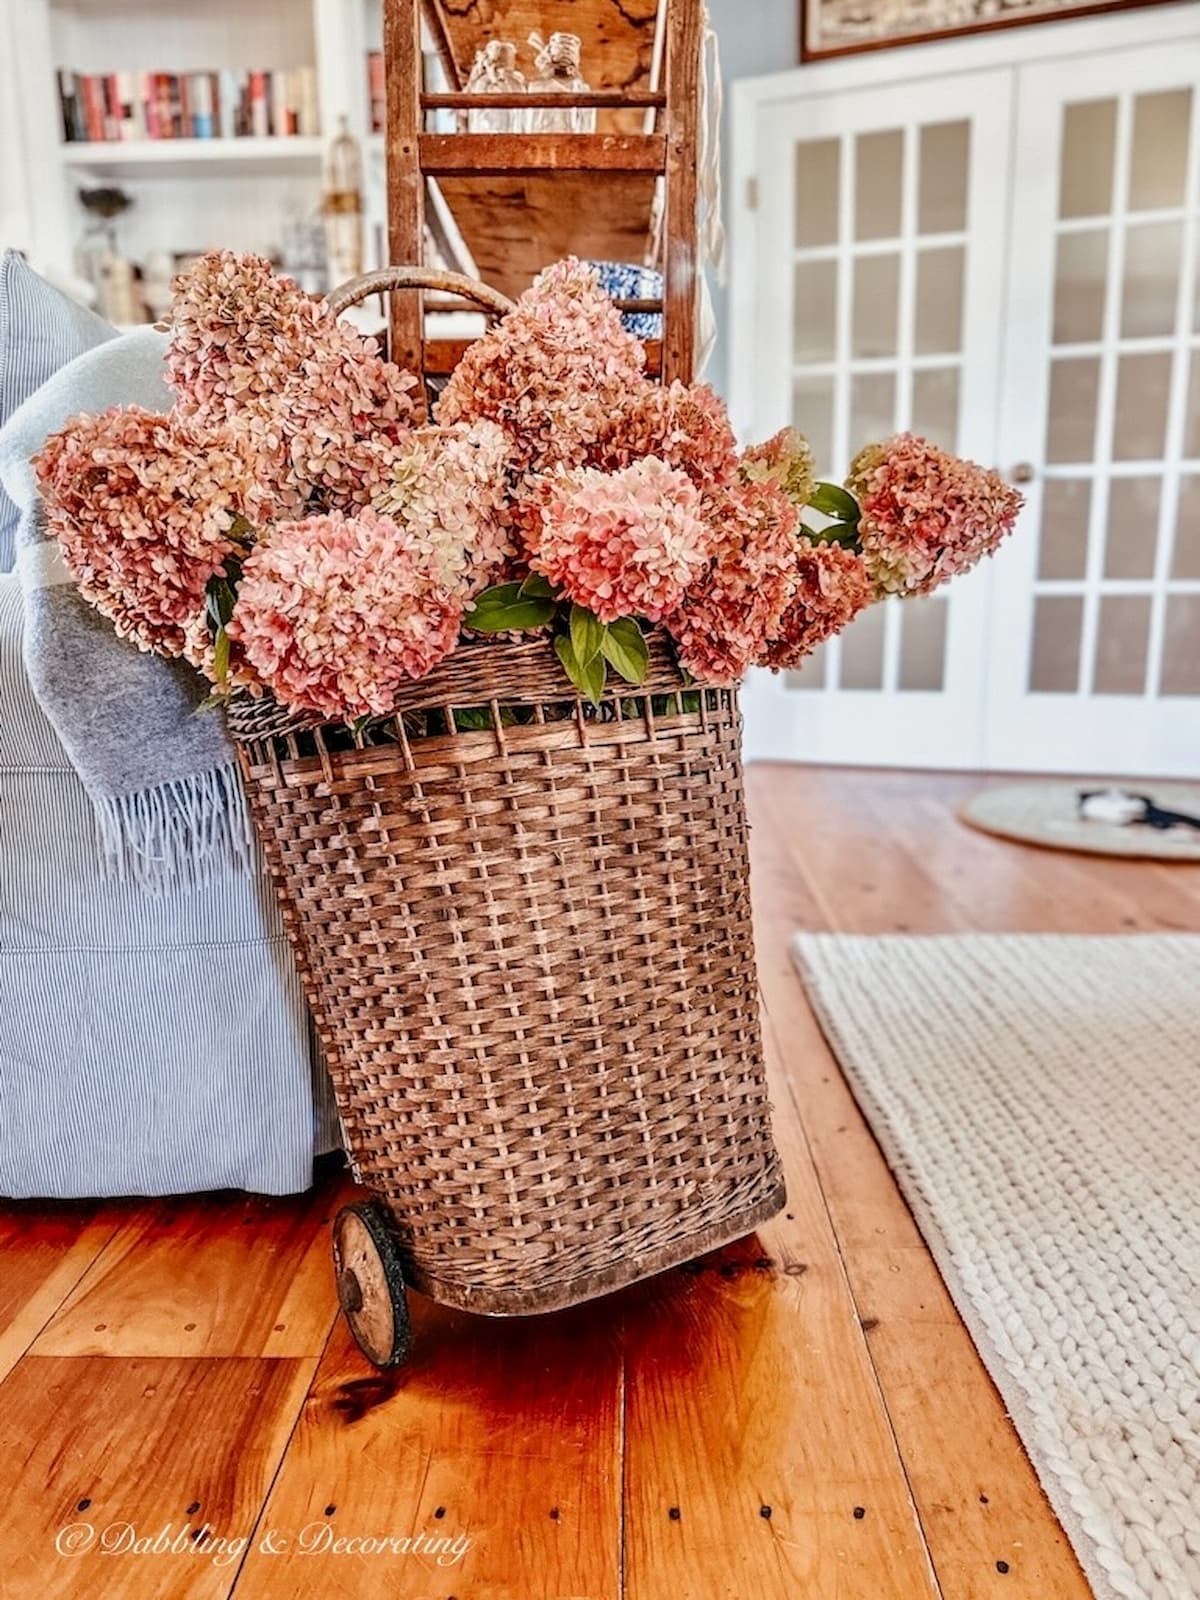
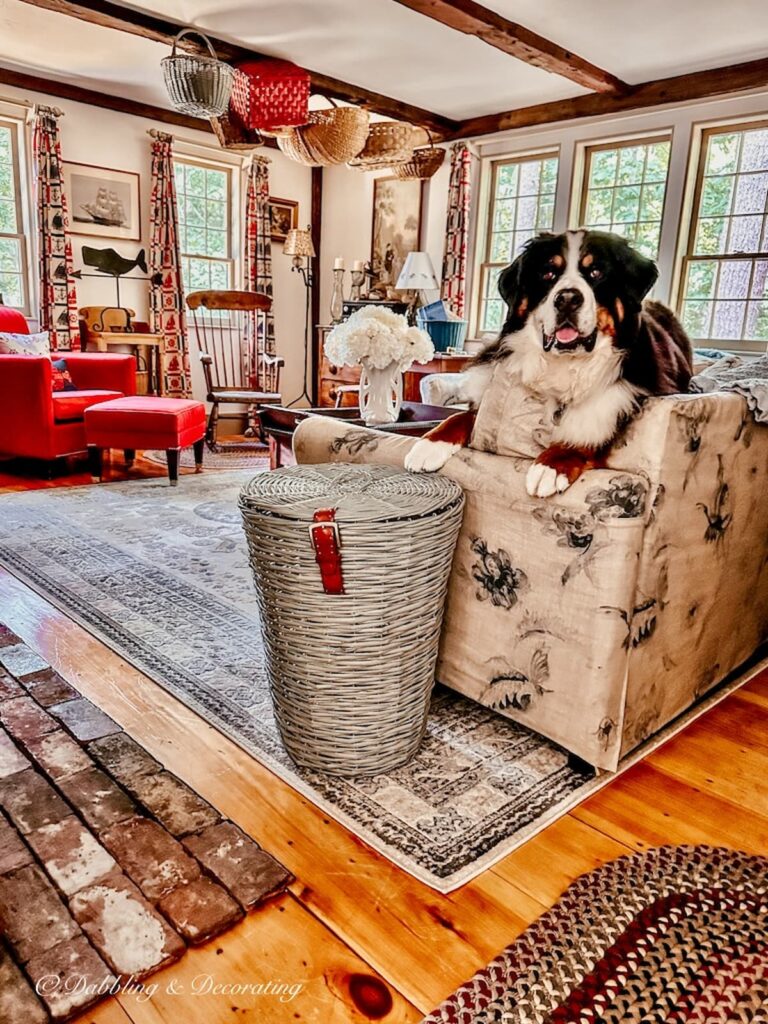
DIY Basket Decor in the Living Room
This leather belt basket DIY brings just the right touch of rustic charm to our living room. It pairs beautifully with vintage blue decor and even doubles as a small side display table, both stylish and functional in one simple makeover.
It’s also a perfect idea for a thoughtful gift! Imagine turning a thrifted basket into a one-of-a-kind gift basket filled with flowers, baked goods, or cozy treats. It’s such a fun and creative way to upcycle something simple into something memorable.
Vintage Home Decorating Guides and Styling Inspiration
Are you curious about vintage decor but don’t know where to start? These cornerstone guides are packed with seasonal styling tips, how-tos, and inspiration to help you confidently decorate with charm and character.
Love an easy, creative project like this one? Check out more DIY home decor ideas below, from thrifted transformations to budget-friendly styling tricks that bring vintage charm into every corner of your home.


DIY Gift Basket Ideas Using a Wicker Basket Makeover
This painted wicker basket with its chic leather belt detail isn’t just stylish, it’s versatile, too! Turn it into a meaningful, one-of-a-kind gift with these creative DIY gift basket ideas:
These gift ideas are not only budget-friendly but also completely customizable, perfect for any season, recipient, or occasion. And thanks to that charming leather belt, your upcycled wicker basket becomes part of the gift itself.
Recommended REading
You may also find inspiration in this 75+ Women’s Day Gift Vintage Blue and White Ideas post.
Looking for more creative painting ideas? From furniture flips to small thrifted treasures, these DIY paint projects will inspire you to grab a brush and transform something old into something beautiful.

Frequently Asked Questions About DIY Wicker Basket Ideas
Try adding a leather belt as a decorative closure, painting the basket in a fun color, or wrapping it with ribbon, fabric, or jute rope. These small touches instantly elevate a plain wicker basket into a stylish accent piece.
Painting a wicker basket and adding a thrifted leather belt is a simple project that makes a big impact. It’s budget-friendly, requires minimal supplies, and can be styled in any room of your home.
Thrift stores, flea markets, yard sales, and even places like HomeGoods are great sources for inexpensive wicker baskets. Look for ones with a lid and sturdy structure if you plan to add details like paint or a leather belt.
Chalk paint, acrylic, or spray paint all work well on wicker. For best results, use light coats and allow the basket to fully dry between layers. A clear sealant helps protect the finish if the basket will be handled frequently.
Use your painted basket as a stylish storage piece, a seasonal gift basket, a plant holder, or a side table accent. The leather belt detail makes it a great conversation piece and adds a vintage-modern touch to any space.
Join the Vintage Circle — Familiar Finds, Styled Your Way™
Love vintage treasures, thrifted gems, and a home that tells your story? Leave a comment, share this post with a kindred spirit, or head to my Start Here page to explore more. Want fresh prompts and timeless ideas? Subscribe to join our Seasonal Vintage Decor Styling Challenge for weekly inspiration and behind-the-scenes peeks.
Pin forLater!


Shop DIY Wicker Basket Ideas
This post may contain affiliate links, which won’t change your price but will share some commission.
Better yet, run the belt across the top and leave loose to use for a handle
Great Idea!
I love this idea, but to me just that little bit of leather looks out of place on that big basket. I’m going to do this, but I’m going to run the belt completely across the top and use for a hinge also. And if the belt is long enough I may run it all the way to the bottom on each side. I’ll let you know. Thanks loads for the suggestion and tutorial.
That’s what it’s all about, finding inspiration to repurpose. Send me photos, I’d love to share your results on our Reader’s Showcase Series!